Project Permissions
Note: Only Global Admins and Project Owners have the ability to access Project Permissions in Ediphi.
In Ediphi, collaboration is made effortless by granting you the capability to seamlessly incorporate colleagues into your projects. This article serves as a comprehensive guide, walking you through the process of adding colleagues to your project and effectively managing their permissions.
In this article
Adding Users to a Project
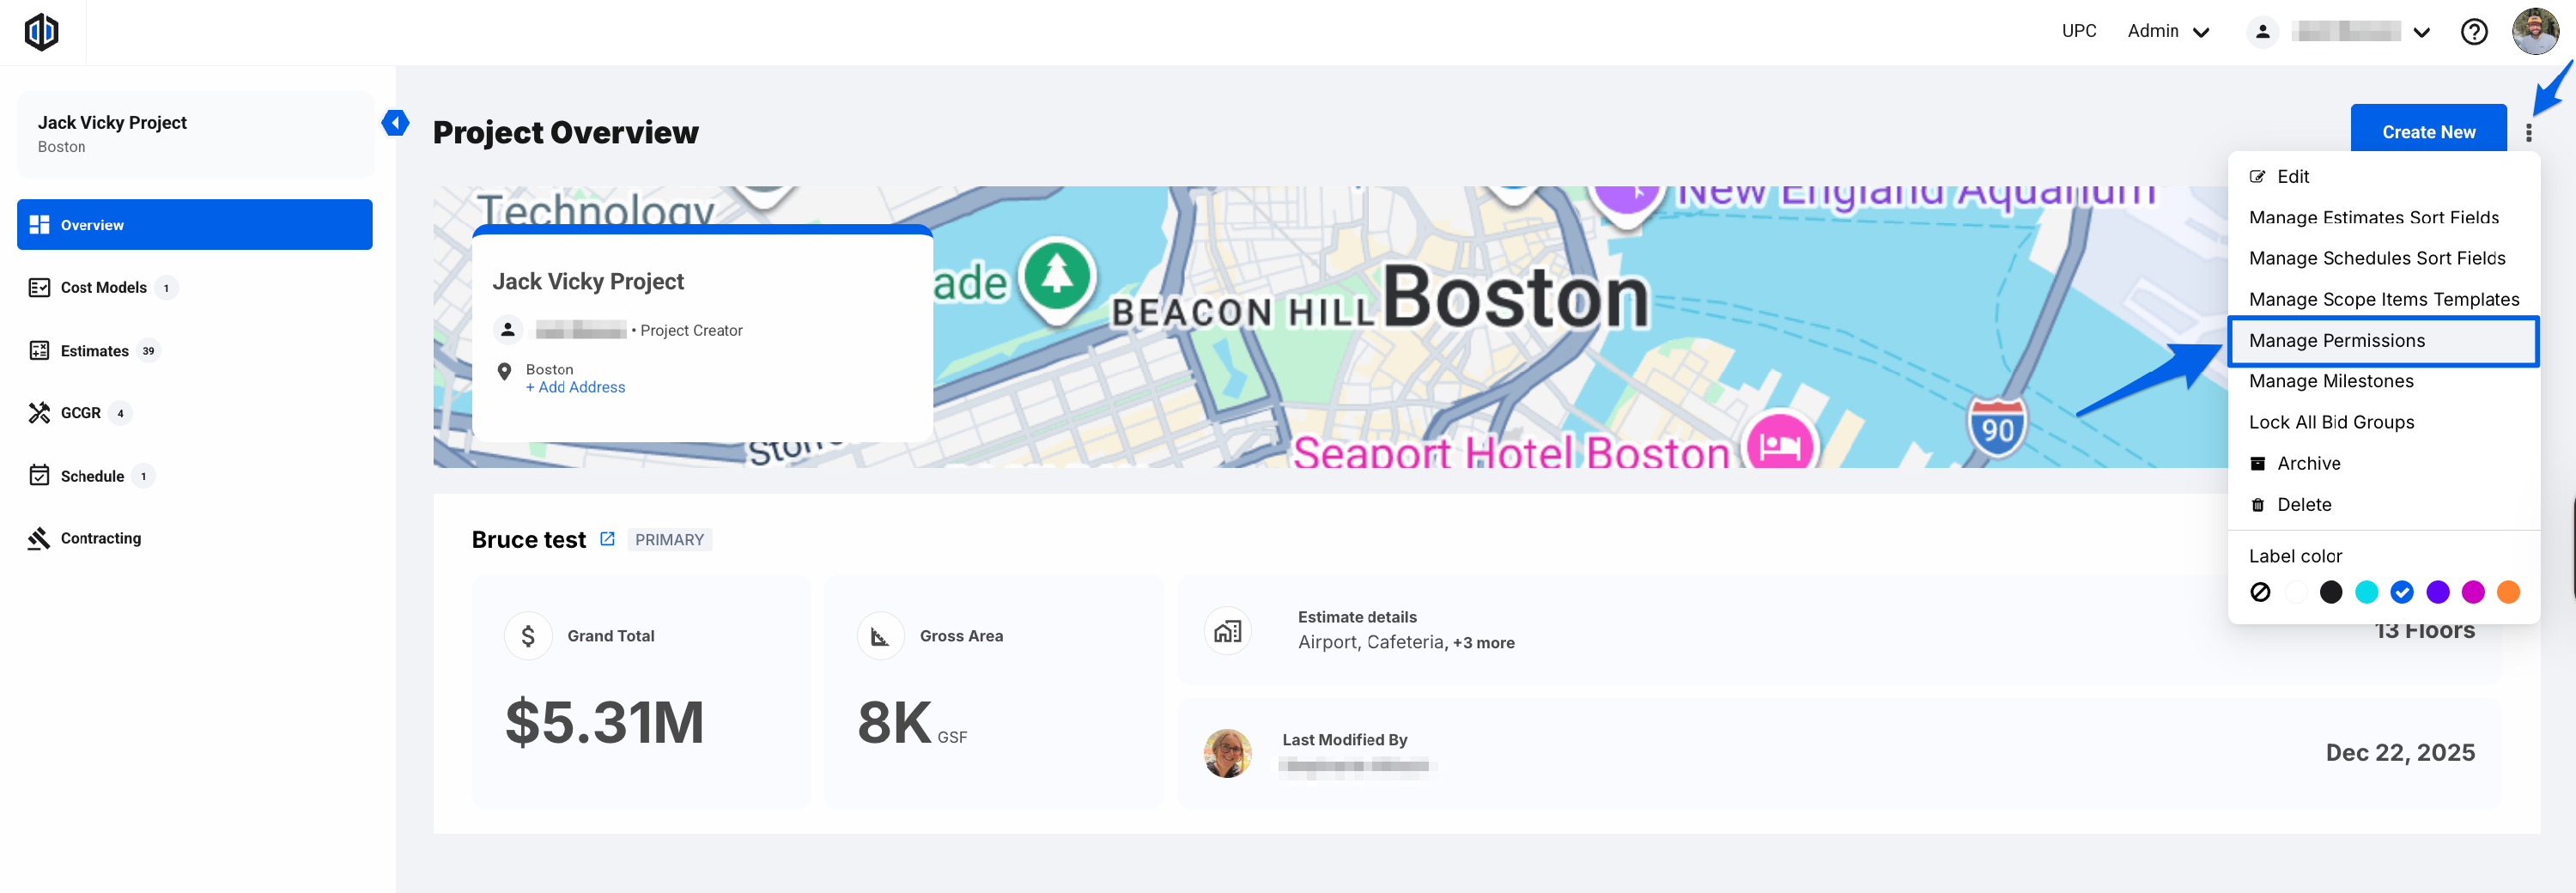
- Start in the project where you want to add users. Click on the ellipsis in the top right corner, then select Manage Permissions.

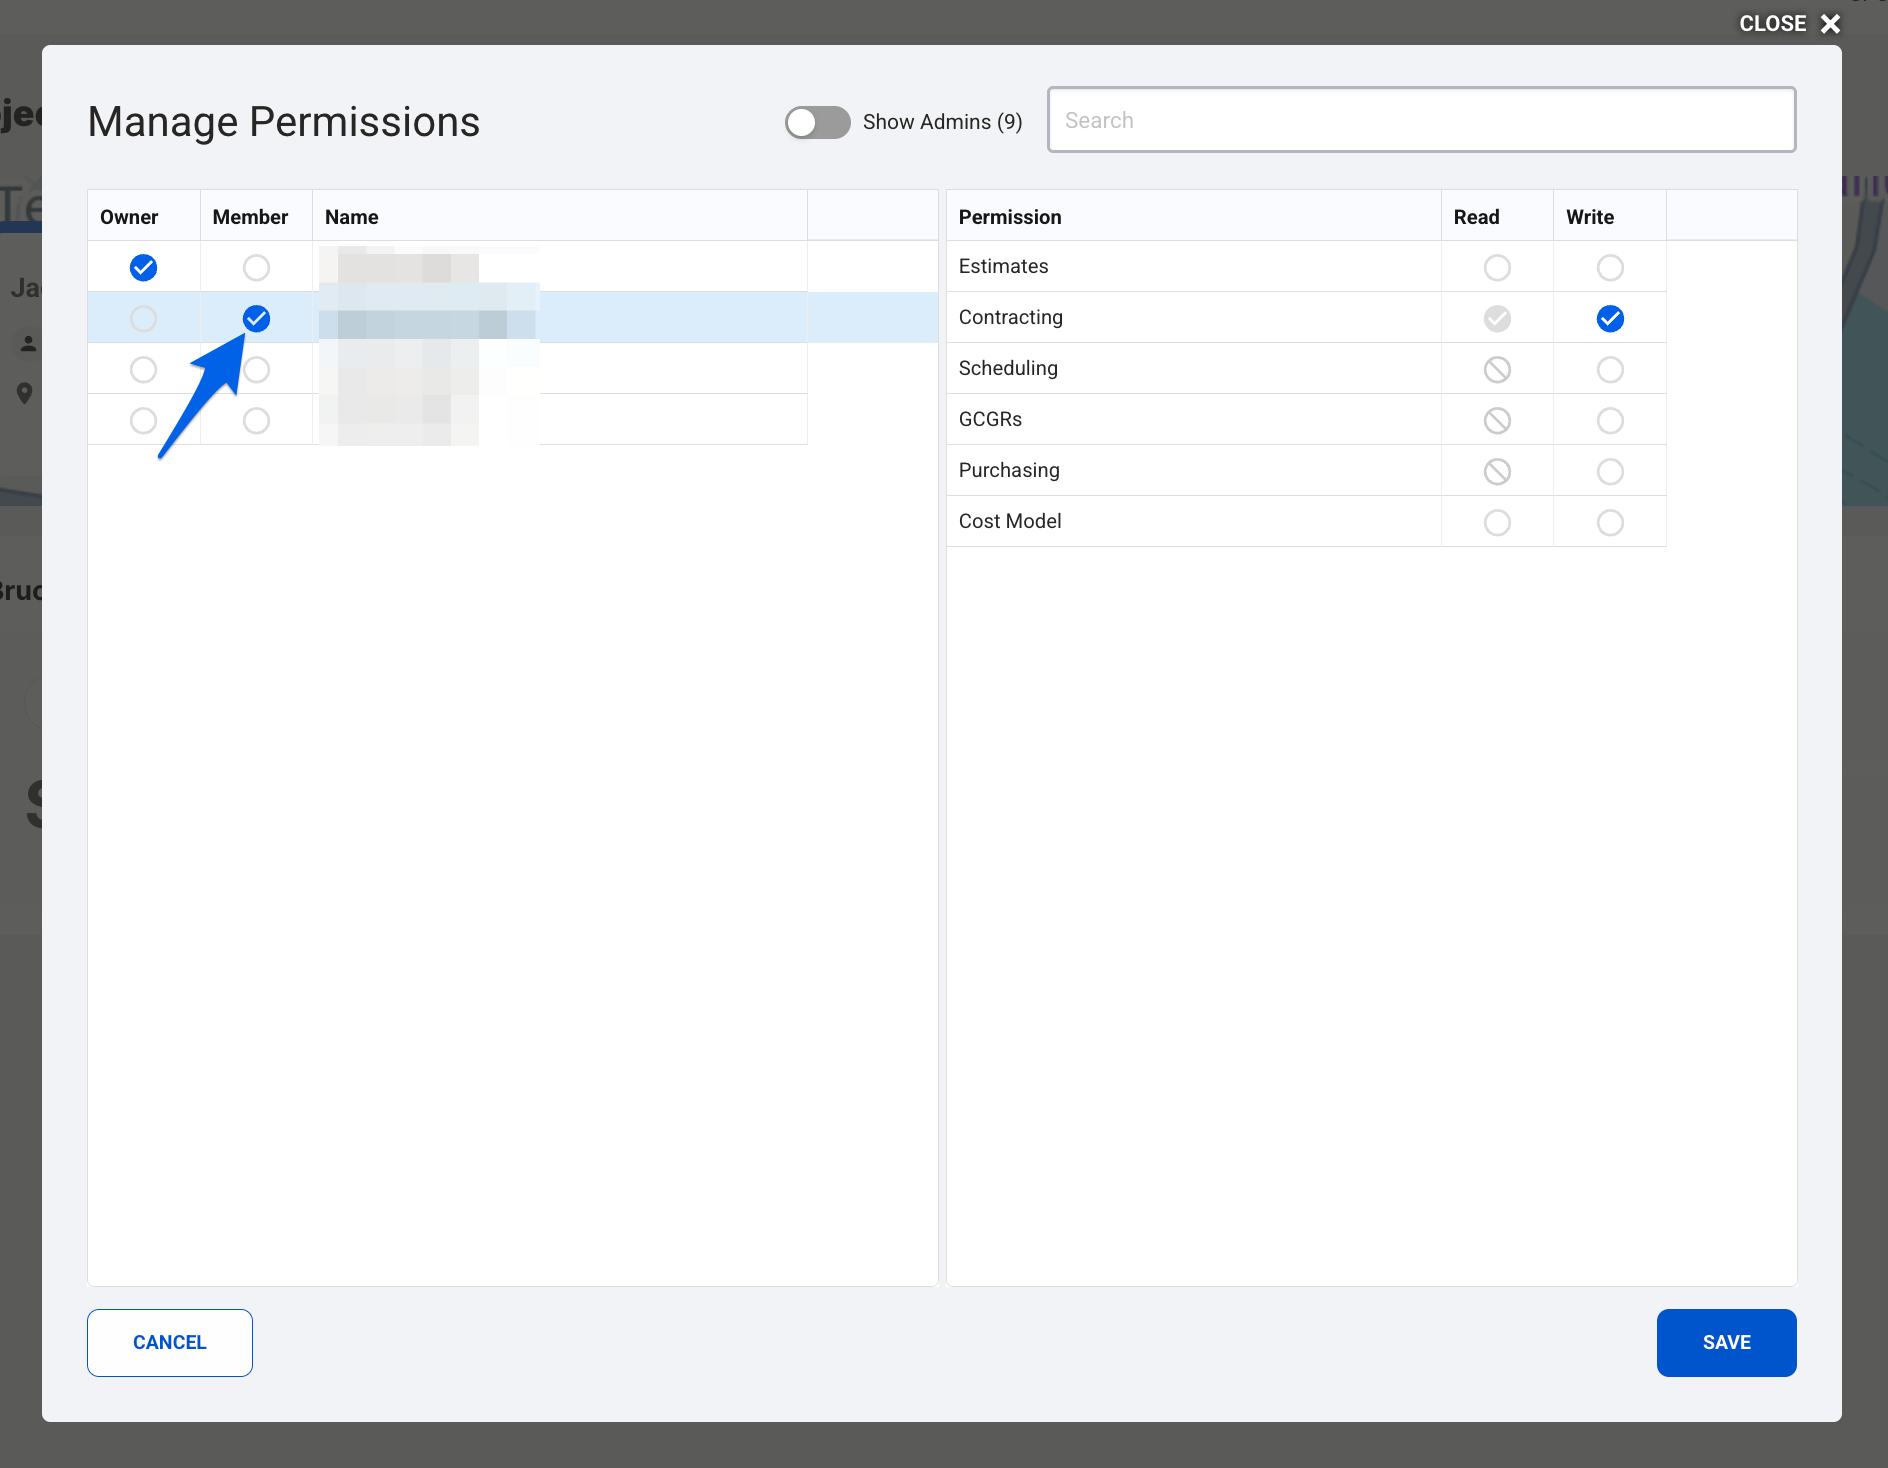
- A pop-up will appear, allowing you to select and/or search for all the current users from your company. Select the level of access you want them to have (Owner or Member).

Note: If you don't see a specific user when trying to add them to a project, this could be due to:
- The user has Admin permissions, which means they automatically have access to all projects within the environment. Pro Tip: Use the "Show Admins" toggle at the top of the modal to view these Admins.
- The user has not yet been invited to the environment. In order to get them invited, an Admin will need to invite them. For more information, please see our Managing Users article.
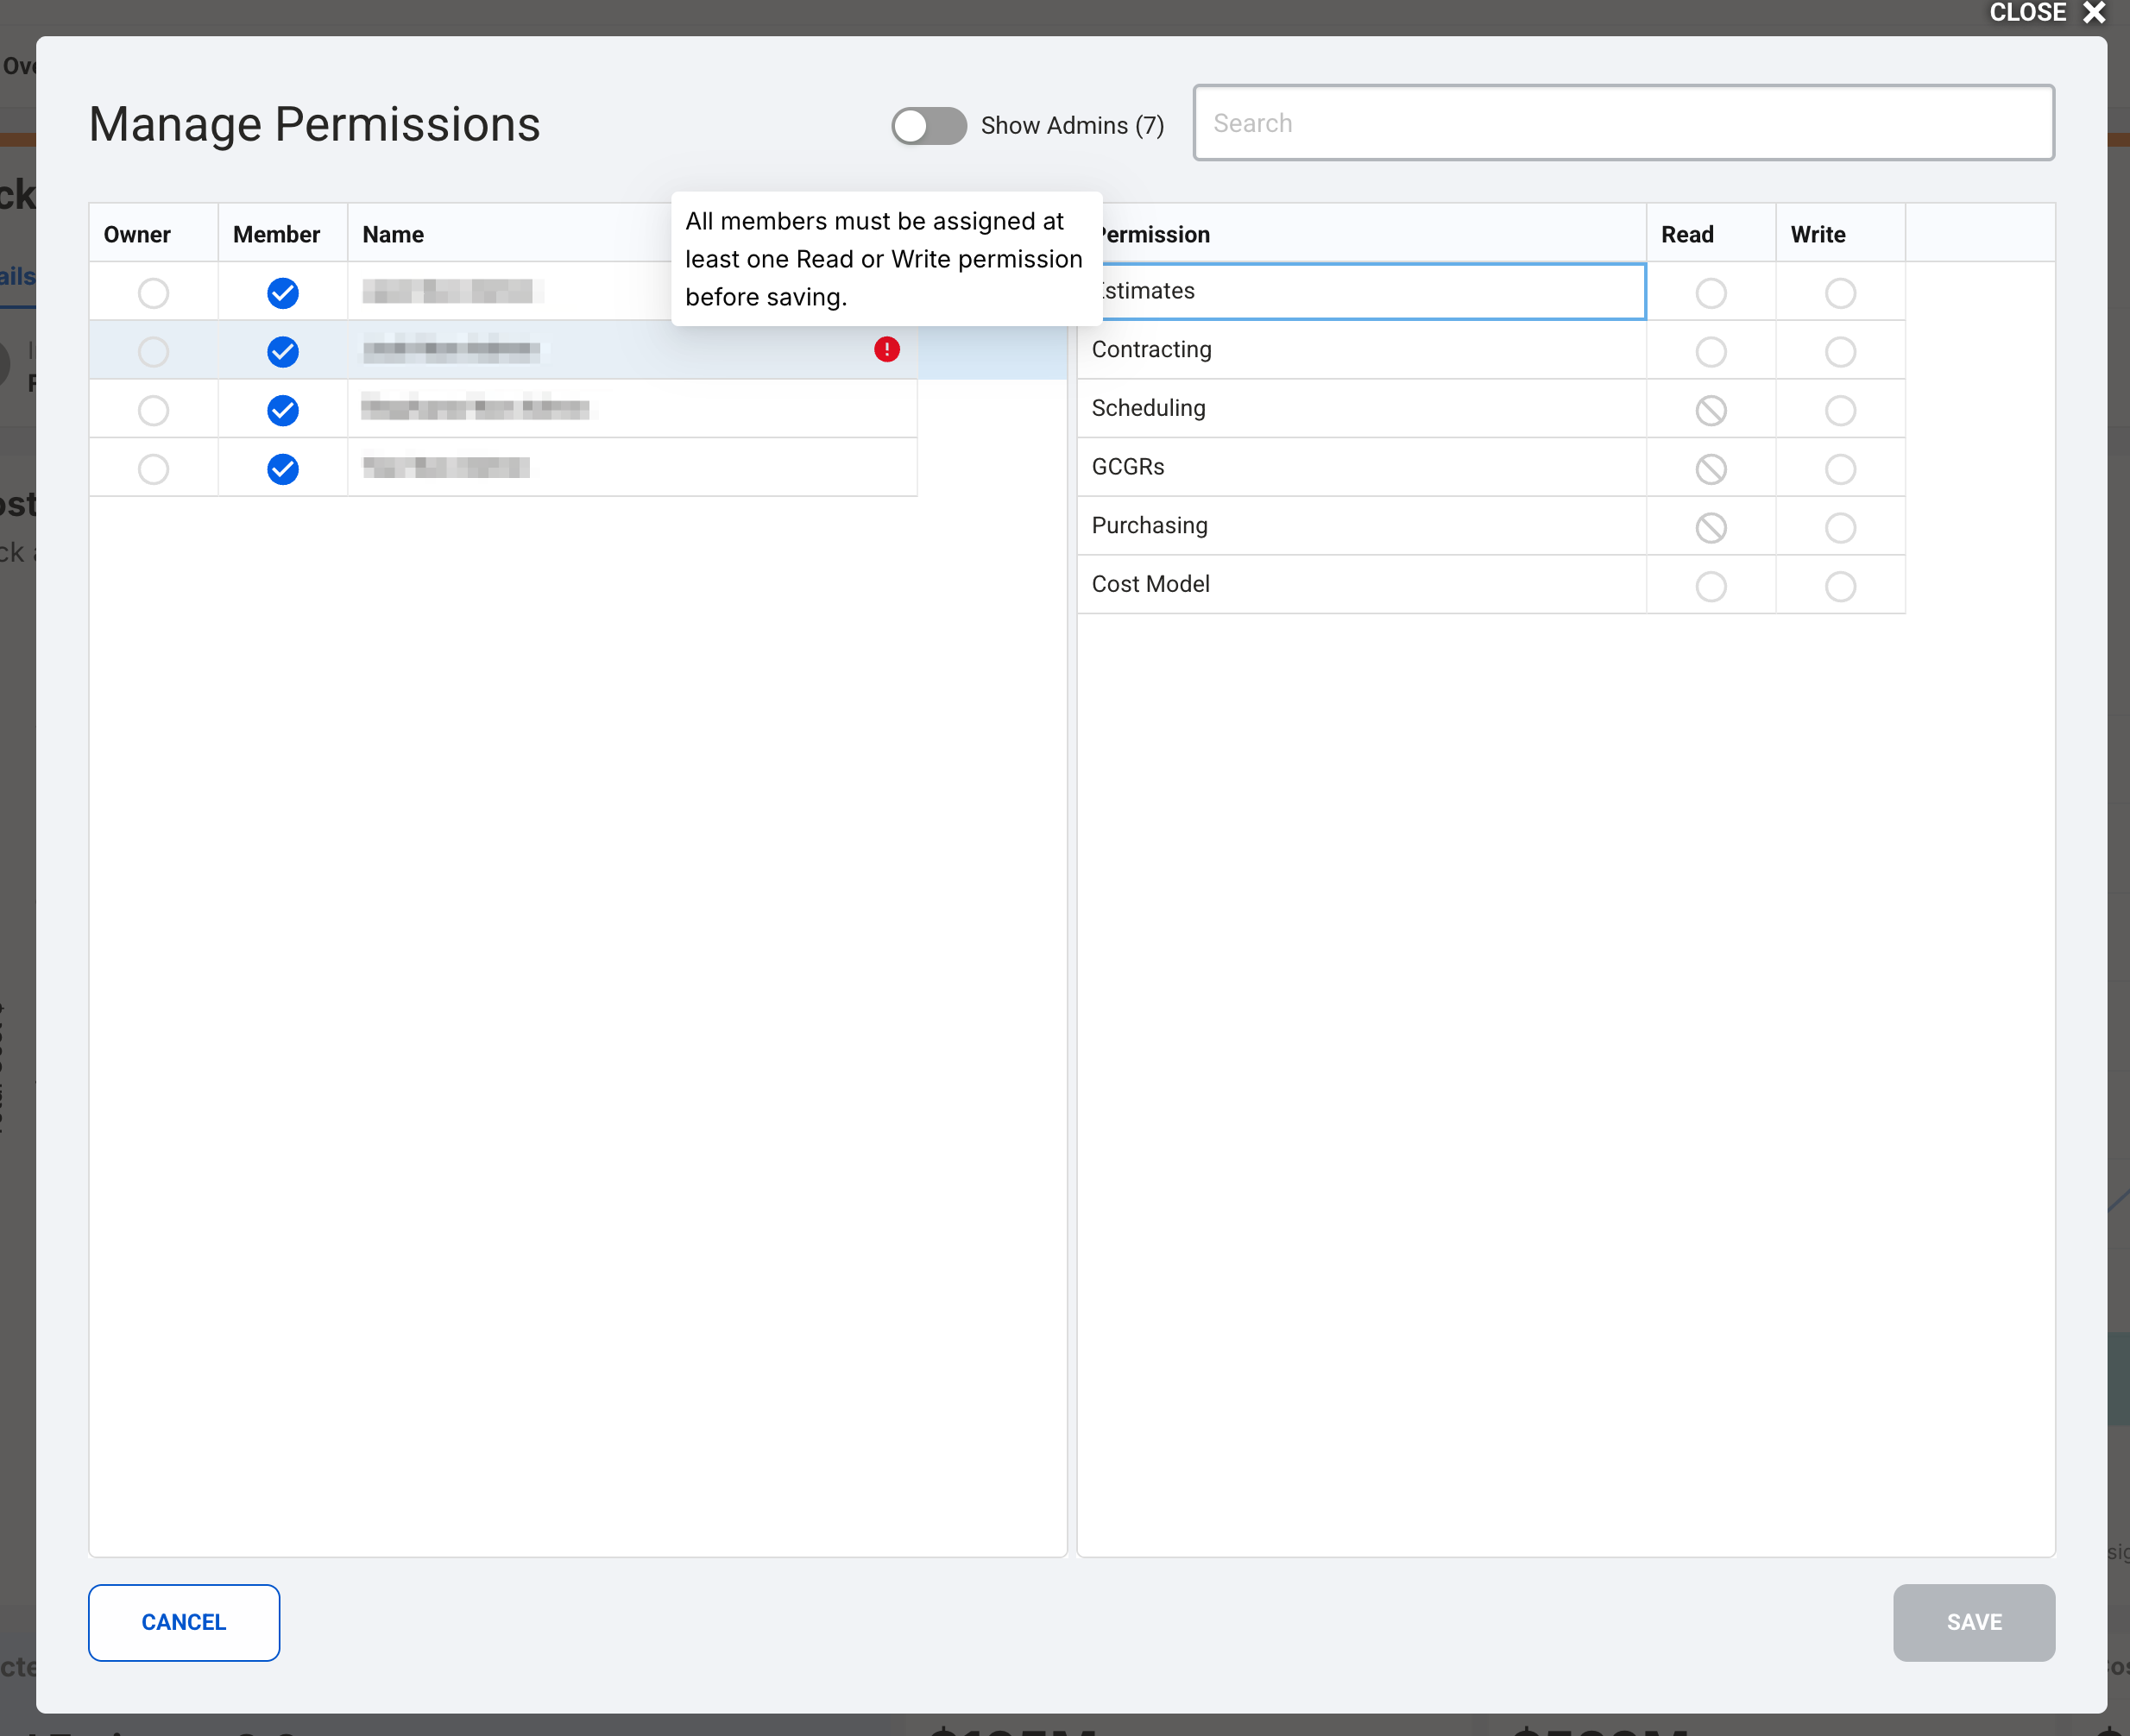
- Once you have selected the proper level of access, you’ll have the option to adjust the user's permissions for the project (User's marked as Owners will already have full permissions). After selecting the user's permissions, click Save.

Note: Setting a user only as "Member" will not give them access to the project; you must assign the user Read or Write permissions to modules in order for them to access. A red warning next to a Member's name means they have not yet been assigned Read or Write permissions; you must assign these before you are able to Save any permission changes.
Editing a User's Project Permissions
- Start in the project where you want to edit a user's permissions. Click on the ellipsis in the top right corner, then select Manage Permissions.
- A pop-up will appear, allowing you to view all current users from your company. Click on the user you’d like to edit. Users who already have a checkbox selected under the Owner or Member columns are curent project users.
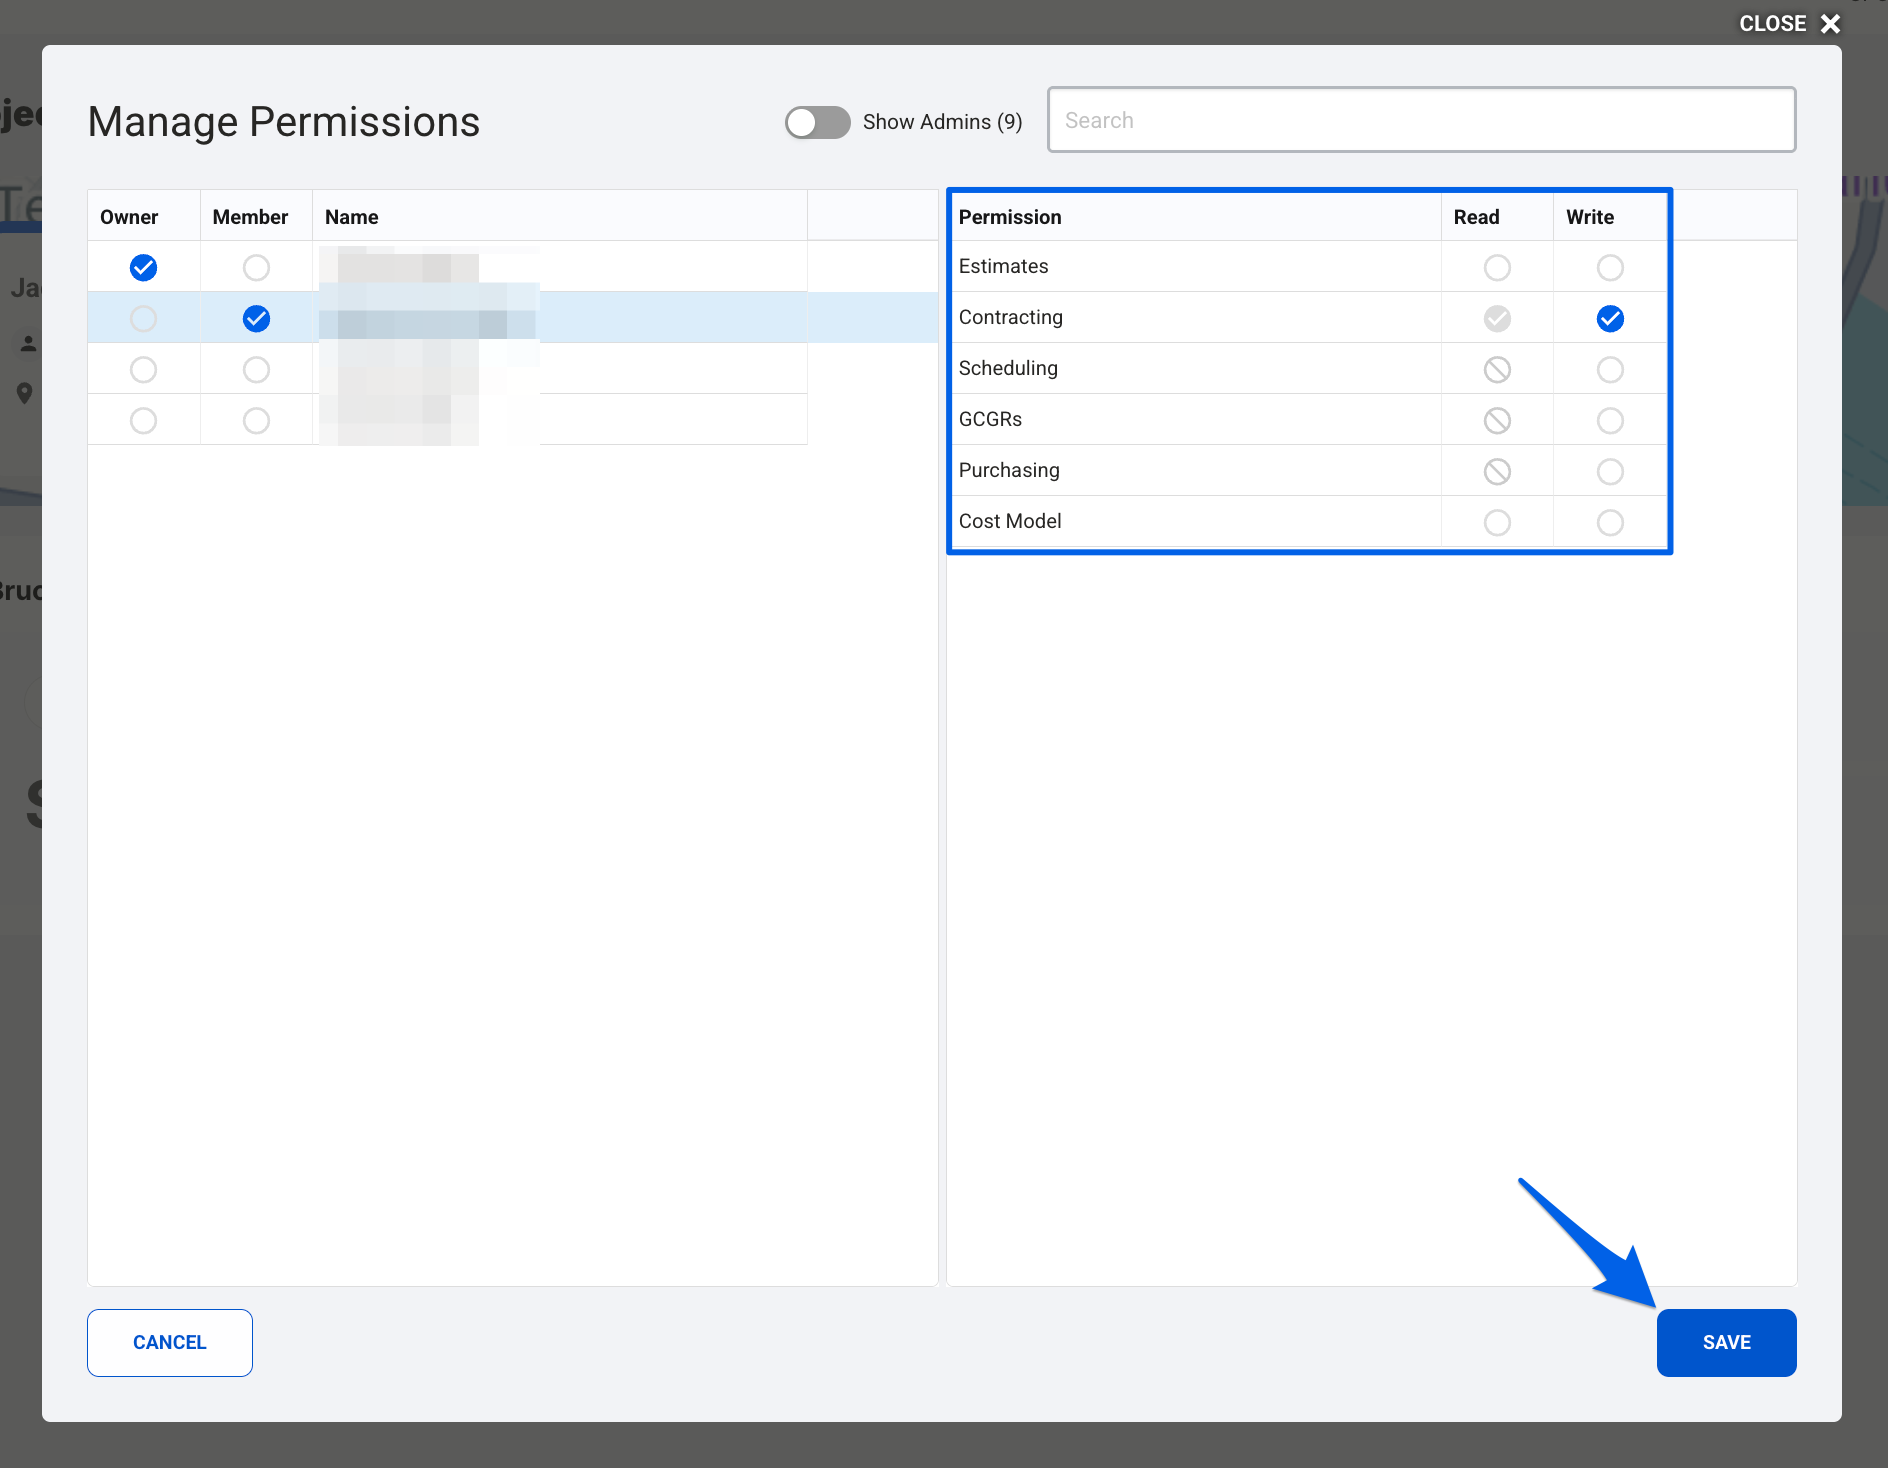
- You will have the option to edit the following permissions:
- Estimates: Read or Write
- Contracting: Read or Write
- Scheduling: Write
- GCGRs: Write
- Purchasing: Write
- Cost Model: Read or Write

Note: Scheduling, GCGRs, and Purchasing don’t have Read permissions. The user will either have full access to it (Write), or no access at all.
- Once the changes are complete, click Save.
Remove Users from a Project
- Start in the project where you want to remove a user. Click on the ellipsis in the top right corner, then select Manage Permissions.
- A pop-up will appear, which will allow you to view all current users from your company. Click on the checkbox of the user you want to remove from the project. Once unchecked, click Save.
Note: Users that have a checkbox selected under the Owner or Member columns already have access to the project.

Pro Tip: A shortcut to Manage Permissions is also available from within the My Projects page. Hover over the project you'd like to manage permissions for, click on the ellipses, then Manage Permissions. From here, continue to follow the next steps from above.

If you have any questions, feel free to contact our support team, and we'll be happy to help!