Saved Views
In Ediphi, you have the ability to manage and create new views within the Detailed Summary section of your estimates. This feature enables you to efficiently configure your own views, save them, and even share them to colleagues within your project. Moreover, company Admins have the ability to configure default project views for users, ensuring that the estimate is presented in the desired format to all individuals.
What problems does Saved Views solve?
- First time users will be able to see from the very beginning, their estimates as they’d expect to see them. ✅
- Team members will be able to easily share views across a project so they can ensure their colleagues are on the same page. ✅
- Individual users will have the ability to effortlessly save their own customized views, allowing them to manipulate the estimate according to their preferences. ✅
In this article
Understanding Saved Views
What can I set under Saved Views?
-
View Name: You can customize the name of your view at any time.
- Visibility: You can Enable/Disable views as Public or a Project Default.
- Public: Setting a view as Public will allow other users within the project to use it.
- Project Default: Setting a view as a Project Default View will ensure the estimate defaults to this view when you and/or colleagues access the estimate for the first time.

Note: Only Project Owners and/or Admins have the ability to set Public views as a Project Default.

- Grid Options: You can set your view to Show Subtotals and/or Show Use Group Quantities.

-
Delete: If desired, you can delete the views you have created at any time by clicking on the trash can icon.

Permissions
Your Saved Views actions will vary based on your project permissions.
- Users with Read Only access will have the ability to select any view, but cannot create, edit, or delete a view.

- Users with Read and Write access will have the ability to save, edit, and delete their own views, as well as select any Public View.

- Admin users and Project Owners will have the ability to create, edit or delete any of their own views, as well as make any Public view a Project Default. They also have the ability to delete any Public view, regardless of the creator.
Using Saved Views
Creating a View
Creating a new view in your estimate is a straightforward process. Here's how to do it:
- Within the Detailed Summary tab, select your desired Grouping and manage the order of your Columns as you normally would.
- Groups: You can select one main group, and up to three subgroups to breakdown your line items in the Detailed Summary.
- Columns: You can select a variety of extra columns to include in your view, and arrange them as desired.
- Grid Adjustments: You can adjust your grid as well by selecting Collapse All Rows, Collapse All Columns, adjust Row Density as well as enter Full Screen.

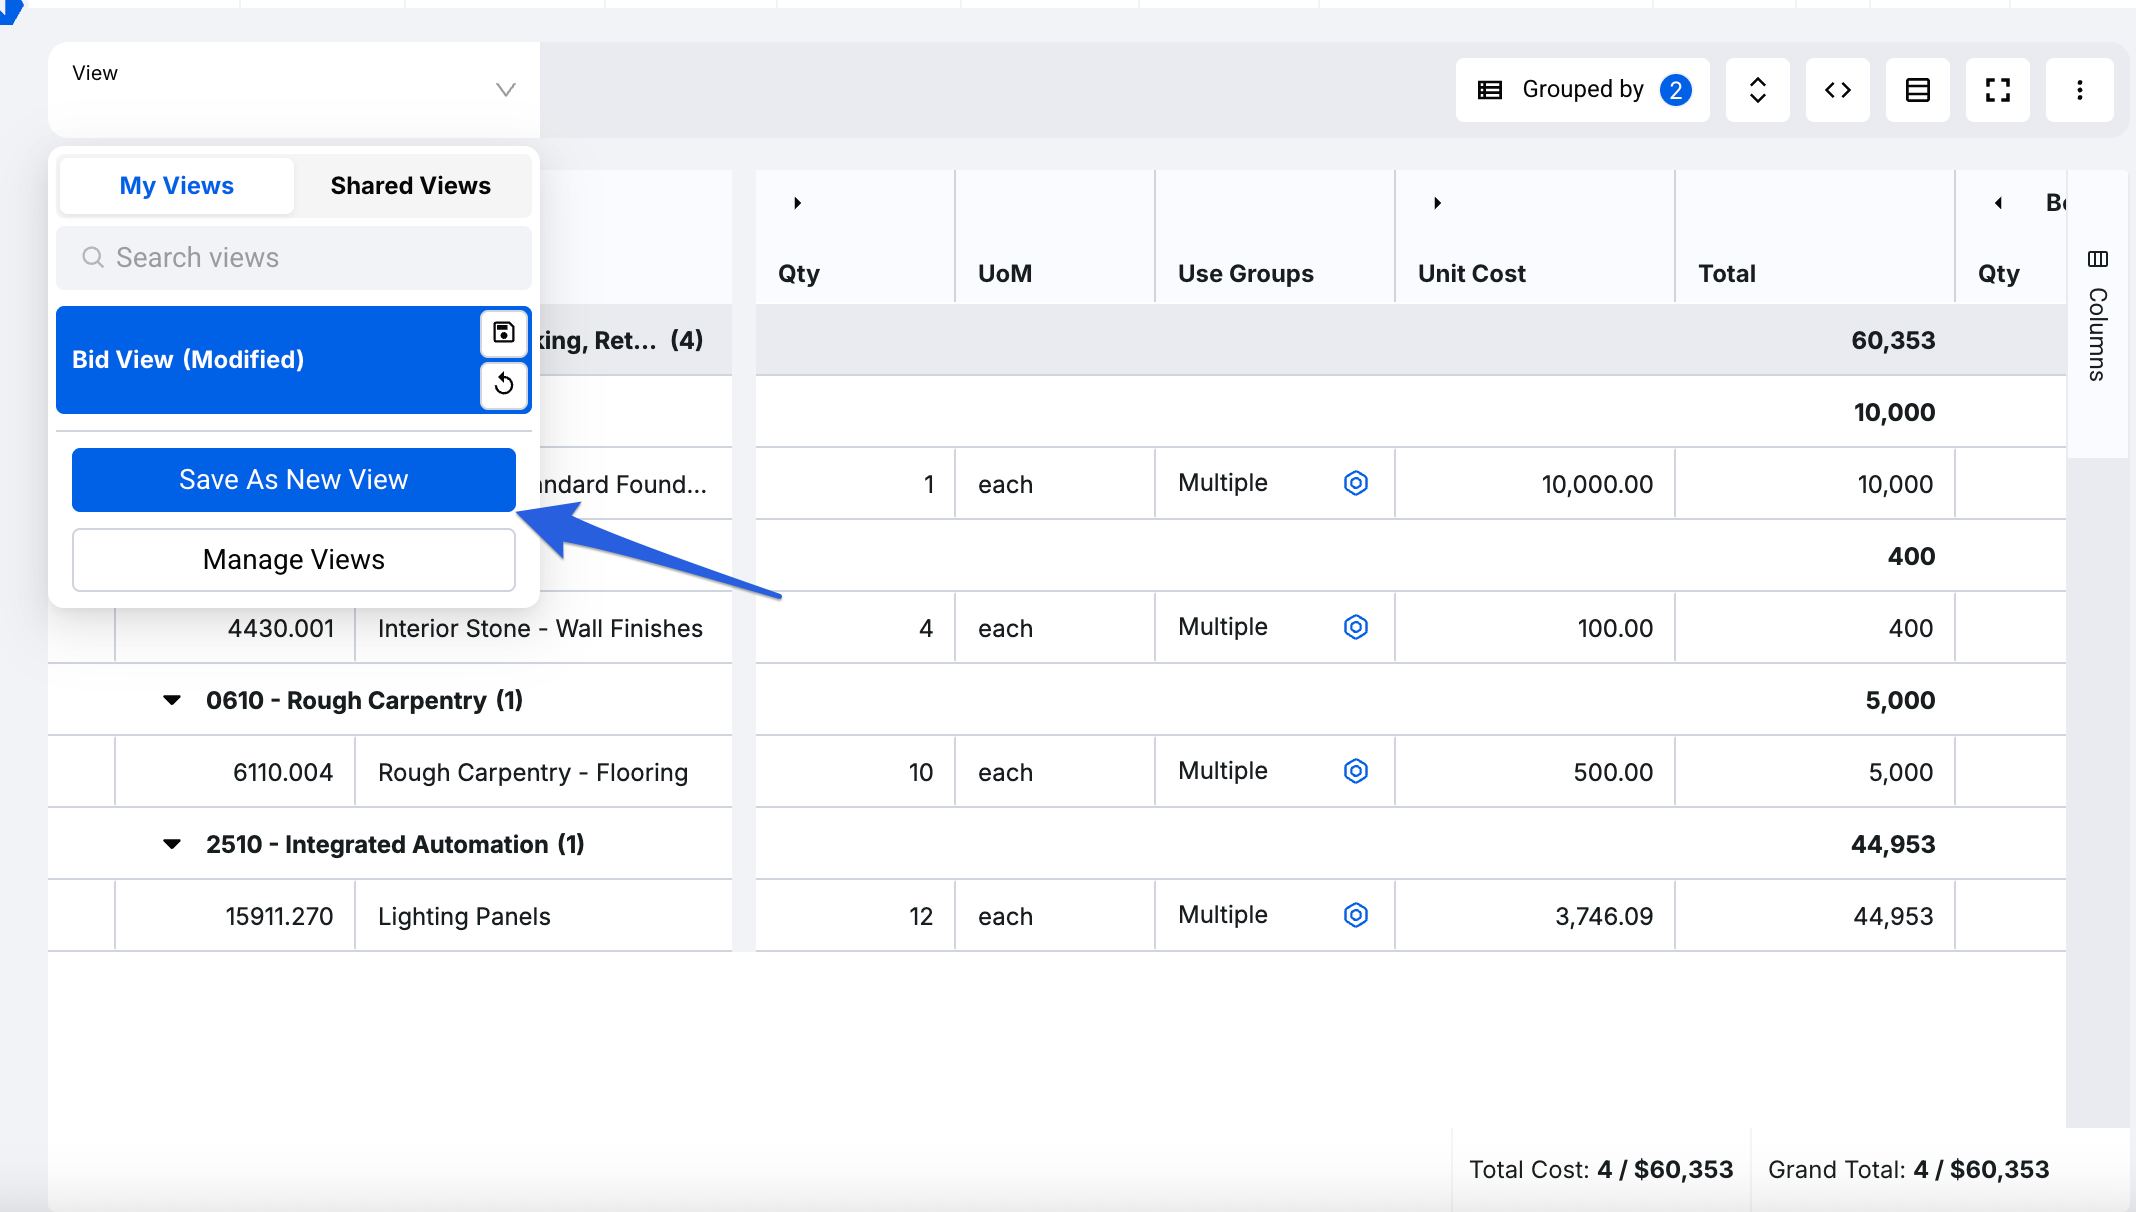
- Once set, click on the View tab in the upper left hand corner. In this dropdown you’ll see a Save As New View option within the My Views sub tab. Click this option.

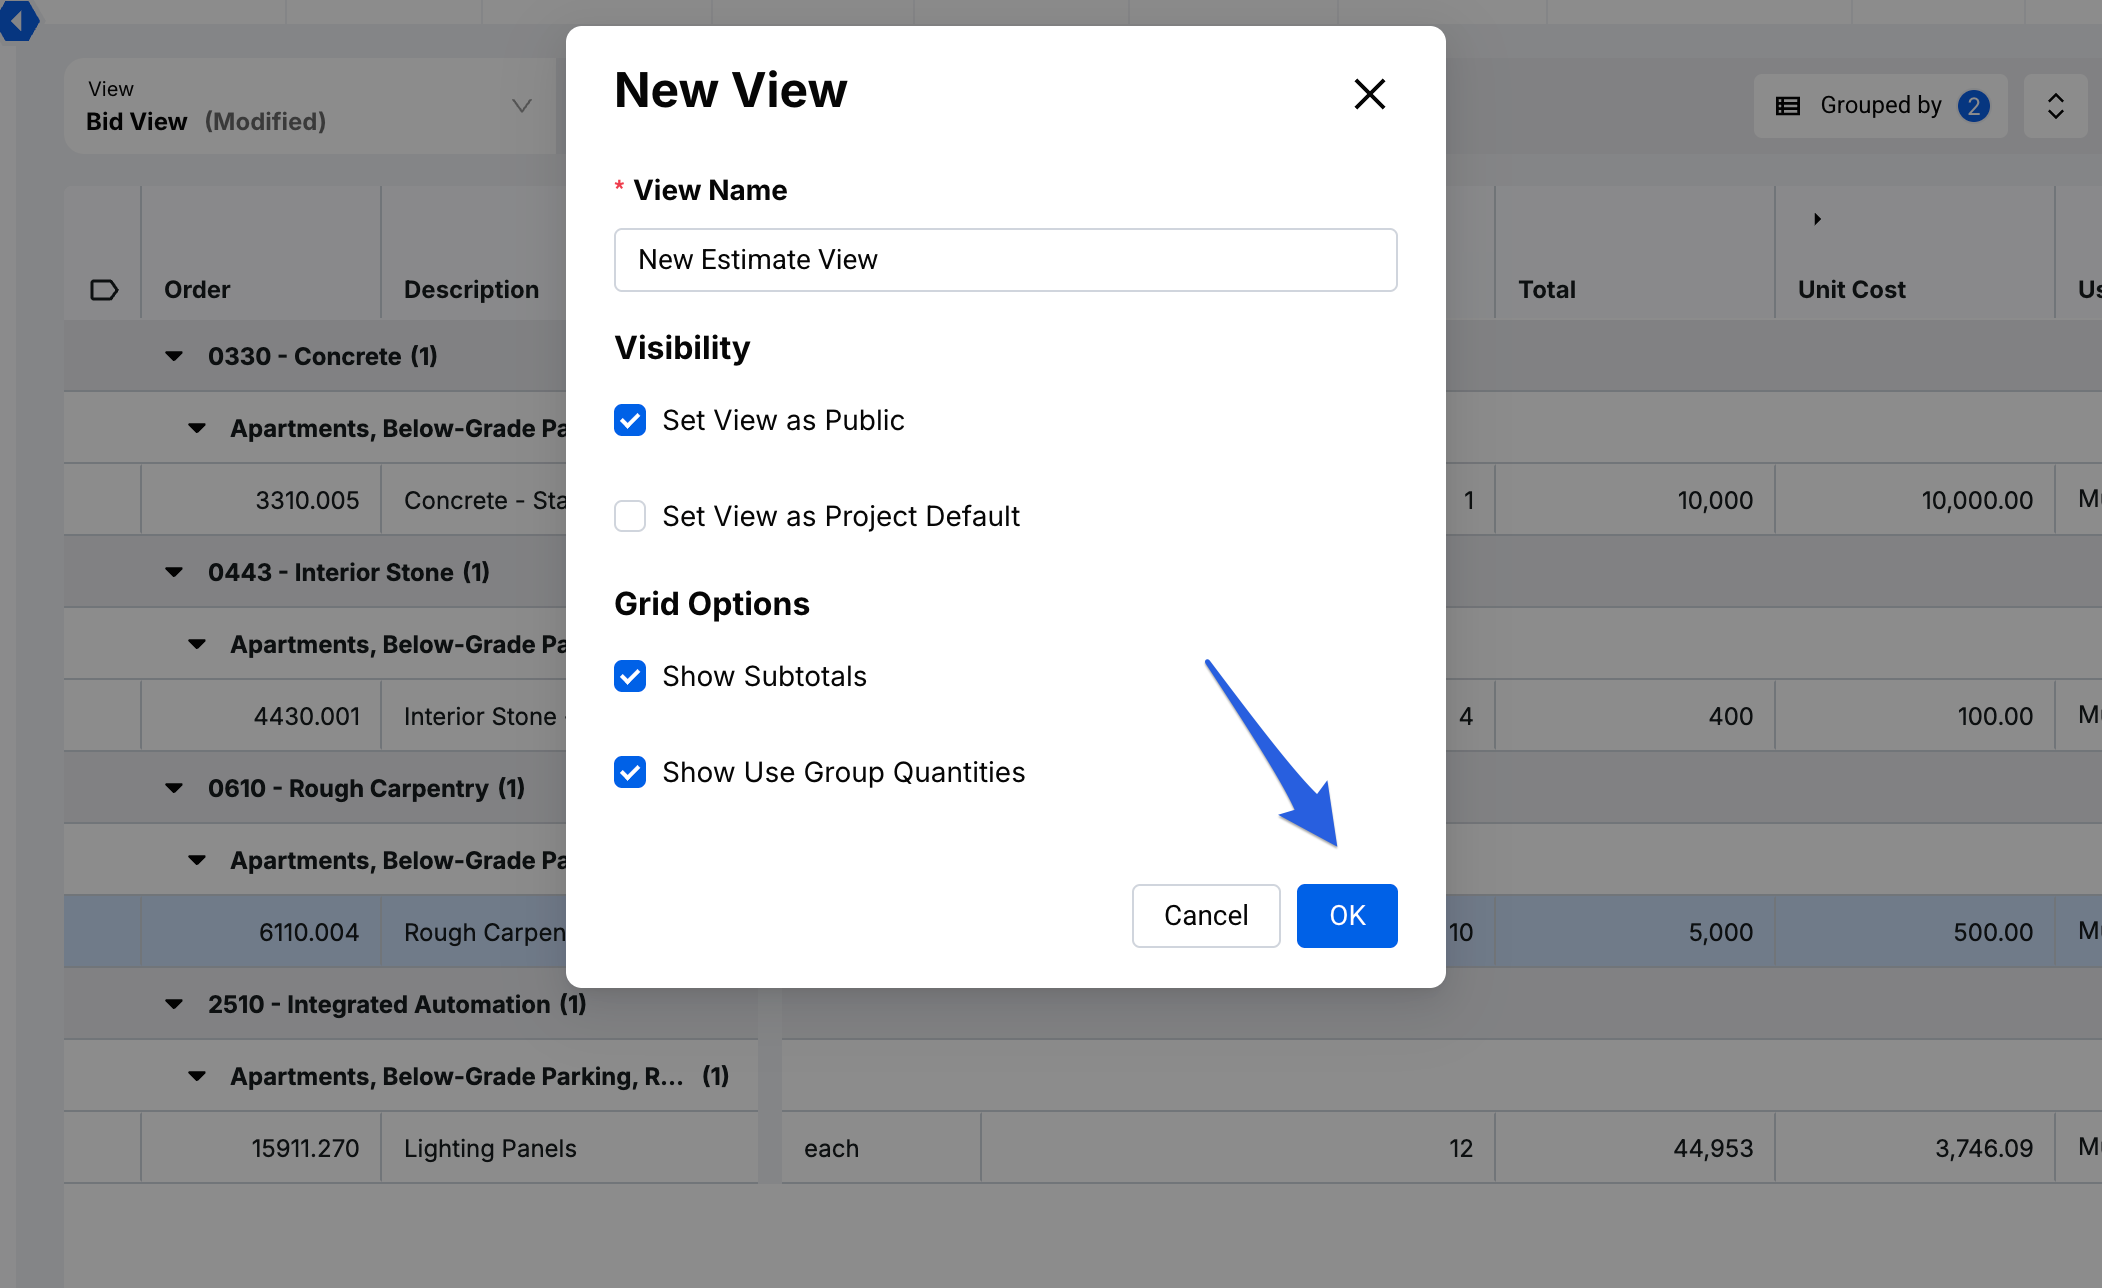
- A pop-up window will appear where you'll be able to name and configure Visibility and Grid Options. Once you've configured your new view, click OK to save.

Note: If you have any estimate specific Use Groups when creating a new view, these groups will not carry over in your view between estimates.
- The View will now automatically appear in your View Tab.

Managing a View
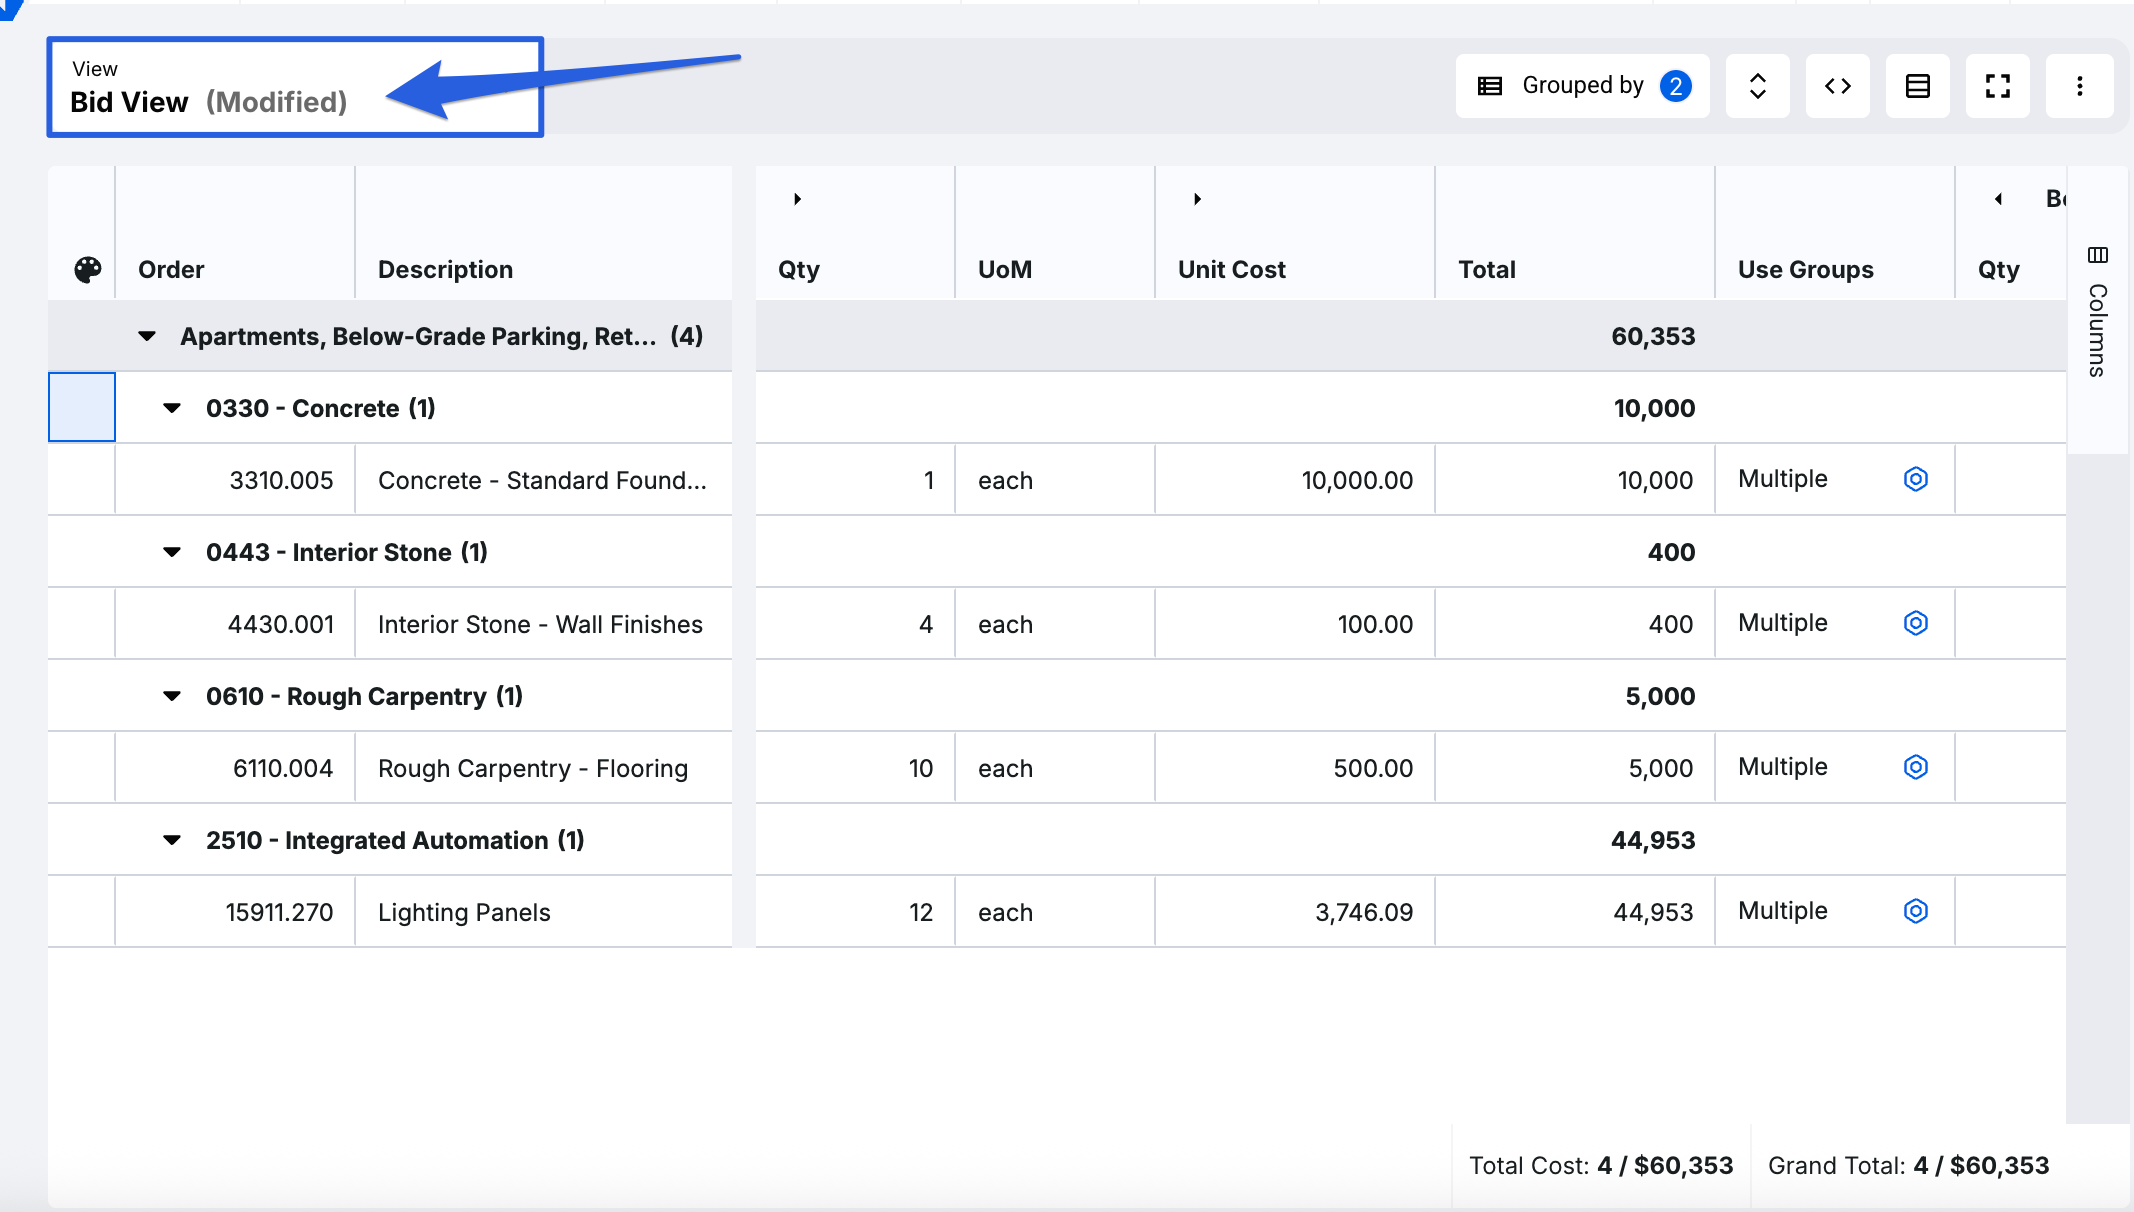
When updating an existing view by re-arranging the columns and/or grouping, the current view in the View tab will update to “Modified.” Once a View is modified you can either Save modifications to update the existing view, Revert modifications to leave it as is, or choose Save As New View to create a brand new view. Here's how to do it:
-
When viewing an estimate using an existing view in the Detailed Summary tab, if you re-arrange any columns and/or groupings, the View tab will update to show as “Modified.”
-
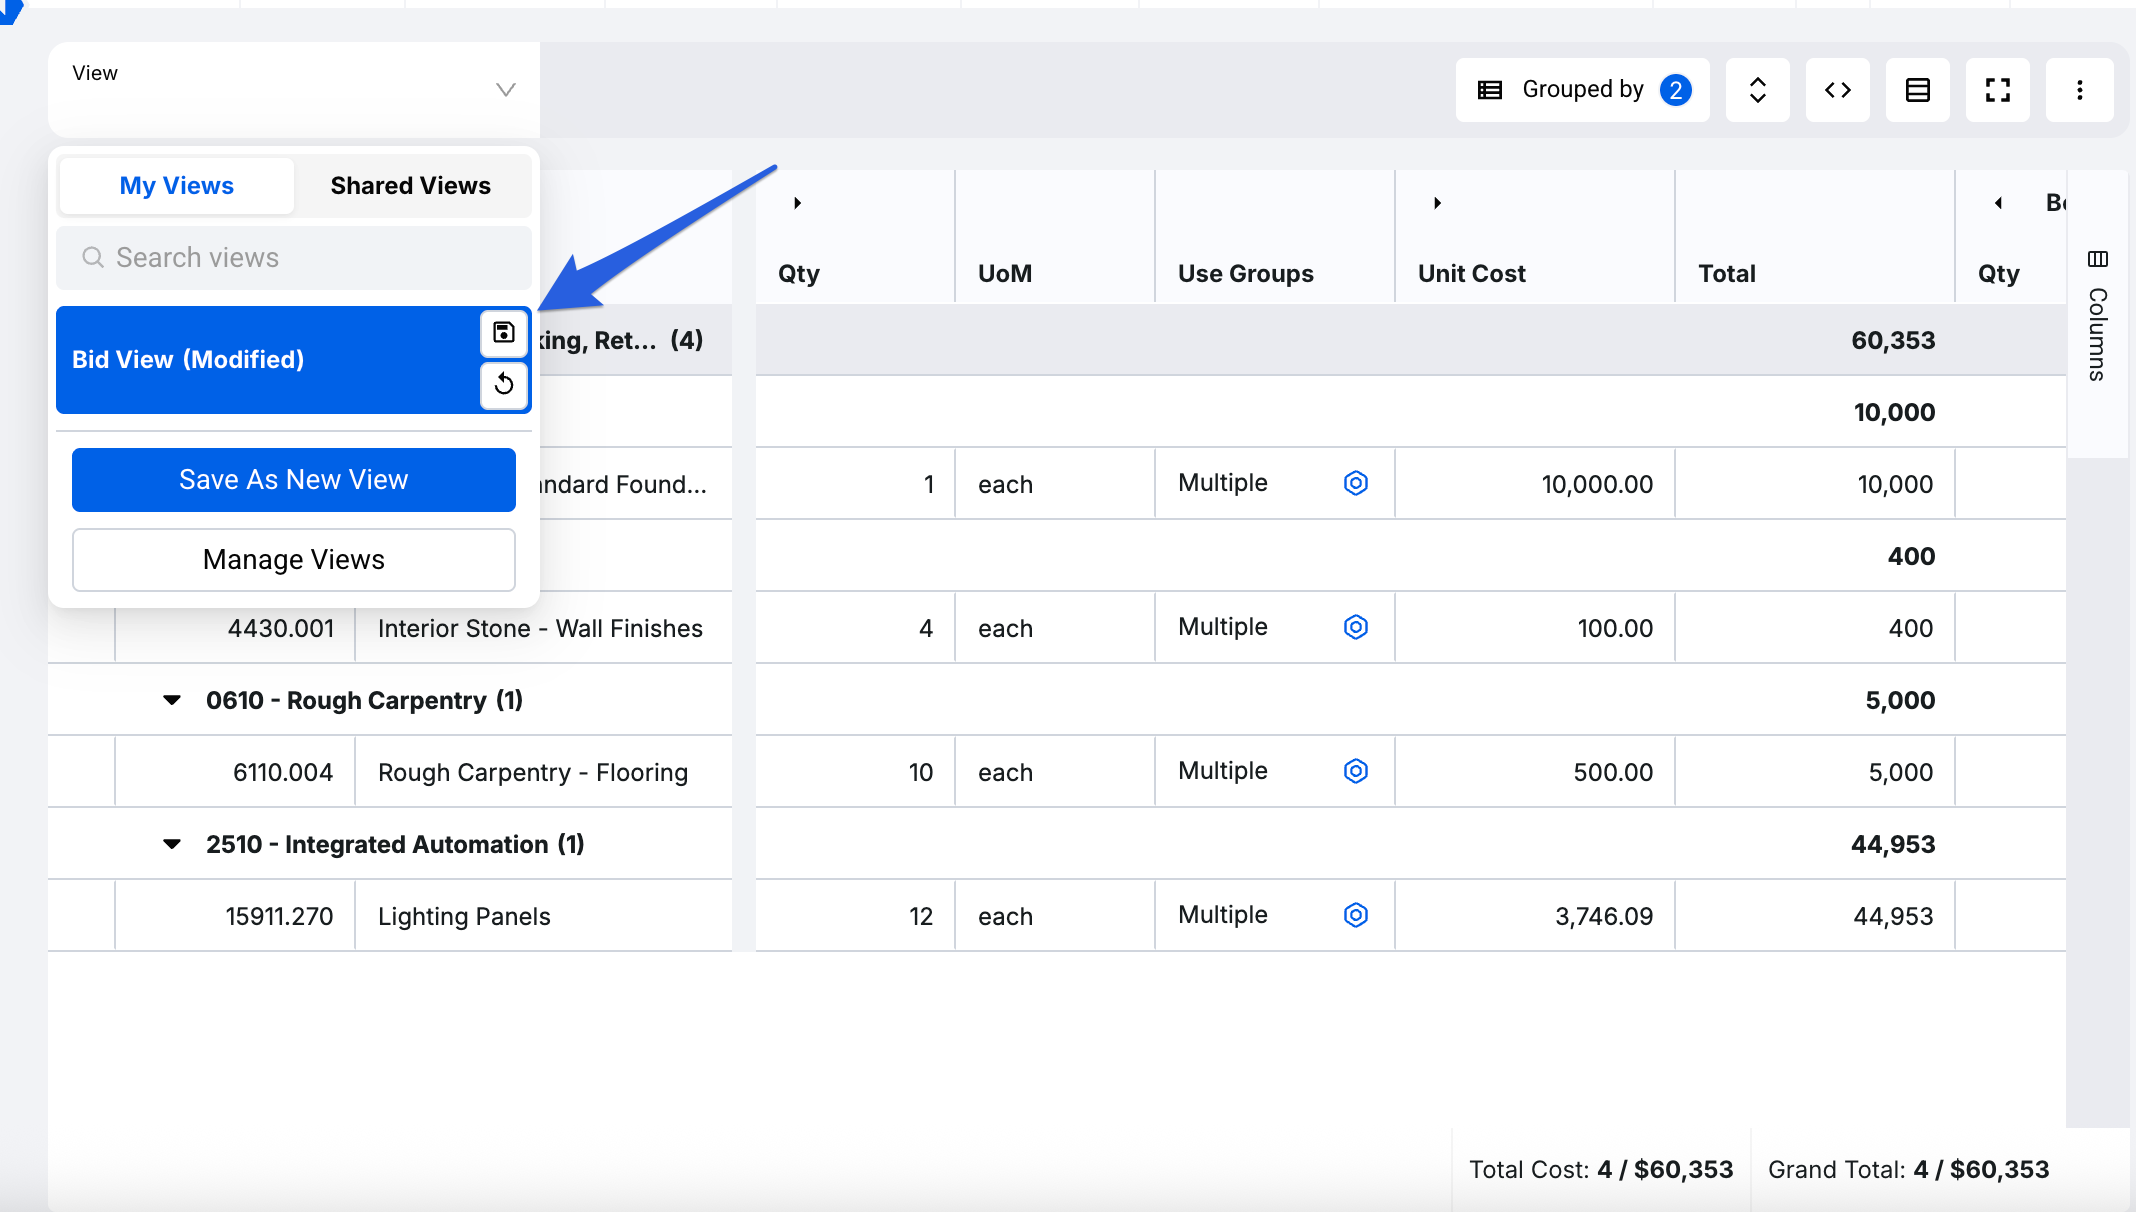
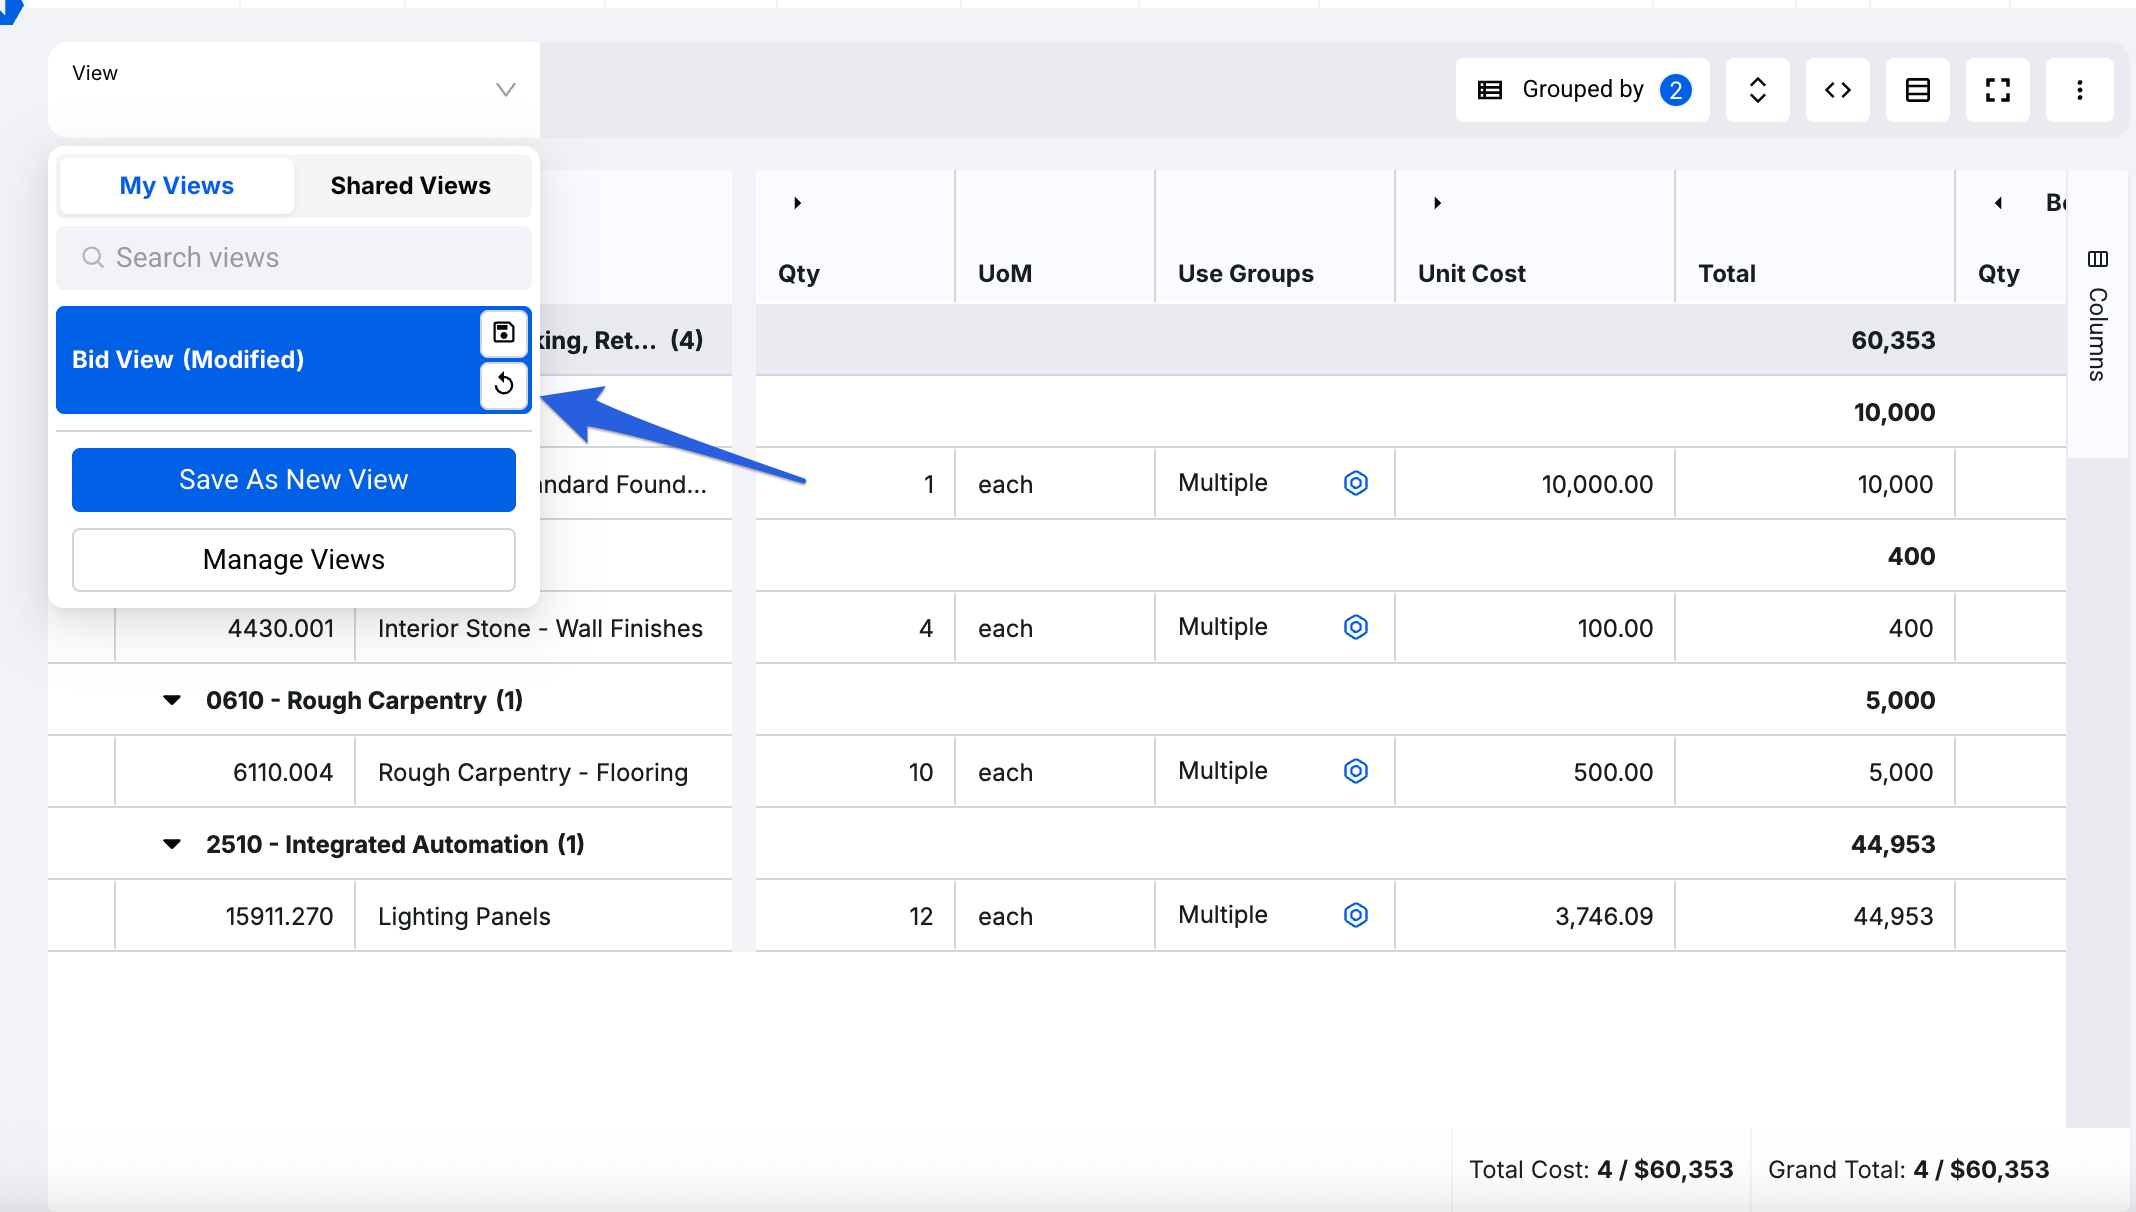
To Save modifications and update the existing view, click into the View dropdown, and select the floppy disk icon in your existing view. A pop-up will appear in the upper right hand corner, confirming your view was updated successfully.
-
To Revert modifications if you accidentally drag and drop columns out of order in the Detailed Summary table, click into the View dropdown and select the circle arrow icon in your existing view. Your view will automatically revert to its previous configuration.
-
To create a new view off of the existing view, click into the View dropdown and select the Save As New View button.
-
A pop up will appear. Once you’ve named and configured your new view, click OK to save.


Note: Choosing Save As New View option does not overwrite your existing view.
Update the View Name
Users have the ability to update the name of a view they have created. To update the name of an existing view, follow these steps:
-
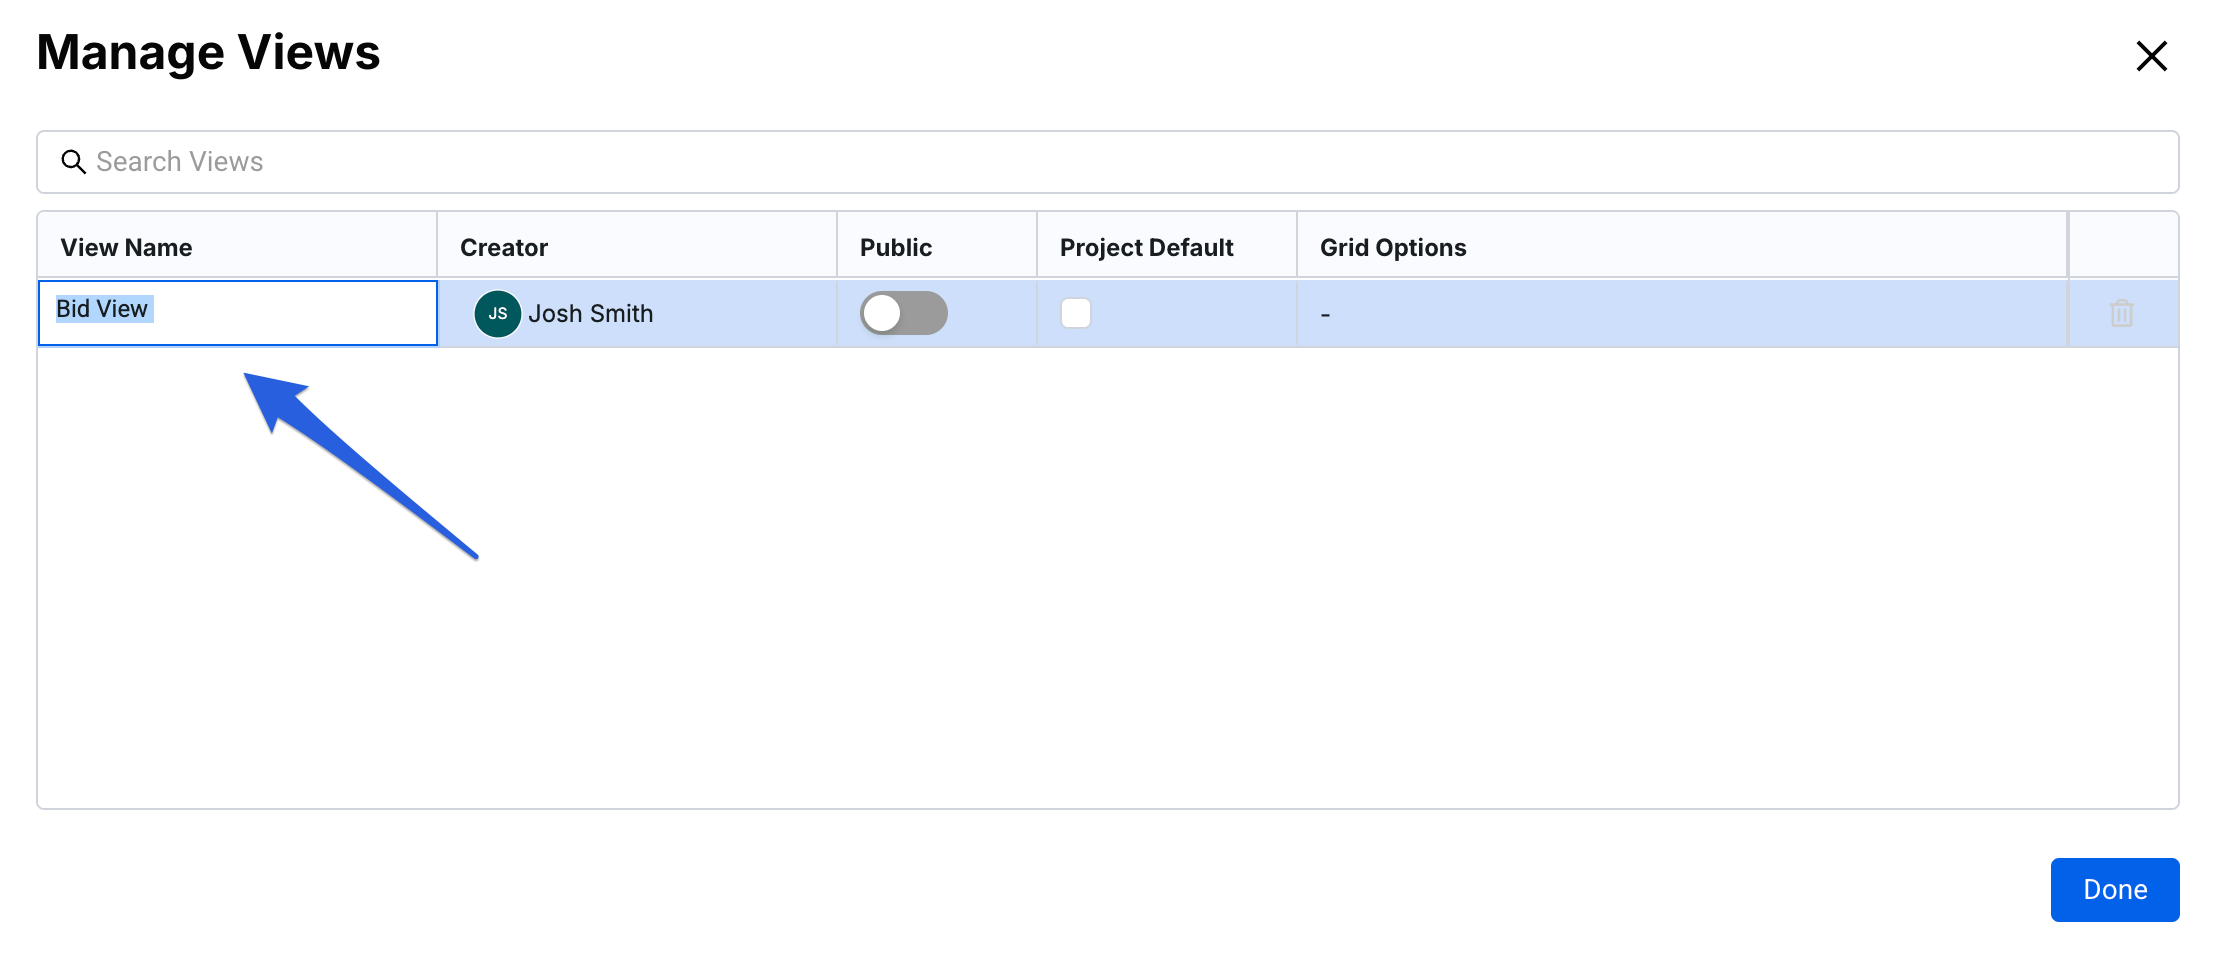
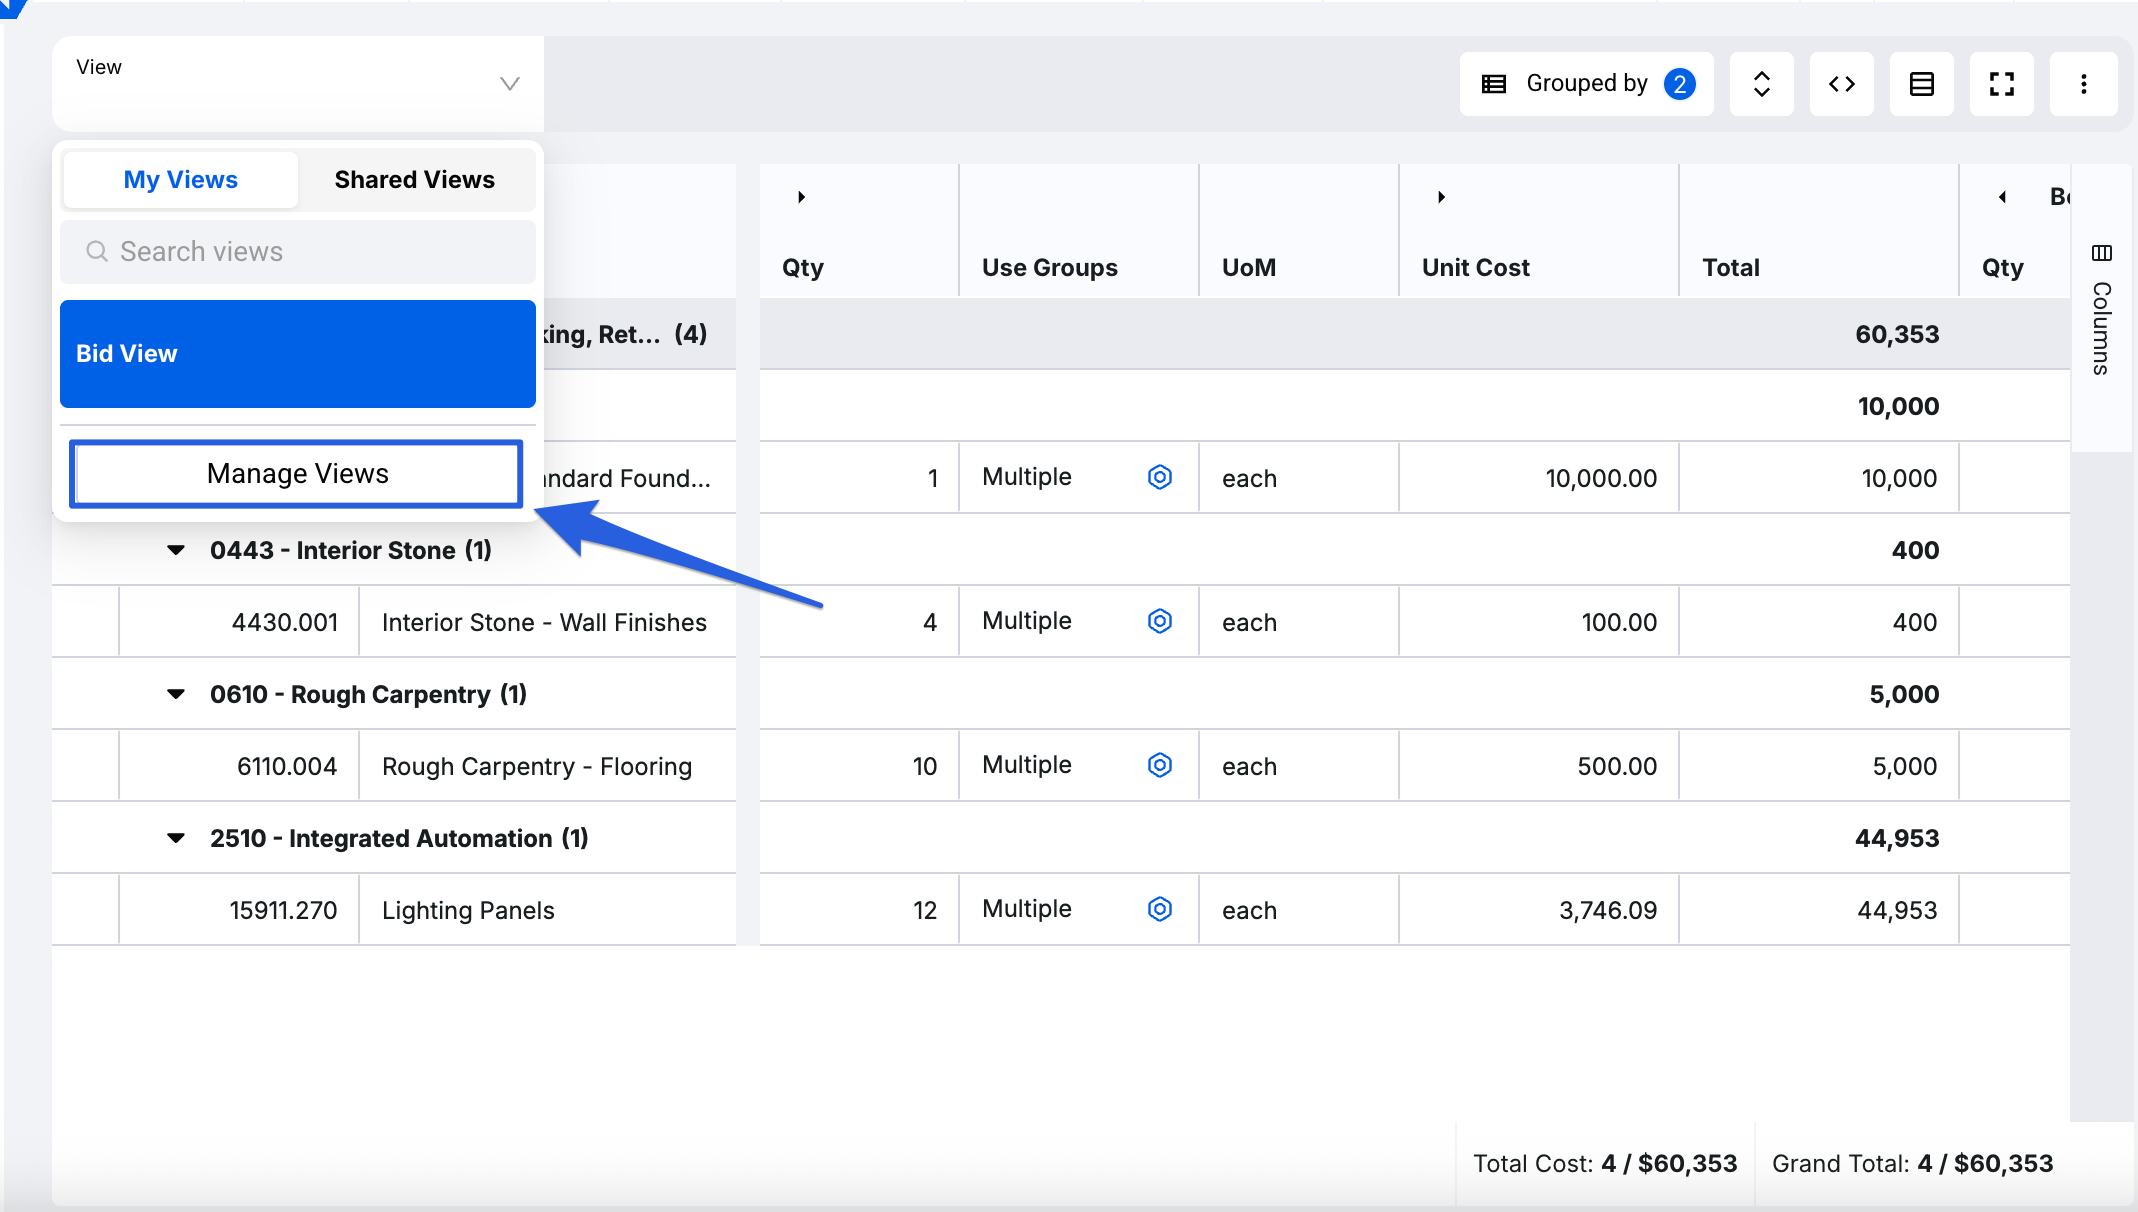
Within the View dropdown, click on the Manage Views tab.
-
A pop-up will appear, where you will see a list of your views, as well as views others have created and made Public. Double-click on the View Name field on any of your views to update the existing name. Select Done to save and update.

Setting a View as Public
Users have the ability to designate a view they have created as Public. This functionality enables colleagues within the same estimate or project to utilize the view on their respective ends, accessible through the Shared Views tab. To set a view as Public, follow these steps:
-
Within the View dropdown, click on the Manage Views tab.
-
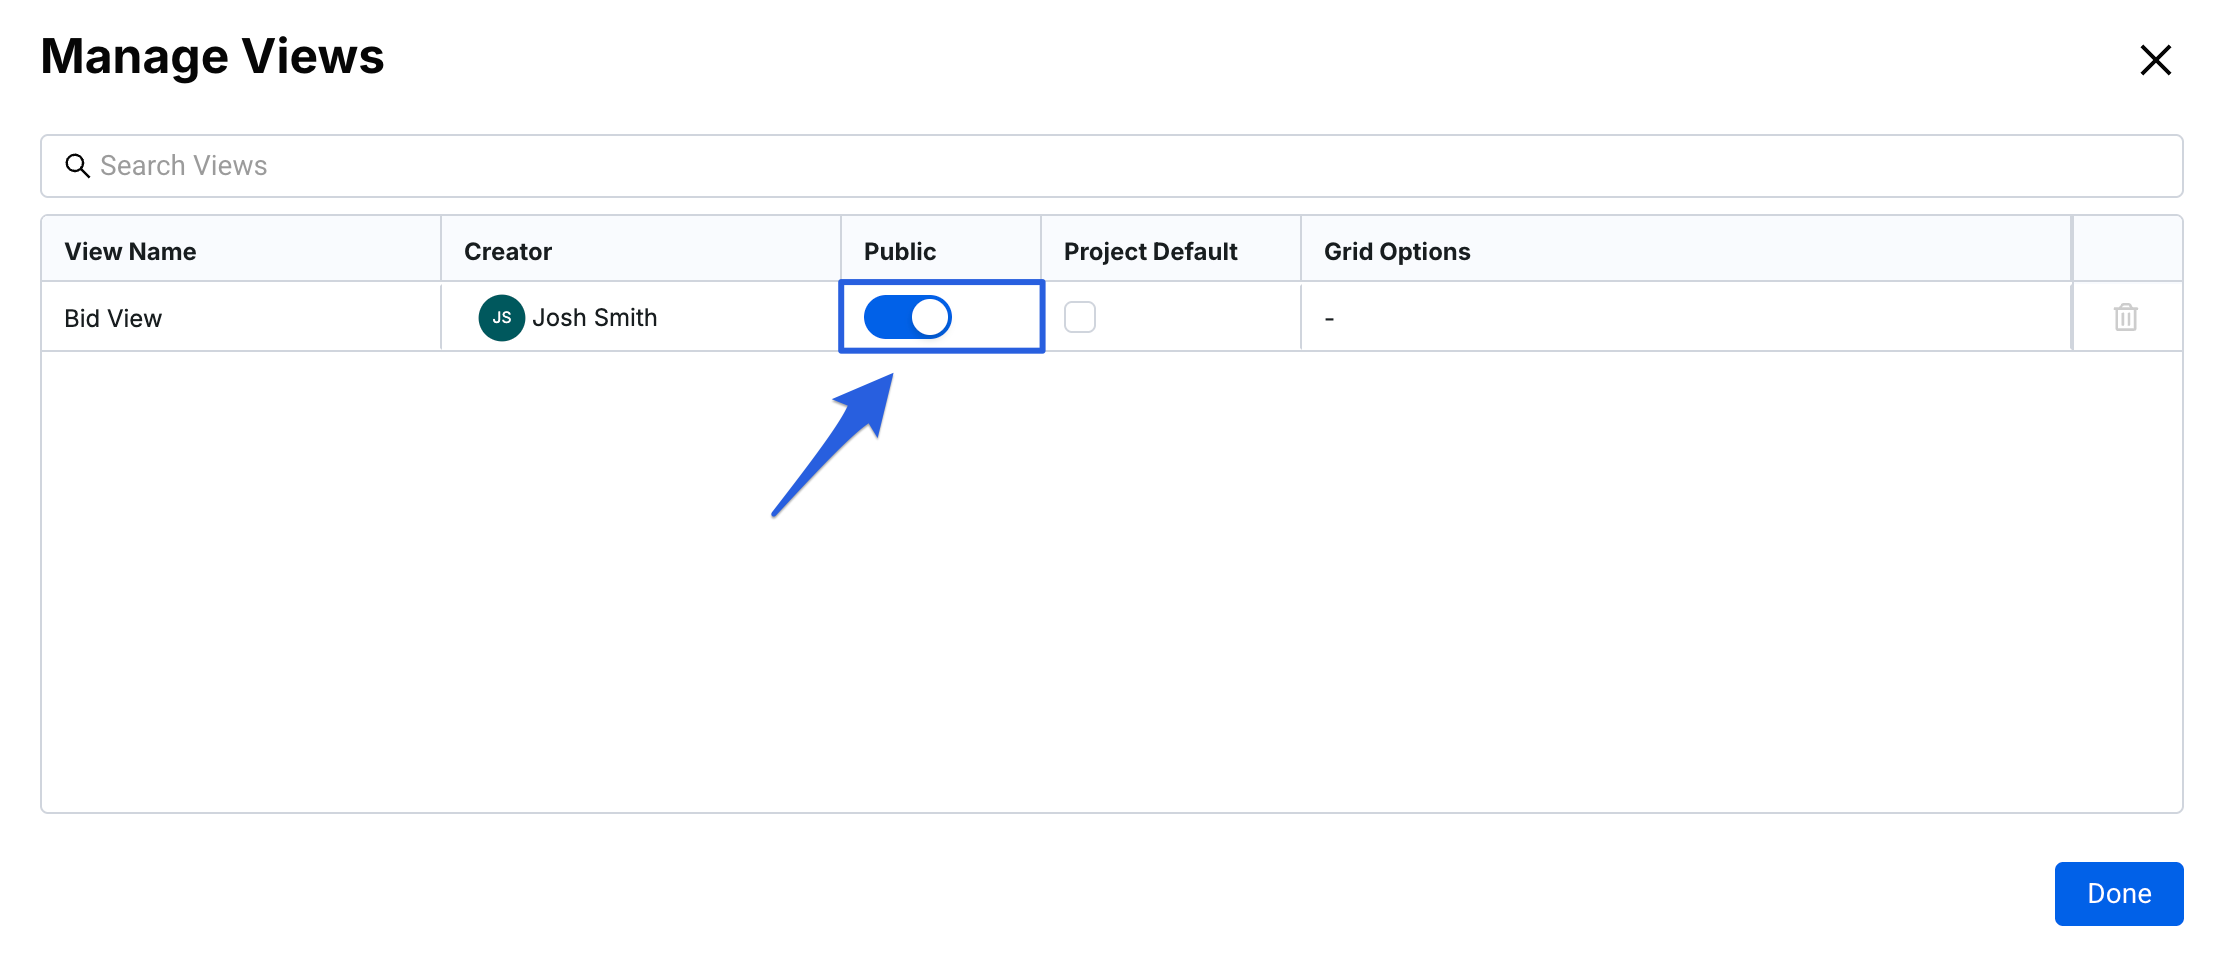
A pop-up will appear, where you will see your existing views. Toggle on the Public button to set the view as Public and click Done to save and update.
-
Colleagues within the same estimate can now utilize the view on their respective ends, accessible through the Shared Views tab. The view will appear along with the name of the view’s creator.


Note: If you’d like to disable a view from being Public simply follow the same steps above, but instead disable the Public option.
Setting a View as Project Default
Project Owners and Admins have the ability to designate a view as the Project Default. This means that any user with access to the estimate, who has not set their own view, will be greeted with this default one. To set a view as the Project Default, follow these steps:
-
Within the View dropdown, click on the Manage Views tab
-
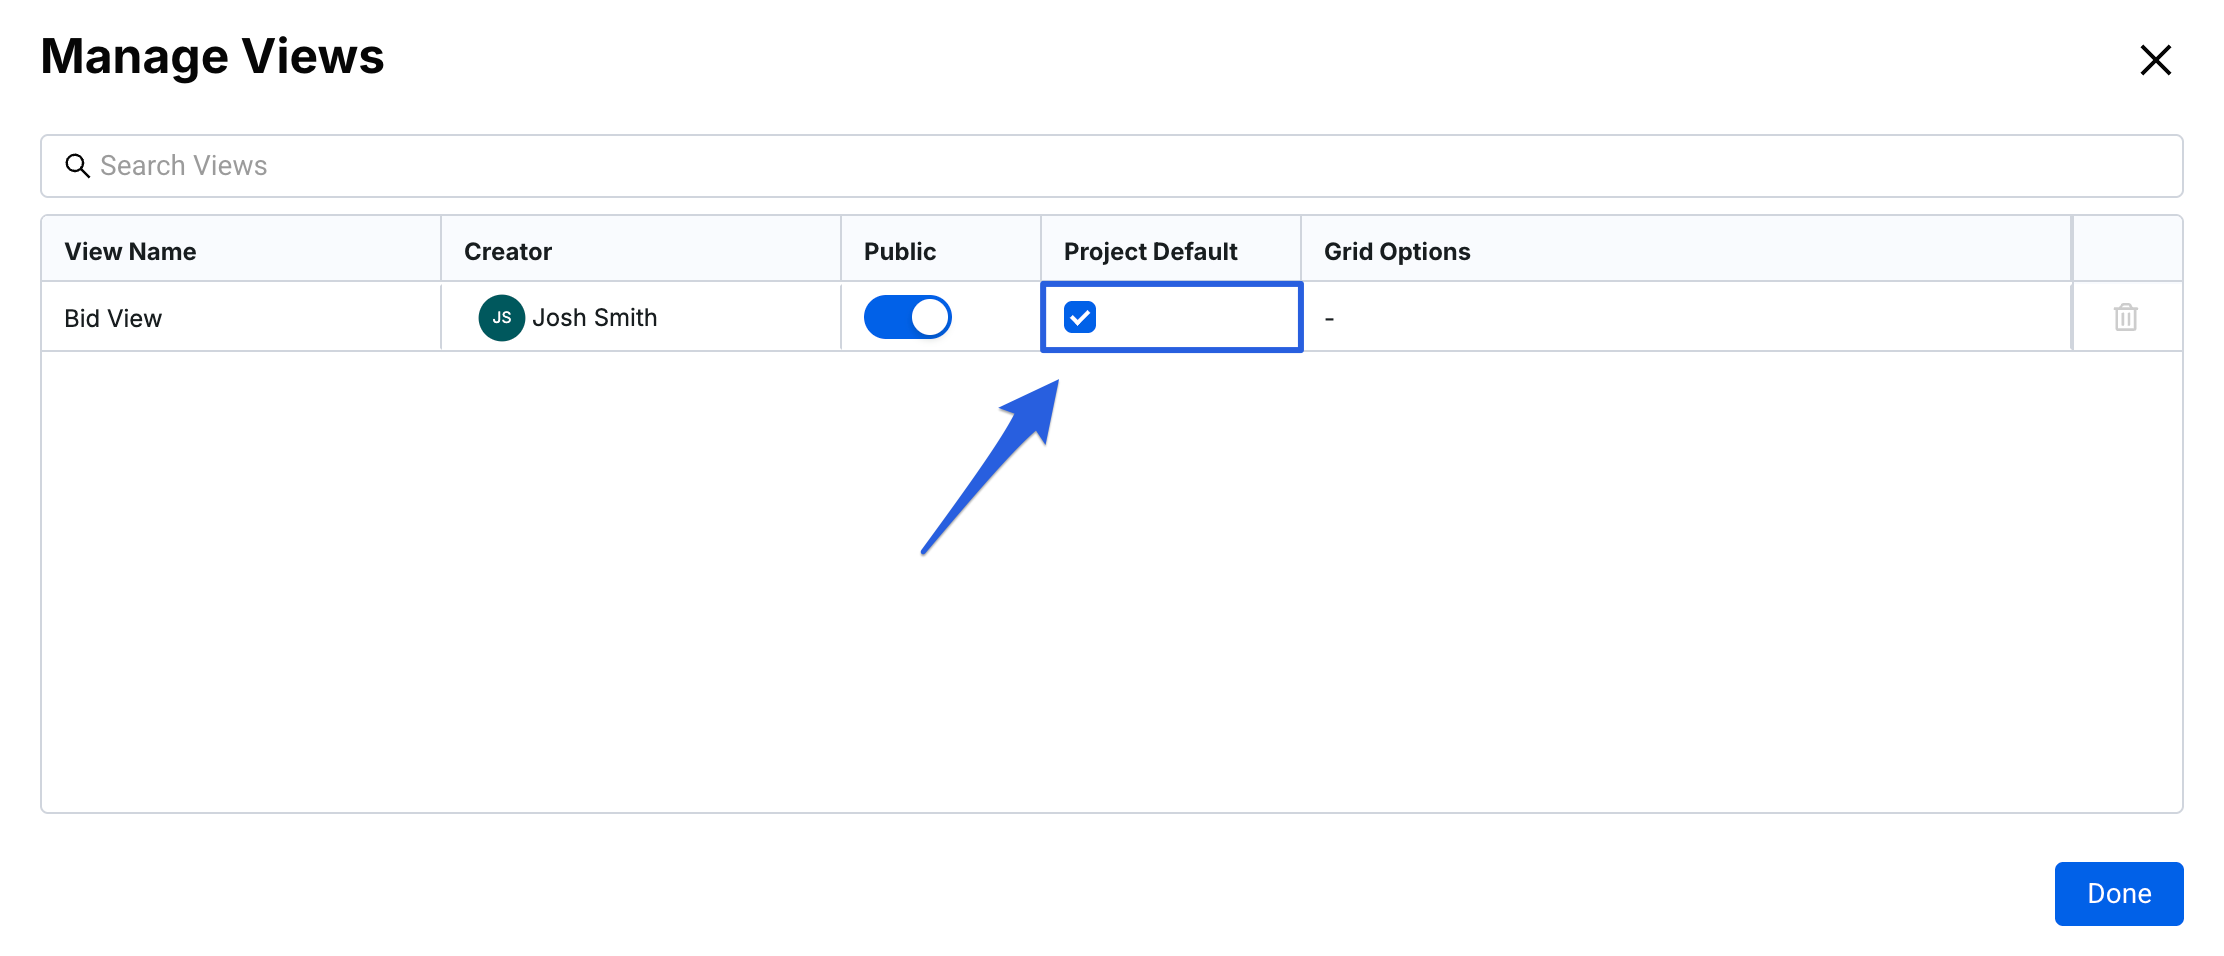
A pop-up will appear, where you will see your existing views. Select the Project Default button to set the view as the Project Default and click Done to save and update.

Note: Setting a view as the Project Default automatically makes it Public. If you want to remove a view as the Project Default, simply toggle off Public; this will also disable Project Default.

Show Subtotals and Use Group Quantities
Users have the ability to update a view’s grid options to Show Subtotals and/or Use Group Quantities. To update these grid options, follow these steps:
-
Within the View dropdown, click on the Manage Views tab.
-
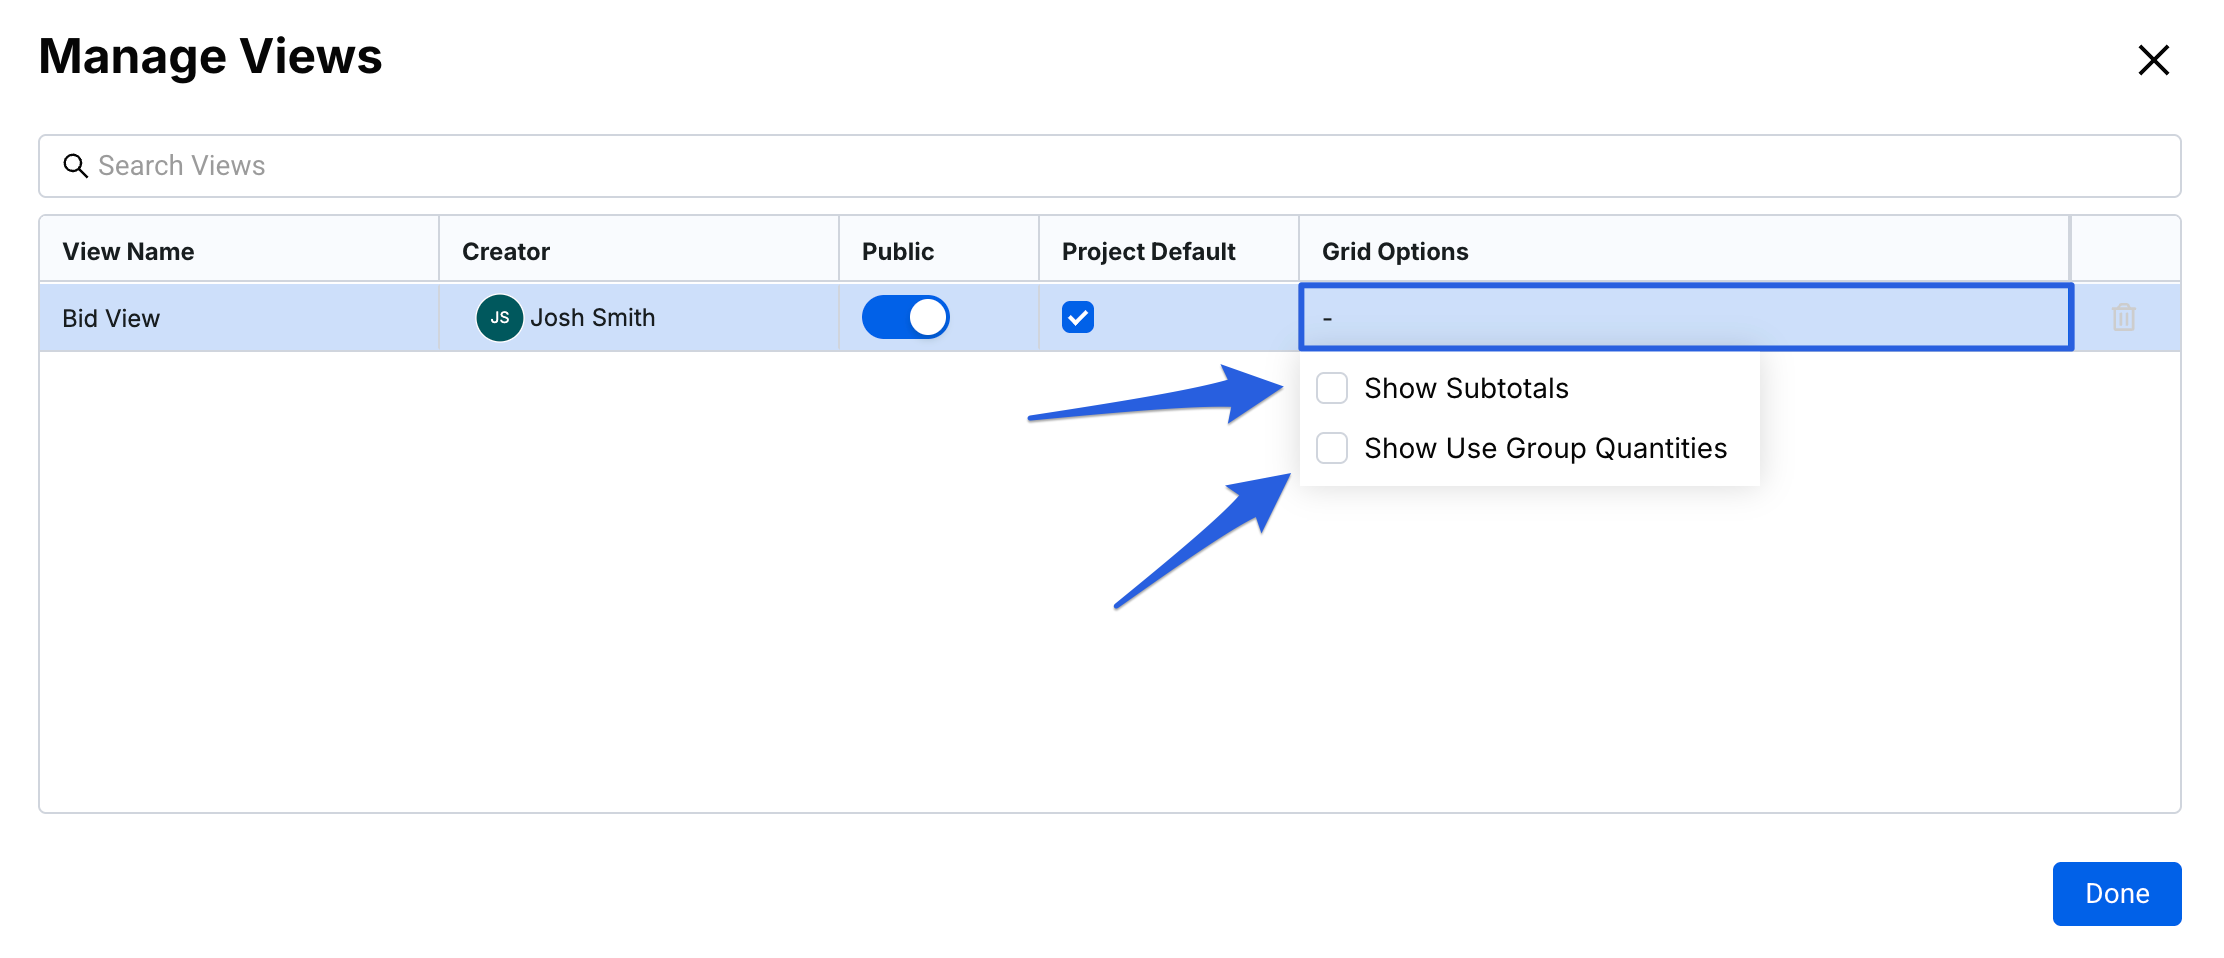
A pop-up will appear, where you will see your existing views. Click on your desired View in the Grid Options field. A dropdown will appear with two options to select from, Show Subtotals and Show Use Group Quantities. Check your desired box and click Done to save and update.

Note: If you’d like to disable a view from Showing Subtotals or Use Group Quantities, simply follow the same steps above, but instead of enabling the these options, disable them by unchecking their boxes and then click Done.
Pro Tip: You can conveniently hide them from your view as opposed to disabling them by clicking the vertical ellipses in the upper right hand corner of your estimate.

Deleting a View
To delete a view from your Saved Views, follow these steps:
-
Click on the View dropdown in the upper left hand corner and select the Manage Views tab.
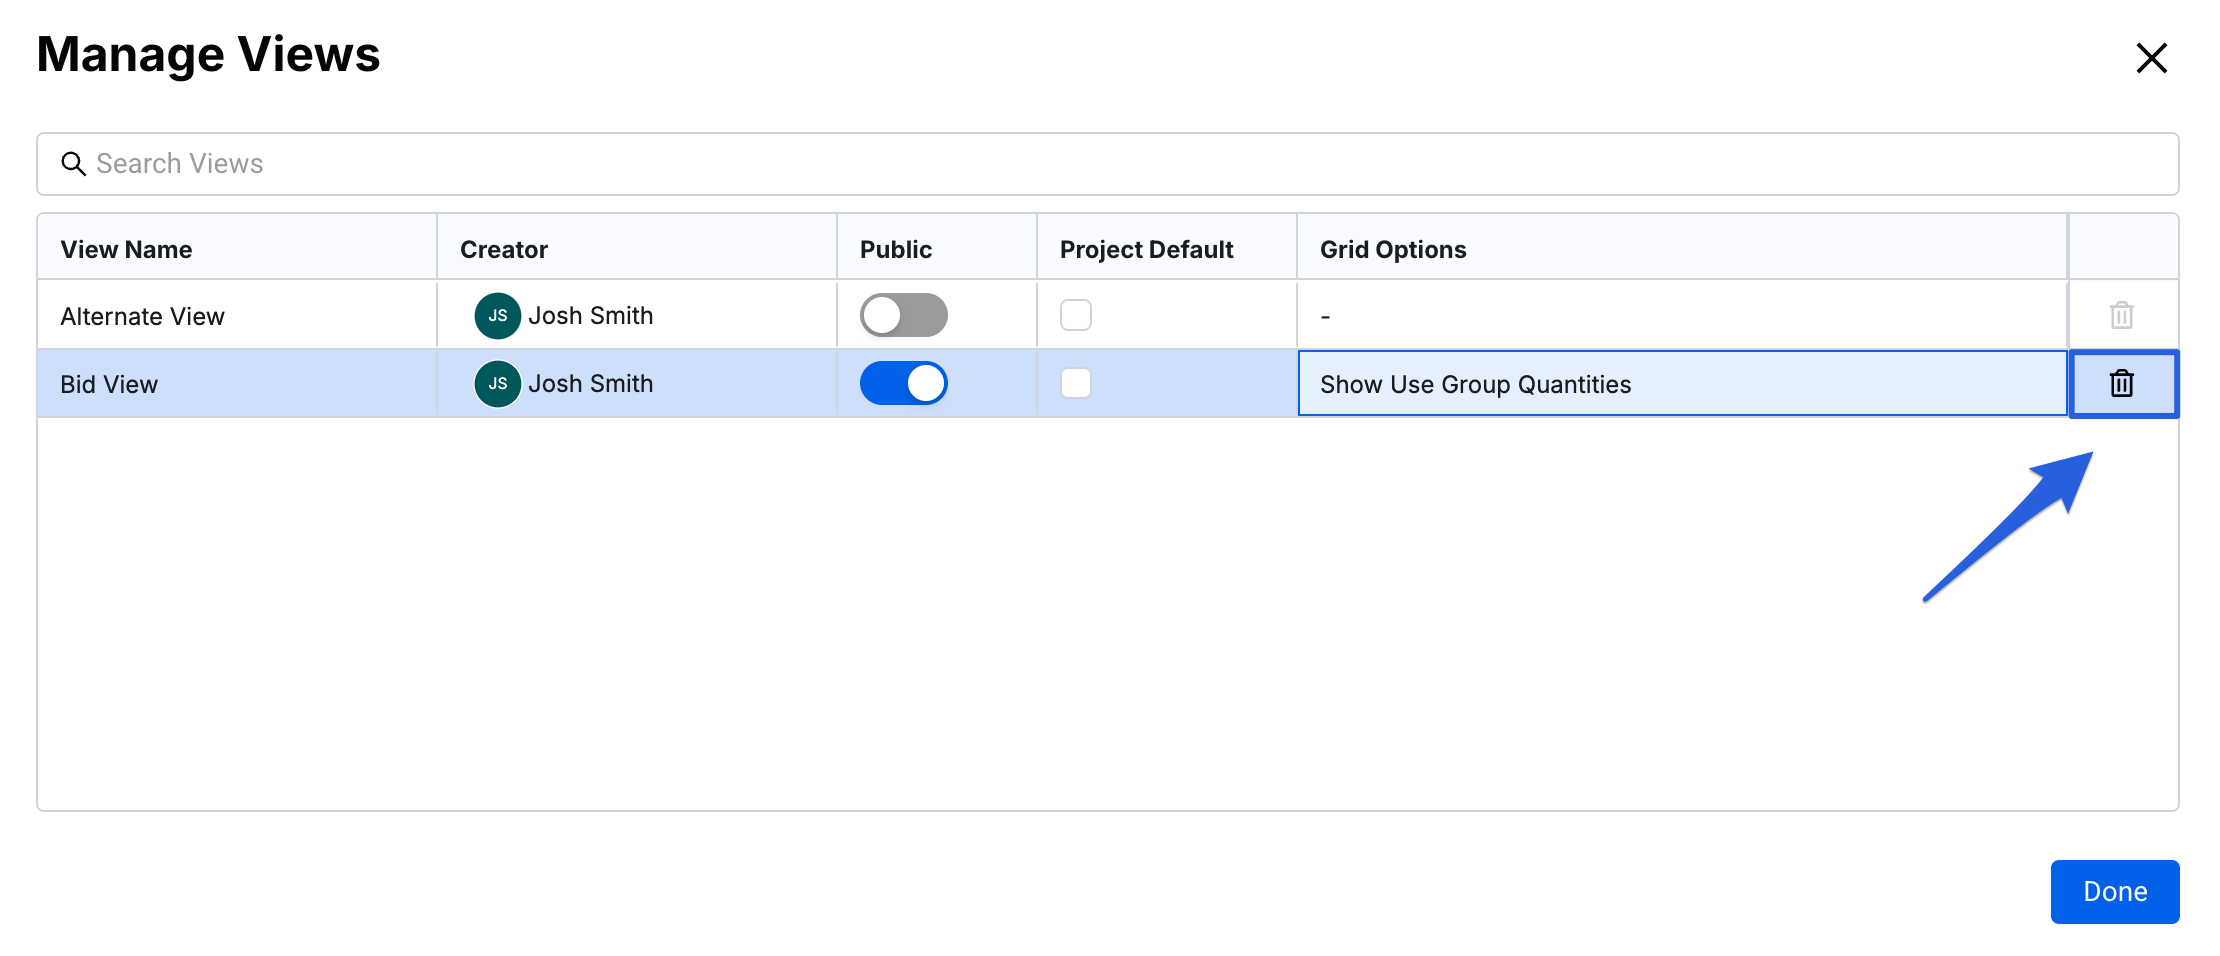
- A pop-up will appear, where you will see your existing views. On the far right, click on the trash can icon next to the view name.

- Another pop-up window will appear asking you to confirm you’d like to delete the view. Click Confirm to delete.

Note: You cannot delete an active view (a view you are currently viewing) in the estimate. If you wish to delete a view with a grayed out trashcan, head back to your estimate and switch to a different view in the View tab. Once the new view is selected, you’ll be able to delete that view.

FAQ's
- I can’t see the Views dropdown option under Line Items or on my Schedule of Values; why?
Saved Views is currently only available under the Detailed Summary section of your estimate.
- Can anyone create a view?
Yes, any user within the platform who has at least Write access within a project has the ability to create views.
- Will setting a view as Public make it accessible to all employees within the company, across all projects?
No. Views are project-specific, and by setting them as Public, you simply ensure that your colleagues within the same project can see and use this view under their Shared Views.
- Why can’t I set my view as a Project Default?
Only Project Owners or Admins can set a view as the Project Default. If you would like your view to be set this way, please reach out to your Project Owner or an Admin.
- Will setting a view as the Project Default affect someone's custom view?
No. The Project Default view is only applicable if a user hasn’t set any views on their end. It basically ensures that any new user added to the project is welcomed by this default view, but they can always create their own and set it as their Project Default.
If you have any questions, feel free to contact our support team and we'll be happy to help!