Using Rooms in an Estimate
The Rooms tab serves as a dedicated space for cataloging all functional rooms within a project. These "Rooms" refer to spaces that contribute to the overall function of the building. Since there are often more geometrically unique functional rooms than there are unique units, this tab provides users with a separate method for visualizing, editing, and tracking these spaces and their finishes from their Units.
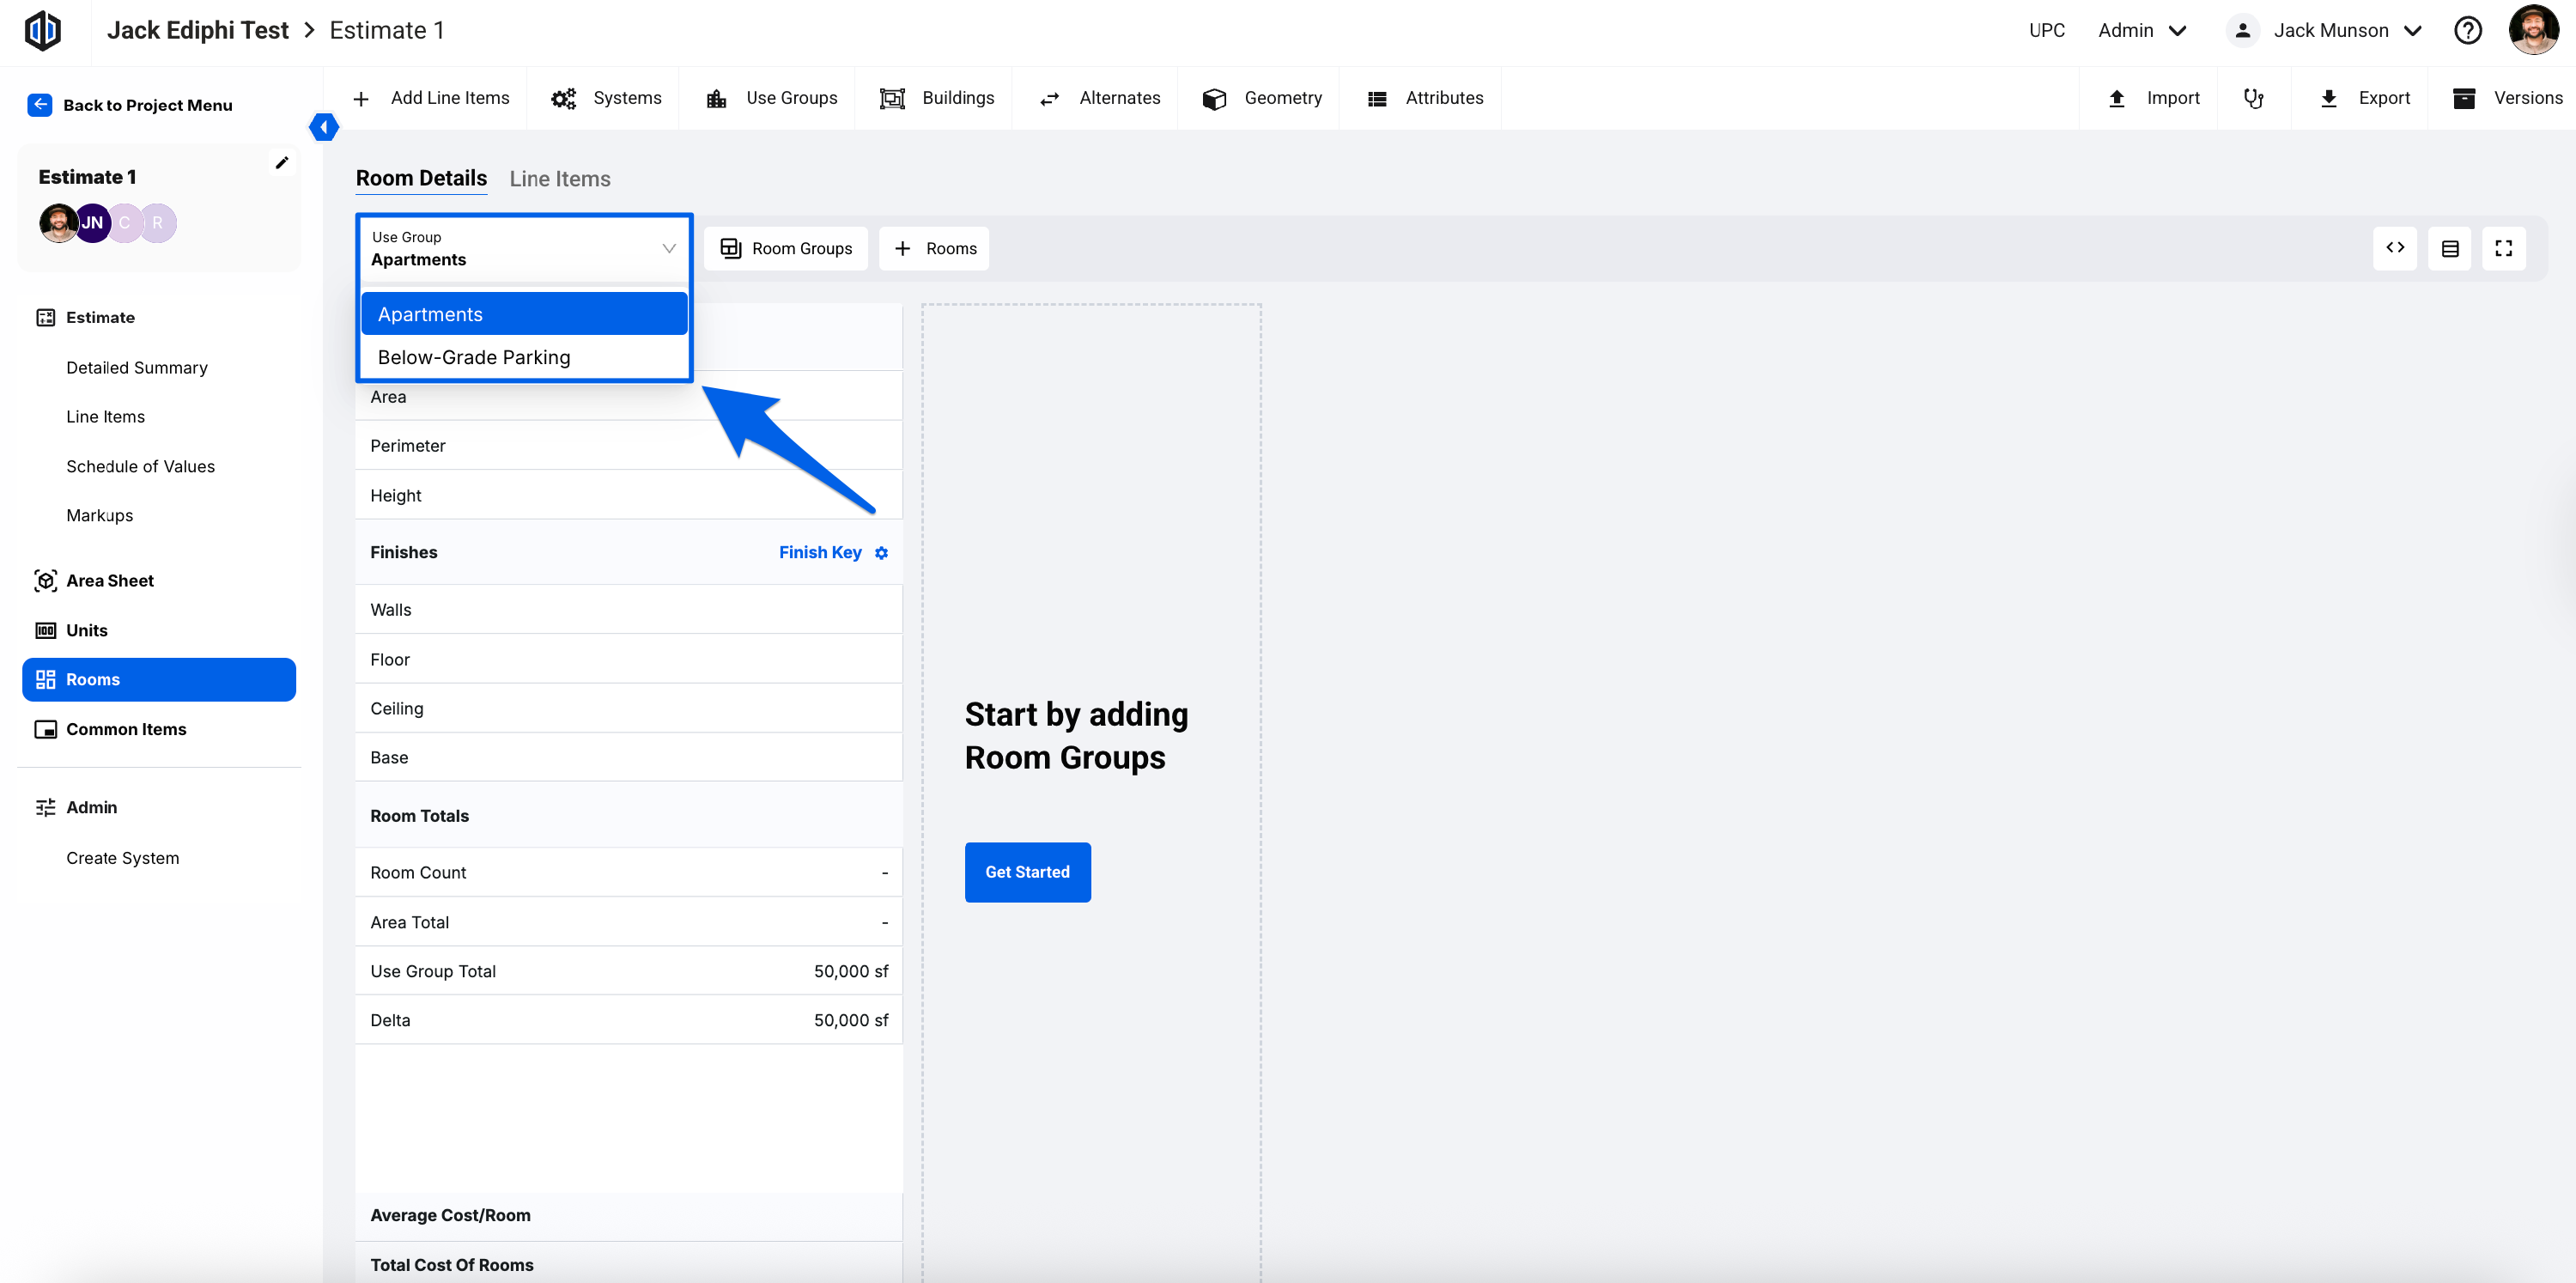
We’ll go over some of the basics of the Rooms tab. To start out, ensure that you’ve selected the correct Use Group that you want to work on:
In this article
Managing Rooms
Within Rooms, you have the ability to add and remove Room Groups and Rooms, in addition to some other useful actions.
Adding Room Groups
By default, a list of Room Groups is provided for your use. If needed, you can easily add new Room Groups through the Admin tool under the Room Groups section.
Note: Only Global Admins have the ability to edit the names of the default Room Groups and to create new Room Groups. If you are not a Global Admin and would like these updated, please contact your Administrator.
After creating new Room Groups in Admin, users will see the Room Groups as options to add within the Rooms tab.

Note: Every room must be assigned to a Room Group. If none is selected, it will automatically be placed in the "Uncategorized Rooms" Room Group. Unlike other Room Groups, this one cannot be renamed or manually created. While you can add rooms to it, it only appears when at least one room is assigned to it, serving as a default grouping for unclassified spaces.
Deleting Room Groups
- Open the Room Details or Line Items section within the Rooms tab.
-
Click on the ellipses next to the Room Group you would like to delete. Select Delete Room Group.

-
A modal will appear requiring you to either move the rooms from the soon-to-be deleted Room Group to an active Room Group or delete the rooms altogether.

- Select either the Move Rooms or Delete Rooms option, and then click the respective button to perform the action.


Adding Rooms
- Open the Room Details or Line Items section within the Rooms tab.
-
Click the + Rooms button OR click the ellipses next to a Room Group and select Add Rooms.

- You’ll then be prompted to enter the title/description of the Room that you’d like to add (required), as well as the Perimeter, Area Average, Quantity, and/or Height (if applicable). You also have the option to add several Rooms at once by clicking on Add Room or Paste from Clipboard. Once you've input the information, you can click on Save.


Note: Your Room Group options will be listed via a dropdown in the Create Rooms modal. The added rooms will be assigned to the selected Room Group.

Moving Rooms
If you need to move rooms from one Room Group to another, you can do so easily.
-
Click the ellipses on the Room Group you want to modify and select Manage Rooms.

- A pop-up will appear, prompting you to select a destination Room Group. To move rooms, use the dropdown menu to choose a Room Group, then check the rooms you want to transfer. Once you've made your selections, click Move Rooms to complete the process.


Deleting Rooms
If you ever need to delete rooms, Ediphi offers 2 paths to complete this action: in bulk, or one-by-one.
Deleting Rooms in bulk:
-
Click on the ellipses on the Room Group you need to delete rooms from and select Manage Rooms.
-
A pop-up will appear, prompting you to either select a destination Room Group to move them to, or delete rooms. To delete rooms, click the Delete option, check the rooms you want to remove from the Room Group, and then click Delete Rooms to confirm.

- A pop-up will appear letting you know this action cannot be undone. Click on Confirm Delete.


Deleting Rooms one-by-one:
-
Click on the ellipses of the specific room you would like deleted. Select Delete Room.
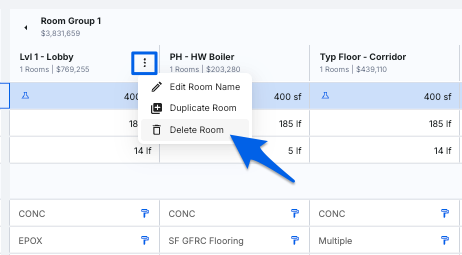
- A pop-up will appear letting you know this action cannot be undone. Click on Confirm Delete.


Duplicating Rooms
-
Click the ellipses on the desired room and select Duplicate Room.

- A pop-up will appear, prompting you to select the destination Use Group and Room Group for the duplicated room. Be sure to verify that you're copying it to the correct groups. You can choose from any existing Use Groups and Room Groups in your estimate or keep it within the current ones. Once confirmed, click Duplicate.


Note: This duplicate will include the same Geometry, the same Finishes, and all of the same quantity formulas within the Line Items section.
Room Details
Geometry


Finishes


Similar to the Geometry section, if your finishes are the same across all rooms or even all Room Groups, you can right-click a cell and select Fill Across Row to bulk apply the finishes across the entire row.


Note: After adding geometry and finishes and/or duplicating finishes to the Room Details section, your finishes will appear as line items within the Line Items section of Rooms. While you can view them here, editing is limited. You are able to edit the information under the Line Items grid, such as Order, Description, Qty, UoM, and Unit Cost.
To edit the other information for finishes, this can be done via the Finish Key modal. To access the Finish Key modal, you can either click on the Blue Link Icon on the Finish line item or navigate to the Room Details section and click on Finish Key in the middle.
Room Totals

Line Items
In the Line Items section of the Rooms tab, your room and finish line items are displayed in a detailed line item format.
Line Item Breakout
Once you've added data to the Room Details section, go to the Line Items section to view your Finish and Room line items. To add more Room line items, simply click + Line Items.

Pro Tip: Keep in mind, after adding Finishes in the Room Details section, those finishes will automatically flow over to the Line Items section.
Note: If you override a Line Item's Total Qty, the row will gray out, and Room total costs will no longer show. This is because we can no longer determine the total cost of a Room or Room Group if a Line Item's Total Qty has been overridden. If you would like to persist room total costs, please remove all Line Item Total Qty overrides and make all edits to Qtys on the rooms themselves.
You have the ability to create quantity formulas for Room line items, as well as edit them in the Line Items section of Rooms. To create quantity formulas for Room line items, start by clicking =, then Enter on your keyboard within the Qty cell, and this will create equations to calculate the correct quantity. Keep in mind, quantity formulas are not applicable for Finish line items.

Within the Line Items section on Room line items, and depending on which cell you are in, you can right-click to Create/Edit Quantity Formula, Fill Across Row, Duplicate, and Delete.

Estimate Link to Rooms
When working in the Estimate Line Items tab, you can click the Blue Link Icon on any Room or Finish line item to be taken directly to the source in the Rooms Line Items section.

Pro Tip: In the Rooms Line Items section, clicking the Blue Link Icon on a Finish line item will take you directly to the Finish Key, which is the source for your finishes.
Grouping
Additionally, in the Line Items section of Rooms, you are able to group your line items the same way you can in the Estimate Detailed Summary tab.

FAQ
- Why am I seeing Use Group Allocations within the Use Group dropdown in Rooms? Is this a bug?
This behavior is intentional. Use Group Allocations can be added directly within Rooms, and they appear in the Use Group dropdown for this reason. This allows you to create rooms (such as Loading Docks) that apply to multiple Use Groups. By creating these rooms within the allocation, their costs are automatically distributed across the associated Use Groups according to that custom allocation.
- Can I delete the "Uncategorized rooms" Room Group?
If you assign all Rooms to a respective Room Group, the "Uncategorized rooms" Room Group will technically disappear unless you move assigned rooms back to this Room Group. You are not able to permanently delete the "Uncategorized rooms" Room Group as that is your default Room Group for any room that is not assigned to a Room Group.
- In the Line Items section, I cannot edit the Qty and Cost per room for Finish line items. Is this broken?
This is expected. Your Finish line items are in a semi-locked state as they have been pushed from Room Details to Line Items. You can, however, edit the information under the Line Items grid, such as Order, Description, Qty, UoM, and Unit Cost. To edit the other information for finishes, this can be done via the Finish Key modal. To access the Finish Key modal, you can either click on the Blue Link Icon on the Finish line item or navigate to the Room Details section and click on Finish Key in the middle.
- I’m clicking on Add Room Groups but cannot find where to add a brand new Room Group. Where is this located?
Only Global Admins have the ability to create new Room Groups, and they can do so from the Admin tool located on the top-right of the platform. If you are not a Global Admin, you can always edit the Room Group label to any name you prefer (basically, the same behavior as Use Groups).
- Can I delete Rooms in bulk to save time?
Yes, you can! See our Deleting Rooms section here to learn more.
- Why can I not change the name of a Room Group?
If you have Write permissions or higher to Estimates, you are able to relabel a Room Group you added to the project. You cannot. however, create new Room Groups unless you are a Global Admin.
- Can I do Back Calculations or Total Overrides within the Line Items section of the Rooms tab?
Back calculations and Total Overrides are not currently available in Rooms.
- Is there a way to expand or collapse all line items like I can within the Estimate’s Detailed Summary?
Yes, you can! In the Line Items section of Rooms, at the top-right of the grid, you will see some icons. Select the vertical arrow icon to either expand or collapse your line item rows.

- I added a bunch of Rooms to a Room Group, but I want to re-organize some. Is there a way for me to do this?
Yes! You can re-organize your Room Groups by moving rooms from one Room Group to another. Please see our Moving Rooms section here to learn more.
- There’s a Room Group that’s all the way at the end of my list, but I’m currently working on it so I need it to be in the front. Can I move it?
Yes, you can move your Rooms and Room Groups by dragging and dropping them in their desired location.
- Is there a way to make the table smaller (more compacted) so I can see more data?
Yes! If you wish to change the size of your table settings in Rooms Detailed Summary, you can do just that. At the top-right of the grid, you will see some icons. Click on the table icon to select from Default, Compact, or Spacious.

- How does the Paste From Clipboard function work?
This option for adding rooms is very effective for pasting items in bulk from a worksheet. In a worksheet (Microsoft Excel, Google Sheets, Apple Numbers, etc.), create five columns for Description, Perimeter, Area Average, Qty, and Height. Fill out these columns with data and then copy them all (right-click, Copy or CTRL+C). Open up the Add Rooms modal and click on Paste From Clipboard.
- What is a “Mark” within Finish Key, and can I edit this if I have duplicate Finishes?
A Mark is a 4-character abbreviated code of a finish. To edit Marks, simply open the Finish Key within Room Details, and double-click on any Mark to edit it. Please see our Using Marks article to learn more.
- What does the number I’m seeing under the Room Group name represent?
The number directly below the Room Group name is the total room cost of all rooms assigned to this Room Group. Furthermore, the number you see below each Room is the cost of that individual room.
- Any way to make this page full-screen so I can have more screen real estate?
Yes, you can remove the top menu options of Ediphi in the Rooms Detailed Summary by navigating to the top-right of the grid and selecting the box icon. To revert to the original size, simply click on the box icon again.

- Do you have a drawing example outlining the different terms within Ediphi?
Yes! See below.

If you have any questions, feel free to contact our support team and we’ll be happy to help!