Managing External Collaborators
Note: Only Global Admins have the ability to manage users within Ediphi.
Joint Ventures (JVs) often require bringing people from partner companies into Ediphi to work on a single shared project, without giving them visibility into the rest of your data. The External Collaborator role is built for exactly this. Collaborators can be invited to specific projects while being restricted from viewing your company's other projects, historical pricing, and sensitive tools by default.
In this article:
- Adding an External Collaborator
- Understanding Collaborator Permissions
- Managing Collaborator Permissions Within a Project
Adding an External Collaborator
The External Collaborator role is meant for people outside your company, such as JV partners, consultants, or other outside collaborators, who only need access to the specific project(s) they're invited to.
- Click the Admin button located in the top-right corner of the screen.
- Select Users from the dropdown.
- Click the New User button in the top right corner.
-
A “Create New User” form will appear. Add their Name and Email.
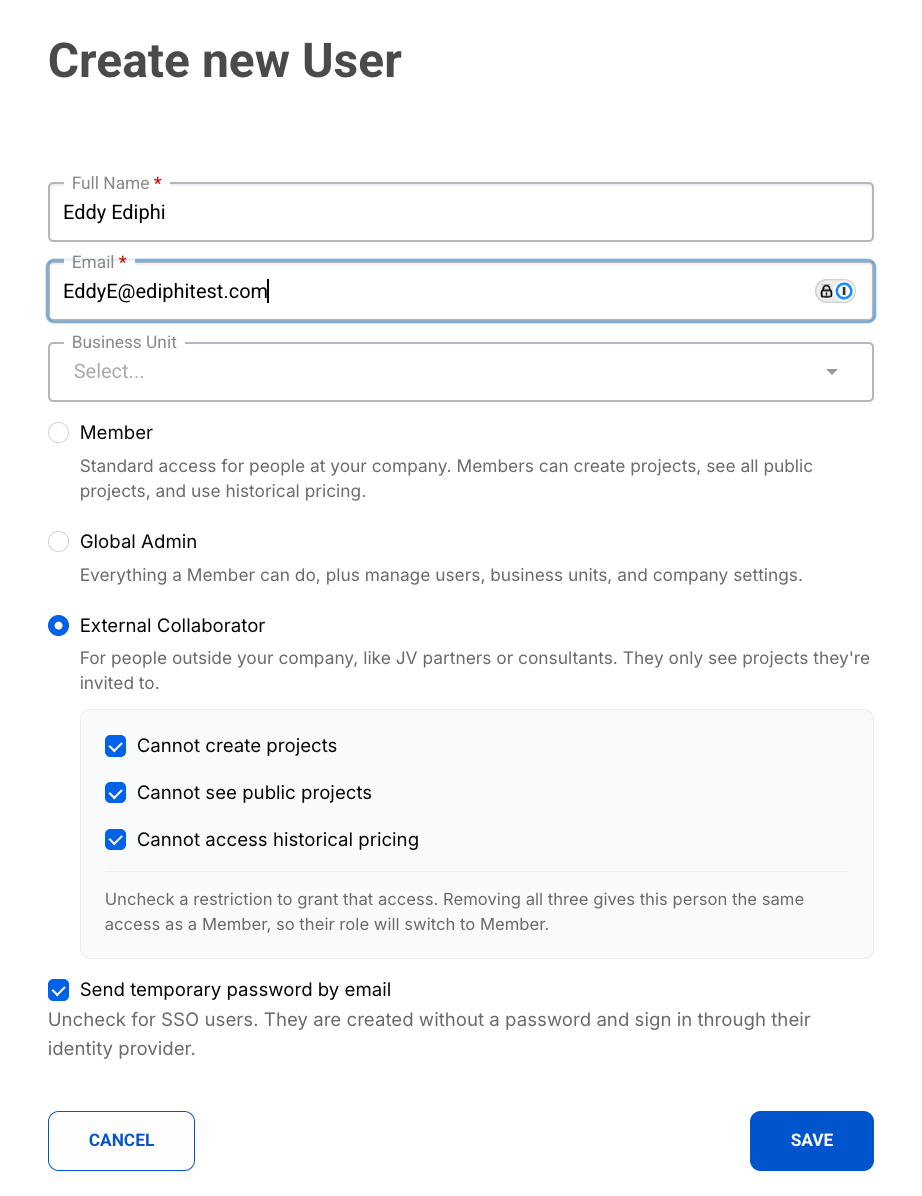
- Choose External Collaborator.
- Three restrictions will appear, all turned on by default:
- Cannot create projects
- Cannot see public projects
- Cannot access historical pricing
- Three restrictions will appear, all turned on by default:
Note: If you uncheck all three restrictions, the user has the same access as a Member, and their role will automatically switch to Member. Additionally, External Collaborators cannot be assigned Regional Admin permissions. Regional Admin is only available to Members.
- Click Save.
The user will receive an email invitation from Ediphi with a temporary password they can use to sign in and create an account. The email will look like this:

Note: If your company uses SSO, these steps may not apply or may differ slightly. Please contact your IT department for further guidance or see Managing Users for more information.
Understanding Collaborator Permissions
Each of the three External Collaborator restrictions controls a different part of the platform:
- Cannot create projects: The user is unable to create new projects of their own and they can only work within projects they've been invited to.
- Cannot see public projects: The user only sees projects they've been explicitly invited to; your company's Public projects are not visible to them. This also means they have no access to cost modeling, contracting, or other project tools by default.
- Access to those tools must be granted individually within each project they're invited to.
- Cannot access historical pricing: The user cannot view historical pricing on projects, the UPC, and pricing models across regions. This restriction is waived only for projects the collaborator created themselves.
Managing Collaborator Permissions Within a Project
Once an External Collaborator has been invited to a project, Global Admins can fine-tune exactly which tools that user can access inside that project. These per-project permissions apply only within that specific project. The Collaborator's access will not carry over to any other project, even if they're invited to more than one. To manage a Collaborator’s project permissions:
- Select your desired project and click on the ellipsis in the top right corner.
- In the dropdown go to Manage Permissions.
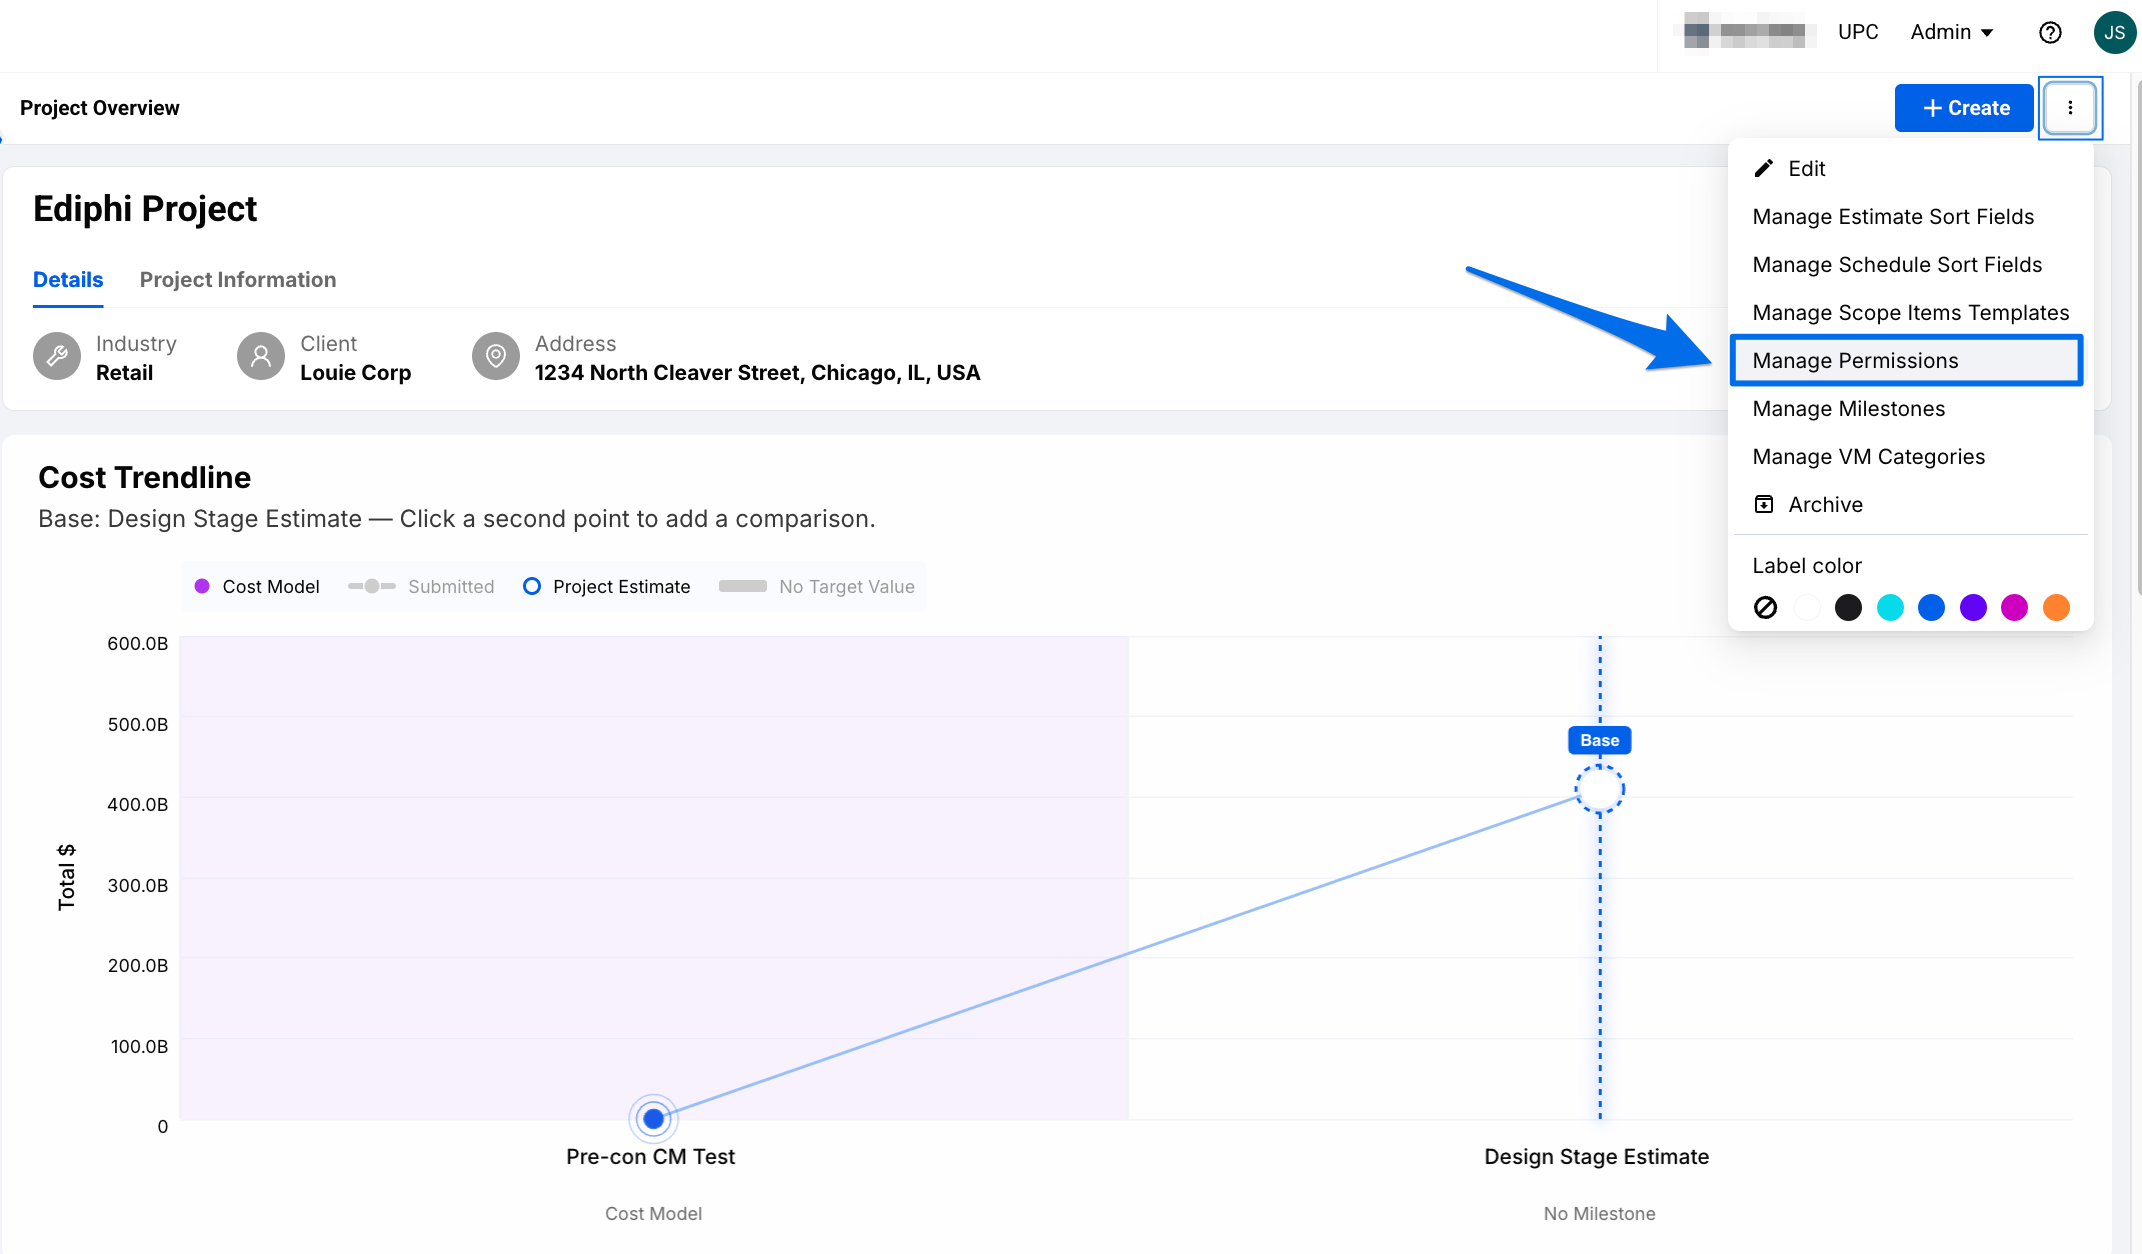
- Find the collaborator. They'll be marked with a “Collaborator” tag.
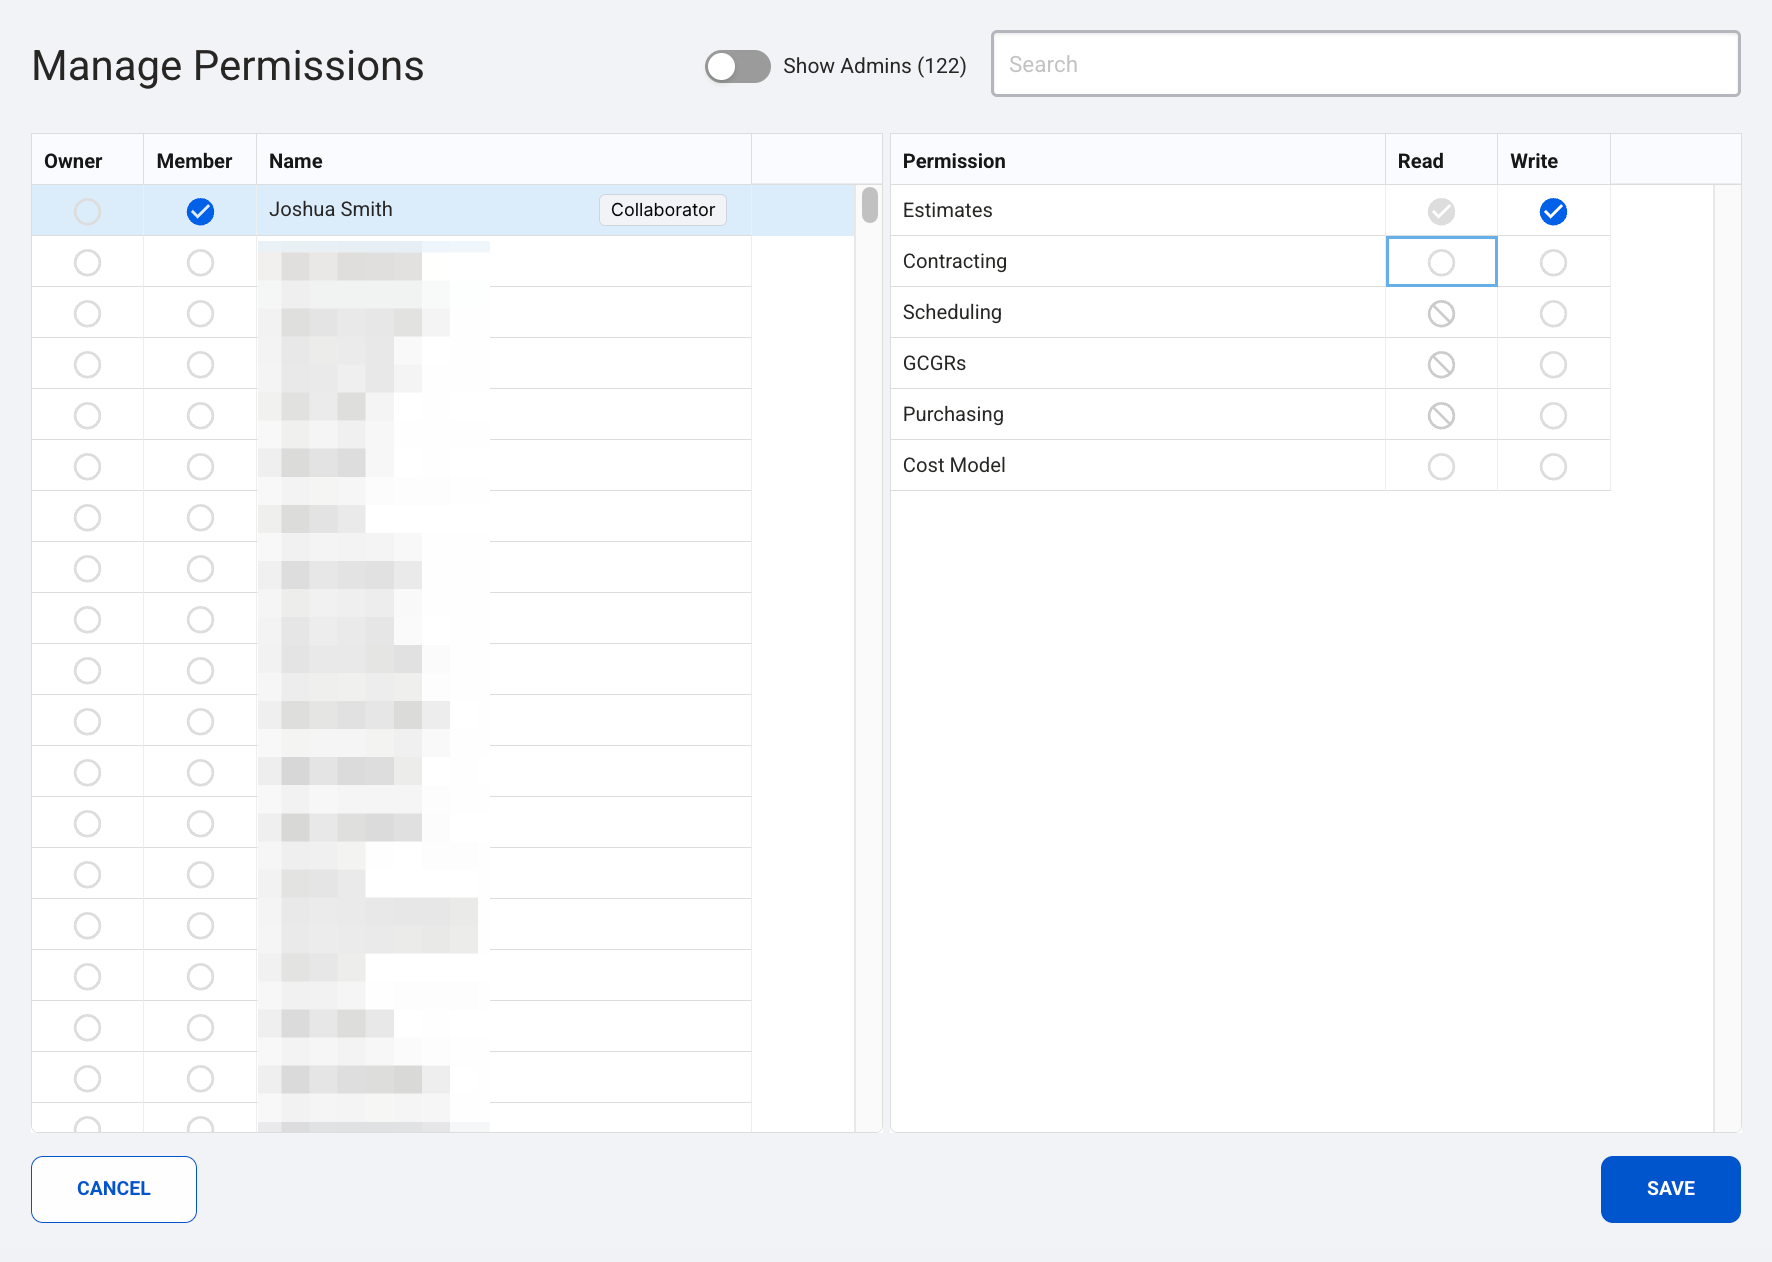
- Grant specific tool access as needed.
- Click Save.
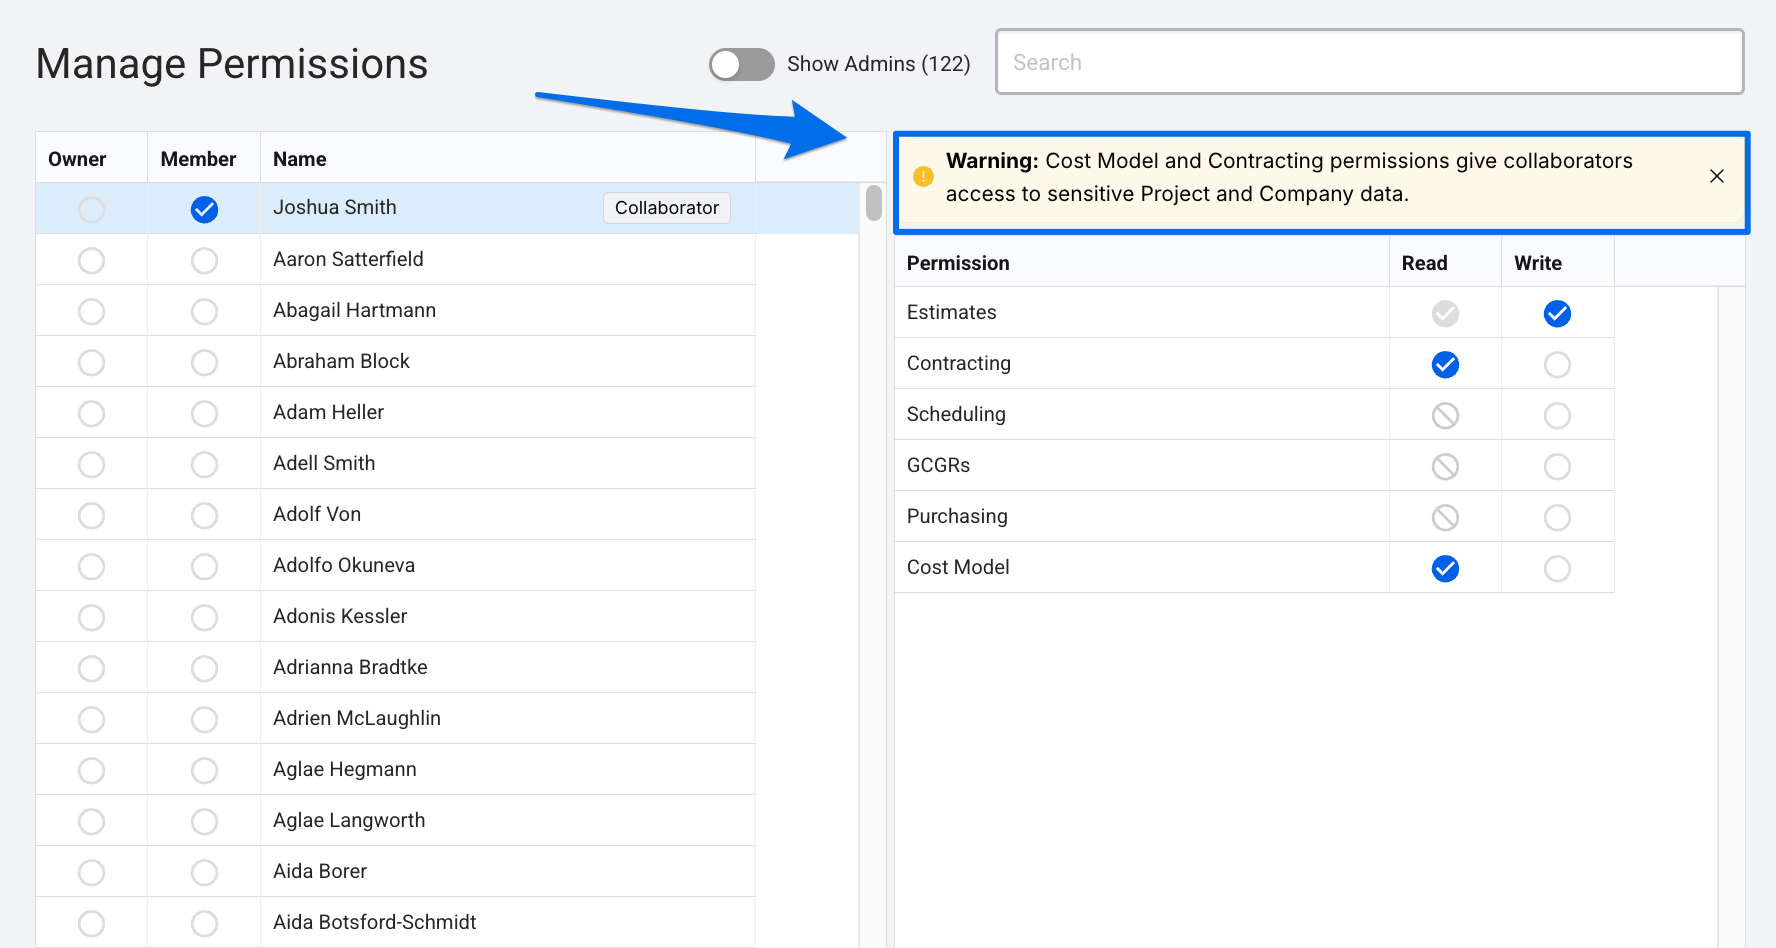
Note: Granting Contracting or Cost Modeling access gives the collaborator visibility into sensitive project data, such as the vendor list. Only grant these permissions when the collaborator genuinely needs them. For more details on project-specific permissions in general, check out this article: Project Permissions.
If you have any questions, feel free to contact our support team, and we'll be happy to help!