Using Assemblies
In Ediphi, Assemblies bundle related components into a single package, streamlining commonly used items. A major advantage is the ability to link Assemblies to the Geometry Worksheet, enabling more flexible and generic configurations. This connection allows automatic updates, such as adjusting footing sizes, without the need to create separate assemblies for each variation, ultimately saving time and effort.
Users have the ability to create Assemblies in either the Line Item or the Detailed Summary views. See below for steps on how to create Assemblies in the platform:
In this article
How to Create an Assembly
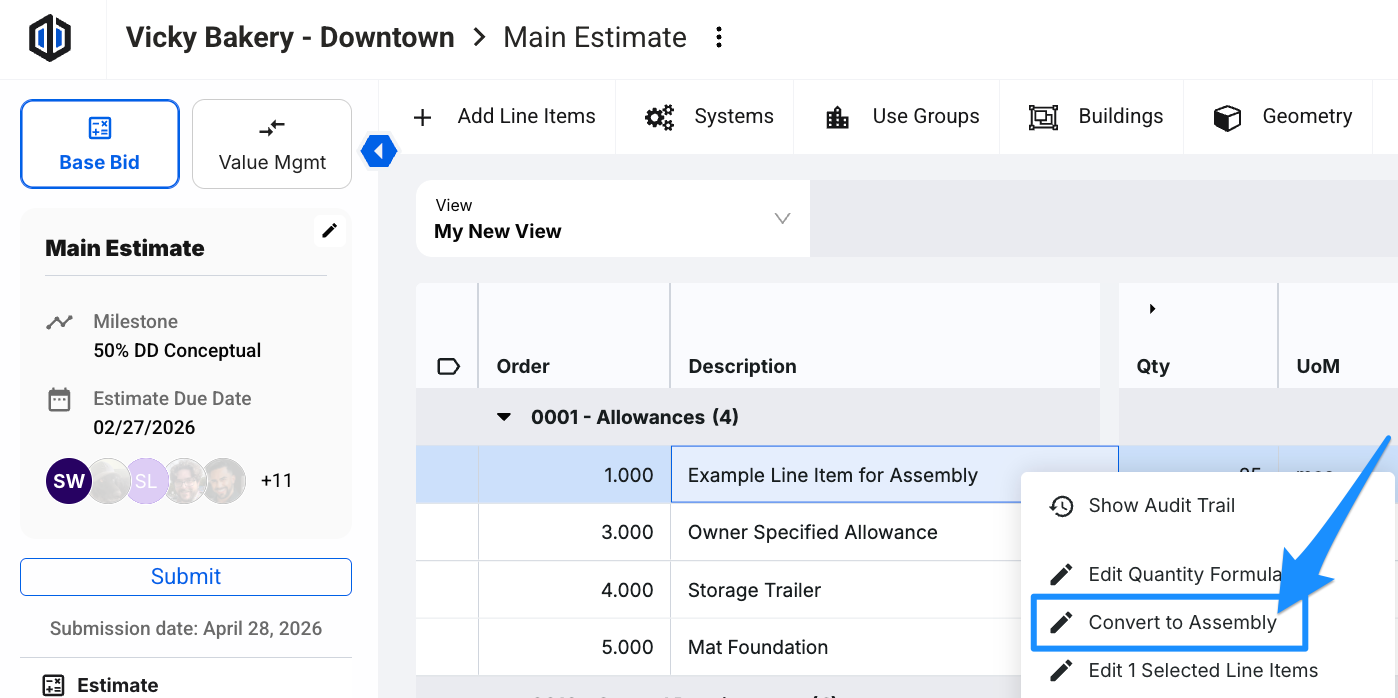
- First, determine which line item the Assembly will be created in. For this example, we'll use a line item called "Example Line Item for Assembly". Right-click on the line item, and select Convert to Assembly.
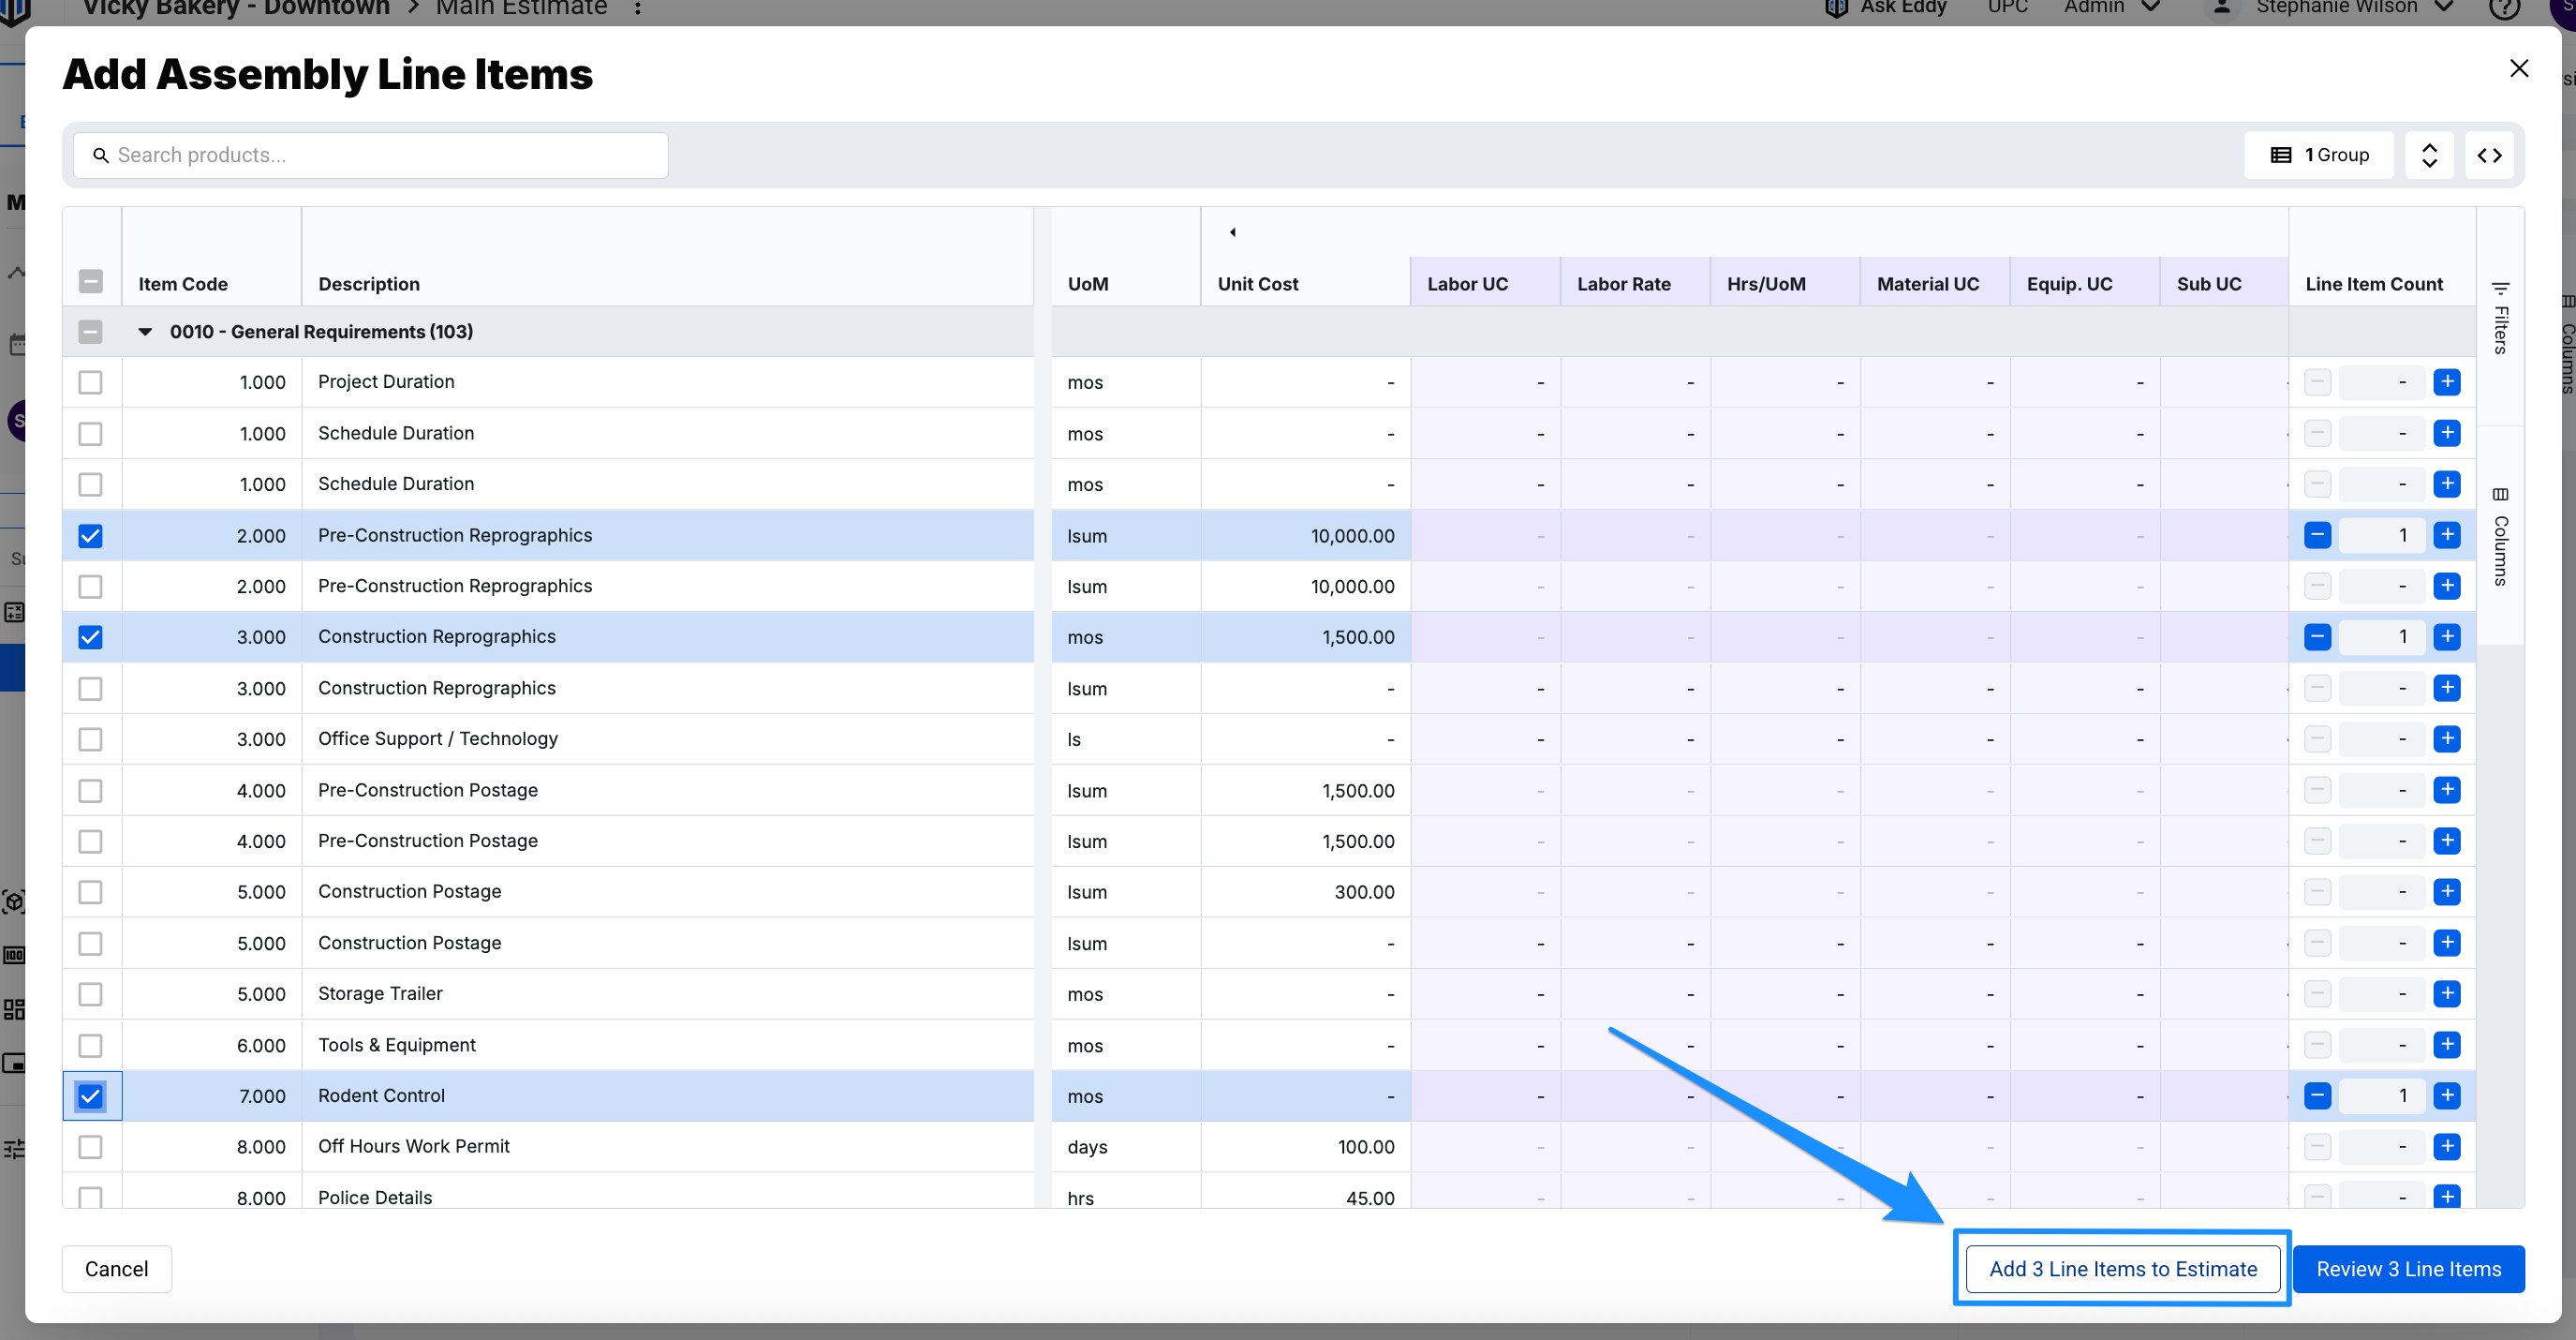
- A pop-up will appear where you'll need to determine which other line items you would like to add into the Assembly from the UPC. Select each line item you wish to add, then click Add Line Items to Estimate.
Note: The first line item you select will be the Selected Assembly Quantity.
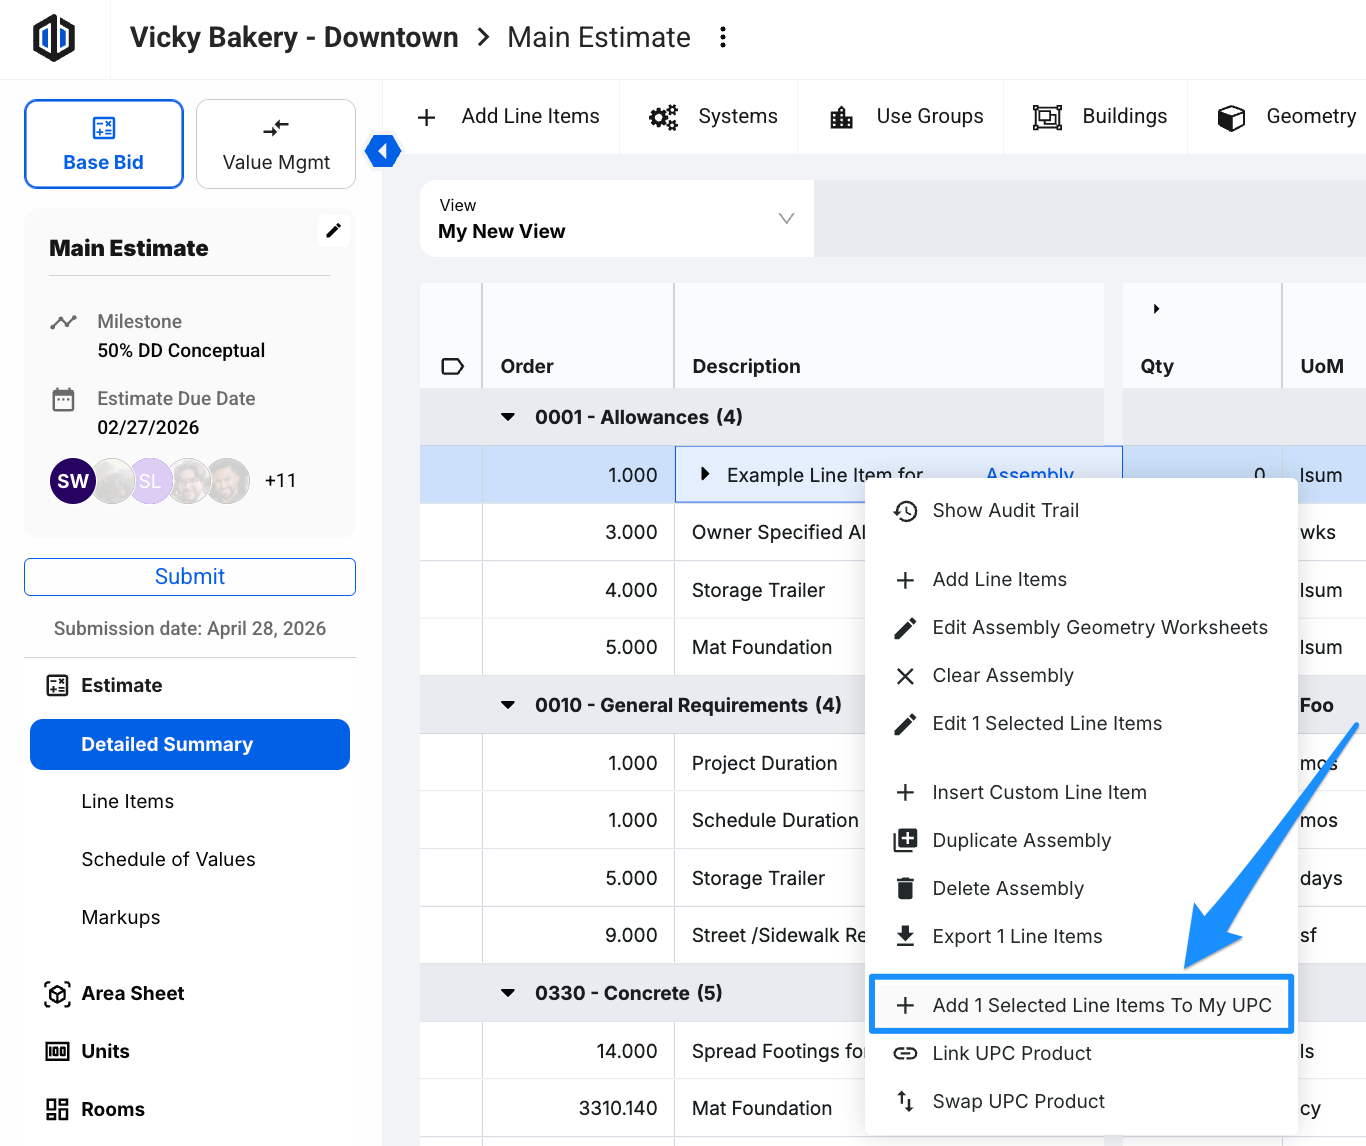
- If you would like to save this Assembly for future use in other estimates, right-click on the line item and select Add Selected Line Item To My UPC (if not linked already). The Assembly will then be available within MyUPC or UPC, and will have an Assembly tag next to it in the Line Item Adder.
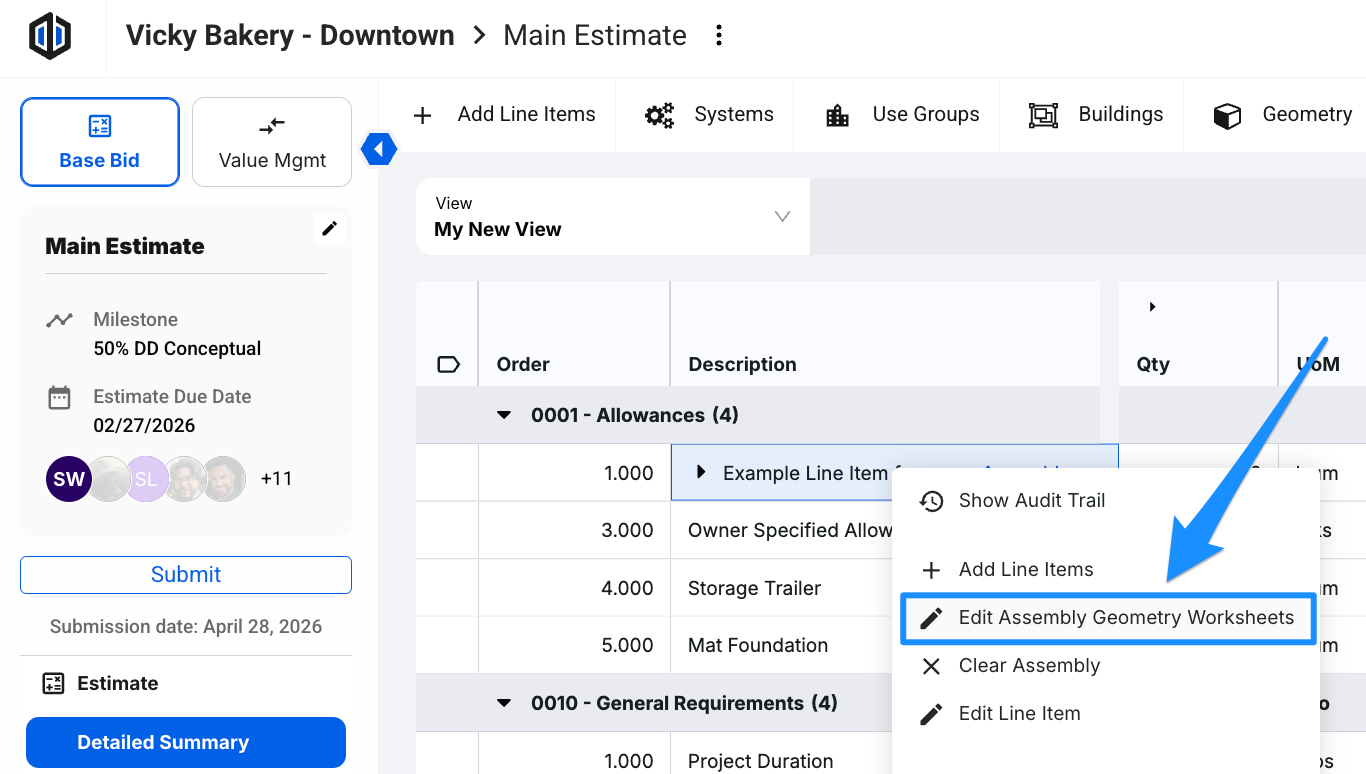
Pro Tip: Access and use an internal Geometry Worksheet within your Assembly. Right-click on the Assembly parent line item, and select Edit Assembly Geometry Worksheets.
Note: Assembly line items will automatically be moved to the top of the list within groupings, regardless of order number.
Using Assemblies
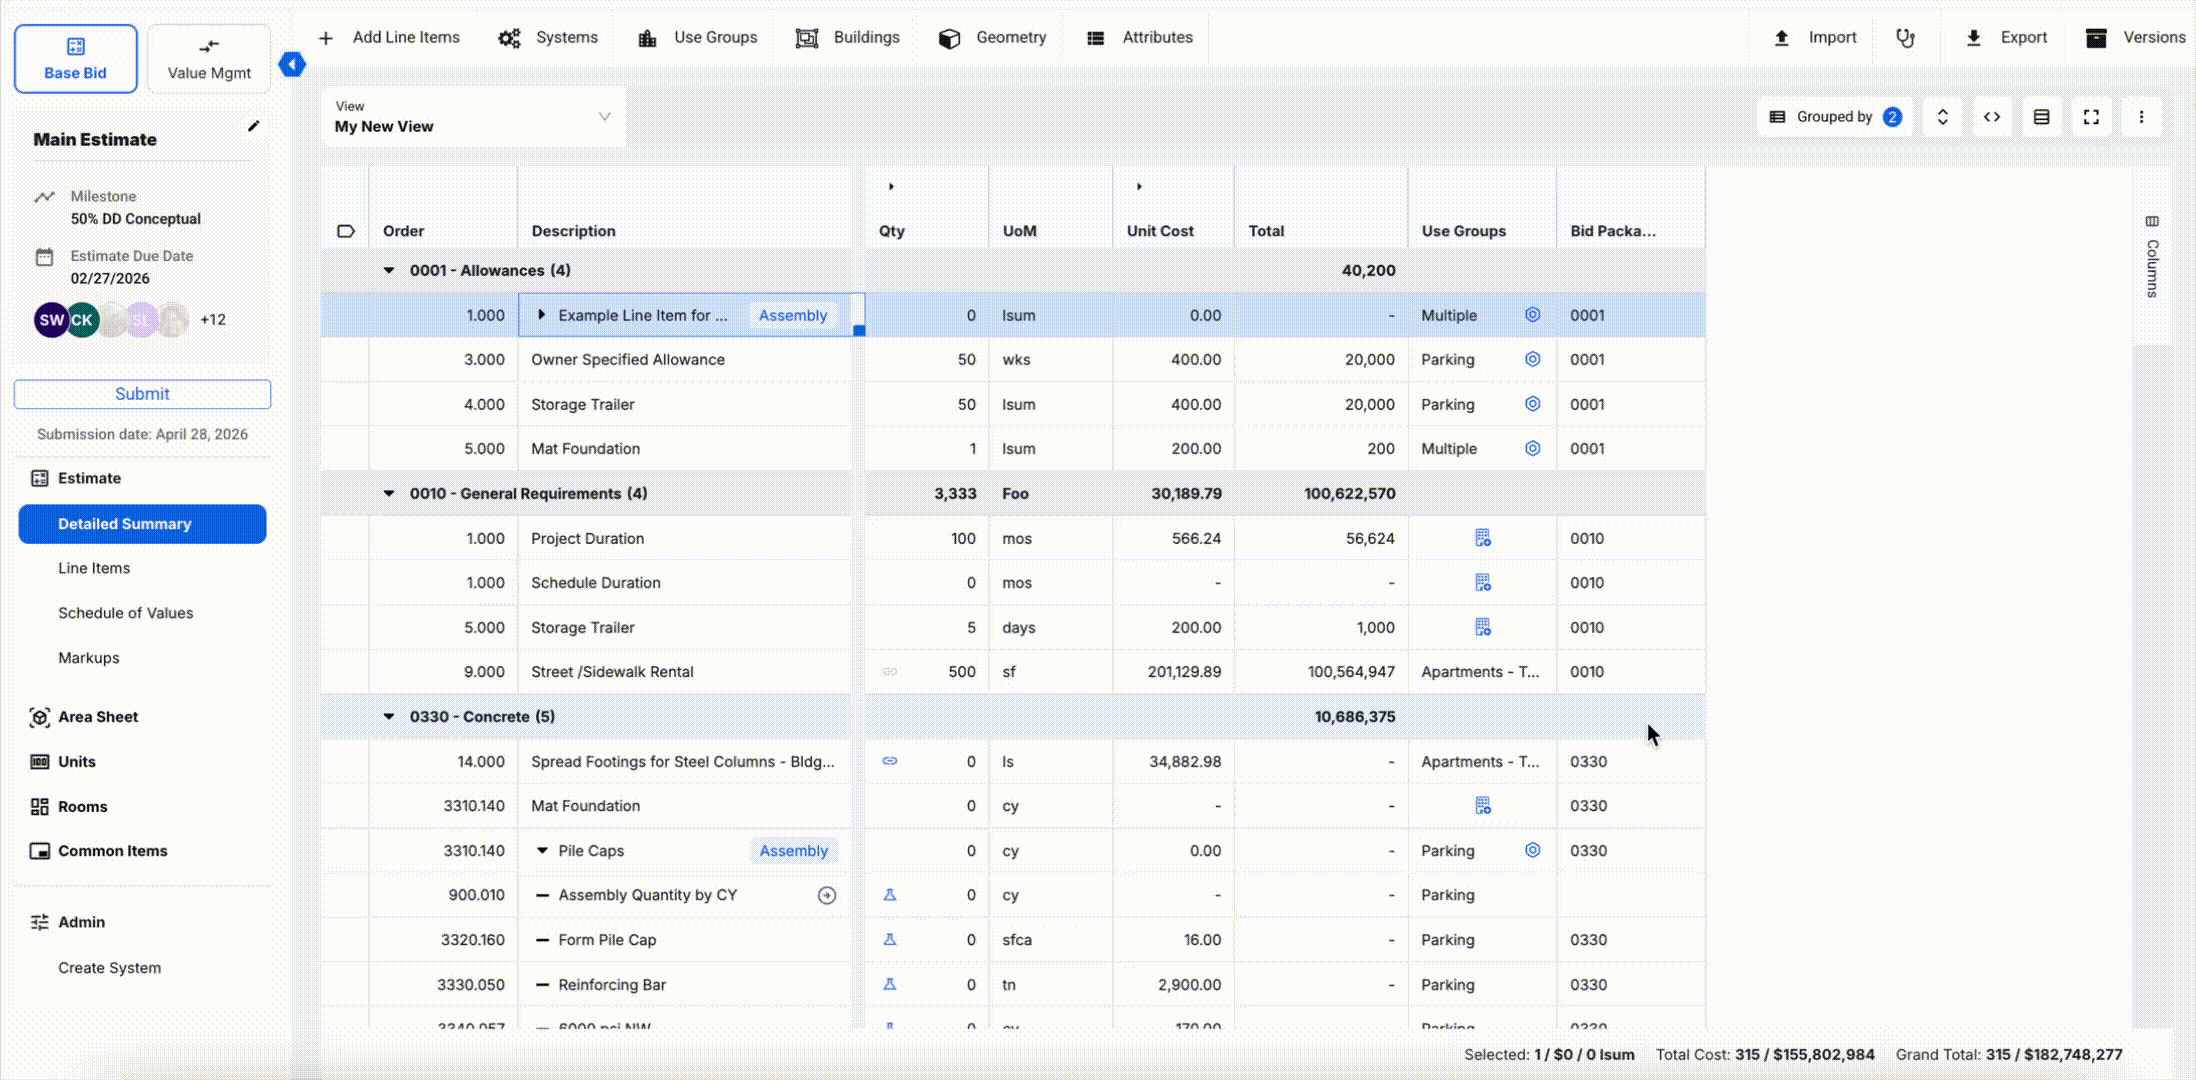
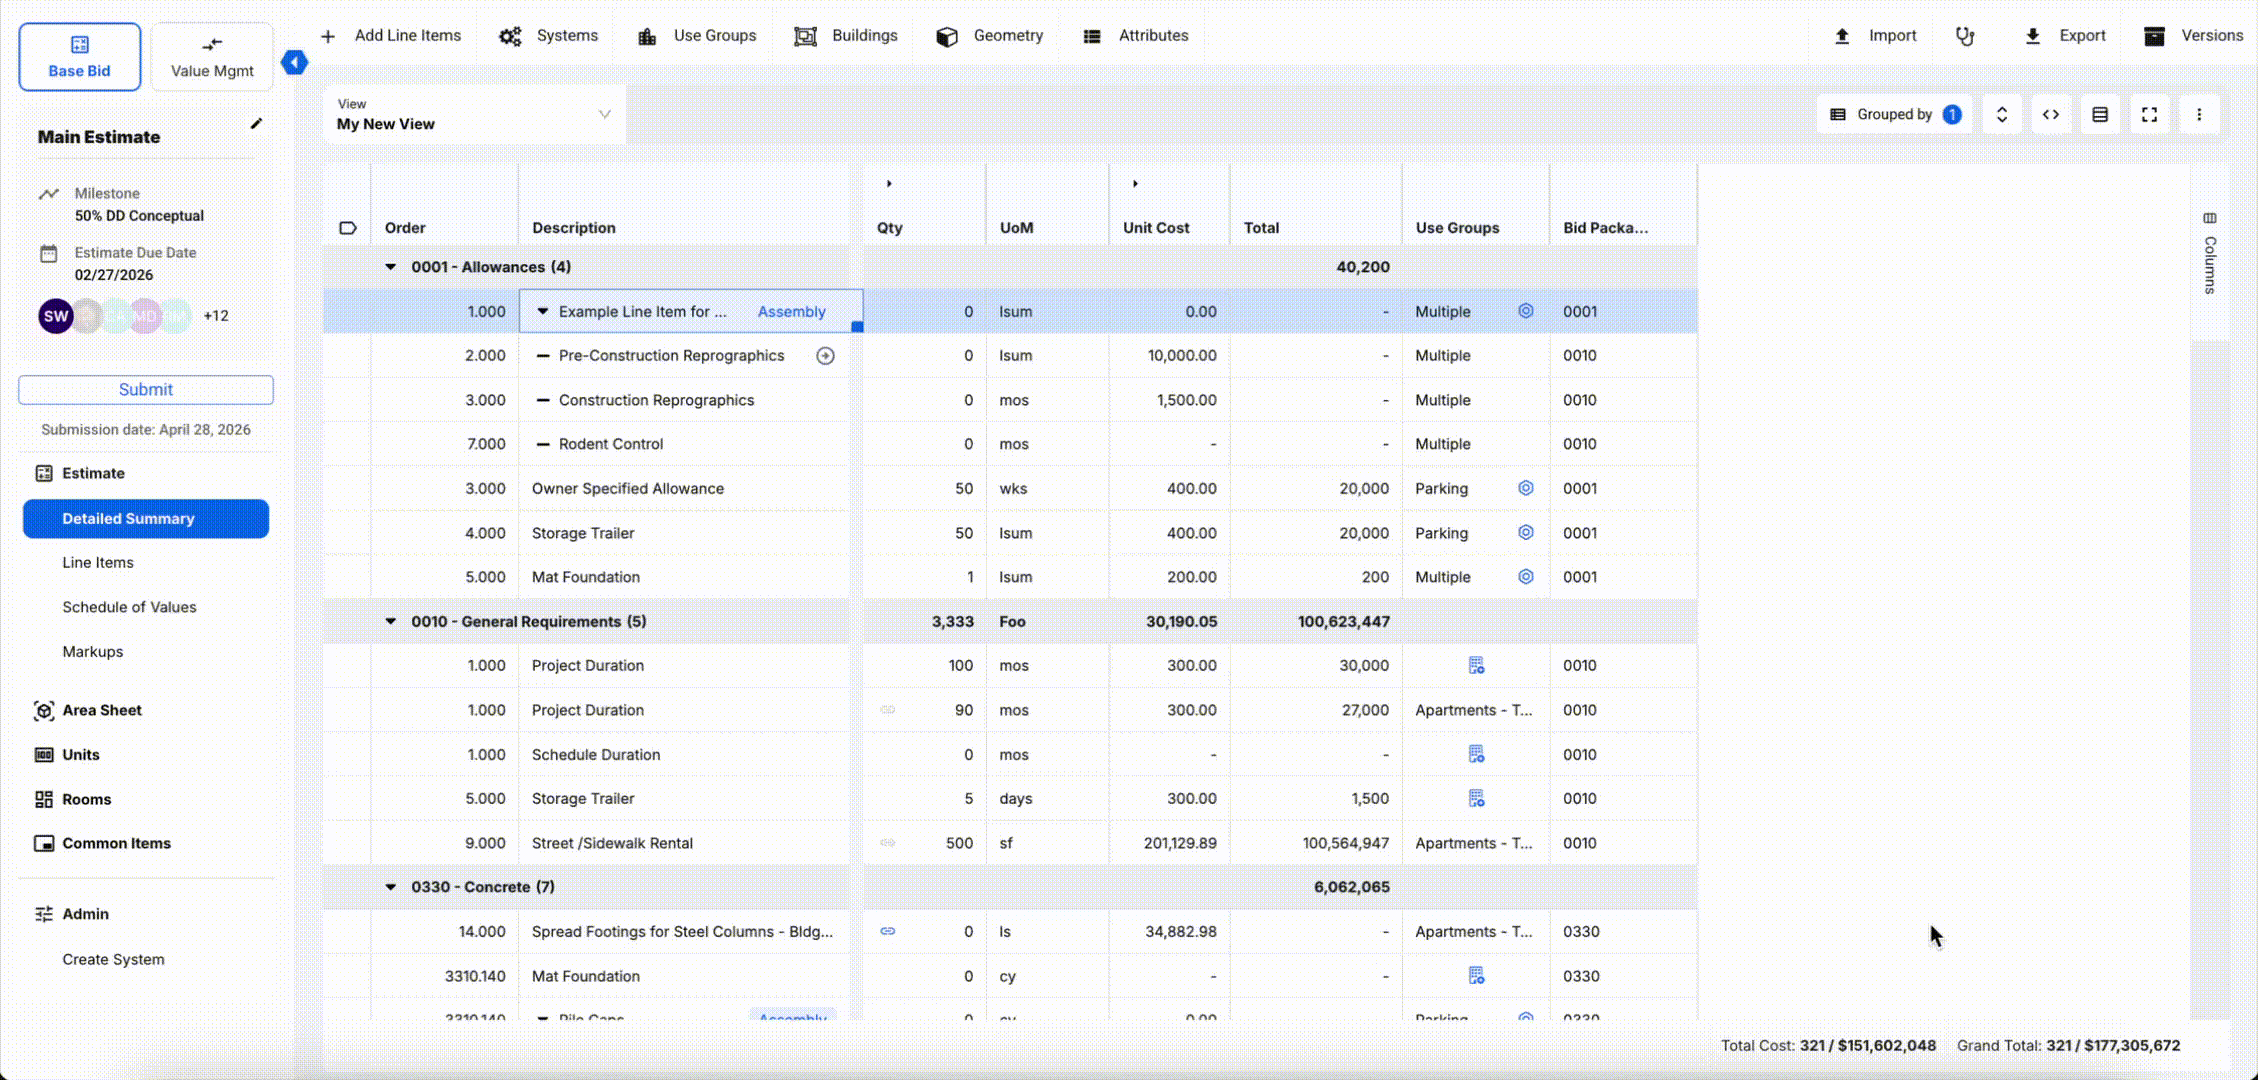
After setting up your Assembly line item, you can now manage it right from within the Detailed Summary.
- Click on the dropdown arrow next to your Assembly line item to expand and view the Assembly children.
- Hover over the Assembly tag within the Parent Line item, then click on the arrow to open the Assembly Geometry modal.
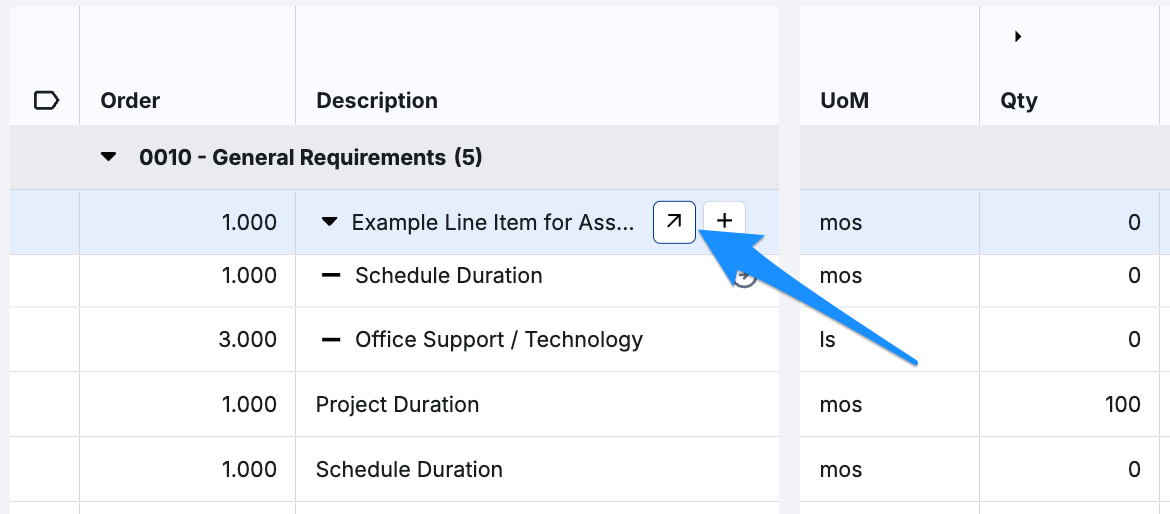
- Hover over the Assembly tag within the Parent Line item, then click on the plus sign to add a new line item to your Assembly. Click the double arrows to expand to the full-screen Line Item Adder modal.
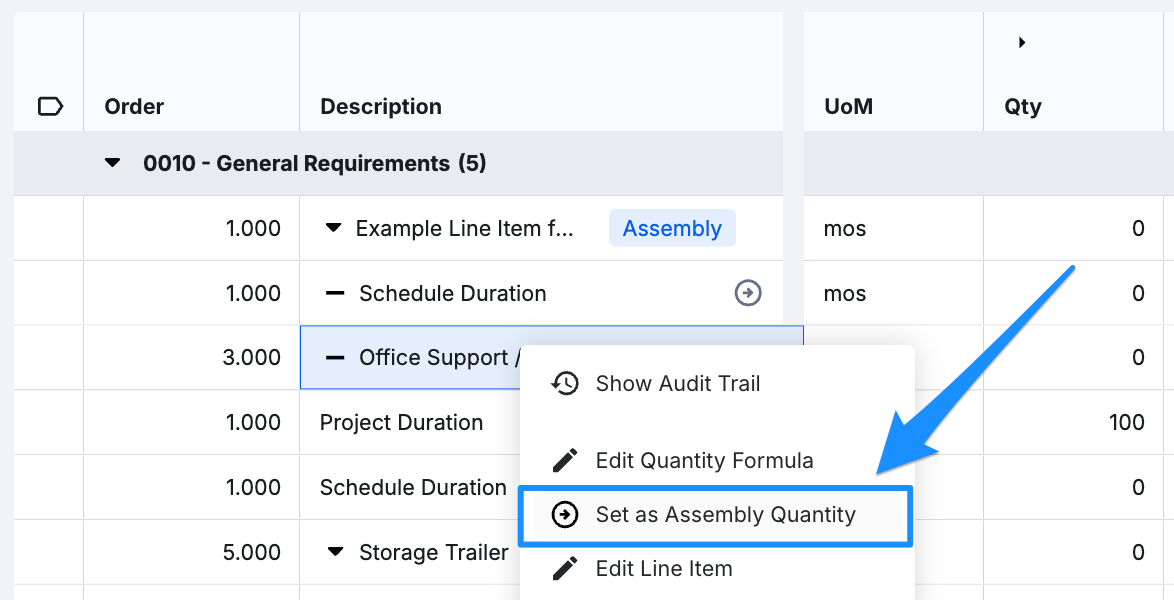
- Update a Selected Assembly Quantity by right-clicking on the child line item, and select Set as Assembly Quantity.
- All values in the parent line item are editable, except Quantity, UoM, and Unit Cost. These are determined by the Assembly children. Note: Total is editable via overrides, and will back-calculate the children line items proportionally. It then updates Unit Costs accordingly.
- Changing the Use Group, Alternate, or System in a parent line item will update all children’s respectively. The children line items are not editable for these fields.
- Report on Assembly parent and children line items by using Report Builder.
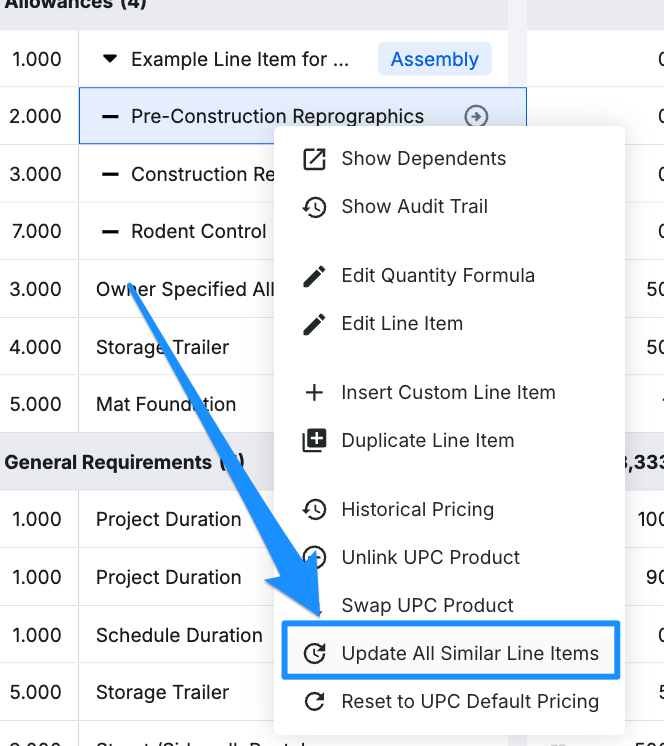
Pro Tip: If you are looking to update Unit Cost/LMSEO for similar line items in bulk without having to make changes one-by-one, use the Update All Similar Line Items feature!
Right-click on any of your child line items, and choose Update All Similar Line Items. Select which line items you wish to update, input values on the right, and click Save. Now, all chosen line items have an updated Unit Cost/LMSEO.
For more information on right-click actions, see our article on Using Estimates.
LMSEO and Assemblies
LMSEO within Assemblies is unique in that they have their own logic which determines parent line items. Here’s how it works:
- The Total of a parent line item equals the sum of all Assembly line item totals
- (Parent line item Total = sum of it’s Assembly line item totals).
- The Labor Rate of a parent line item equals the Labor UC divided by Hrs/UoM (back-calculated)
- (Labor Rate = Labor UC / Hrs/UoM)
- The Quantity of a parent line item equals the quantity of the selected Assembly Quantity line item
- (Parent line item Quantity = selected Assembly Quantity line item’s Quantity).
- The Unit Cost of a parent line item equals the Total divided by Quantity of the parent line item
- (Unit Cost = Parent line item Total/Parent line item Quantity).
- The Hrs/UoM of a parent line item is inherited from the selected child
- (Hrs/UoM = selected Assembly Quantity line item’s Hrs/UoM)
- The Labor UC, Material UC, Equip. UC, Sub UC, and Other UC of a parent line item are distributed proportionally based on children’s LMSEO ratios
- (Total Cost of Labor ÷ Total Cost of Assembly) x Total Unit Cost=Labor Unit Cost
If you have any questions, feel free to contact our support team, and we'll be happy to help!