Adding a Product in the UPC
Note: Only Global Admins have the ability to add products in the Central UPC within Ediphi. If you are a Non-Admin user, please see our Request Add to Central UPC article to learn how to request your products into the UPC.
In this article, we will cover the steps on how to add new products manually in the UPC. If you prefer to import your products in bulk, see Importing a CSV into the UPC.
How to Add a UPC Product
-
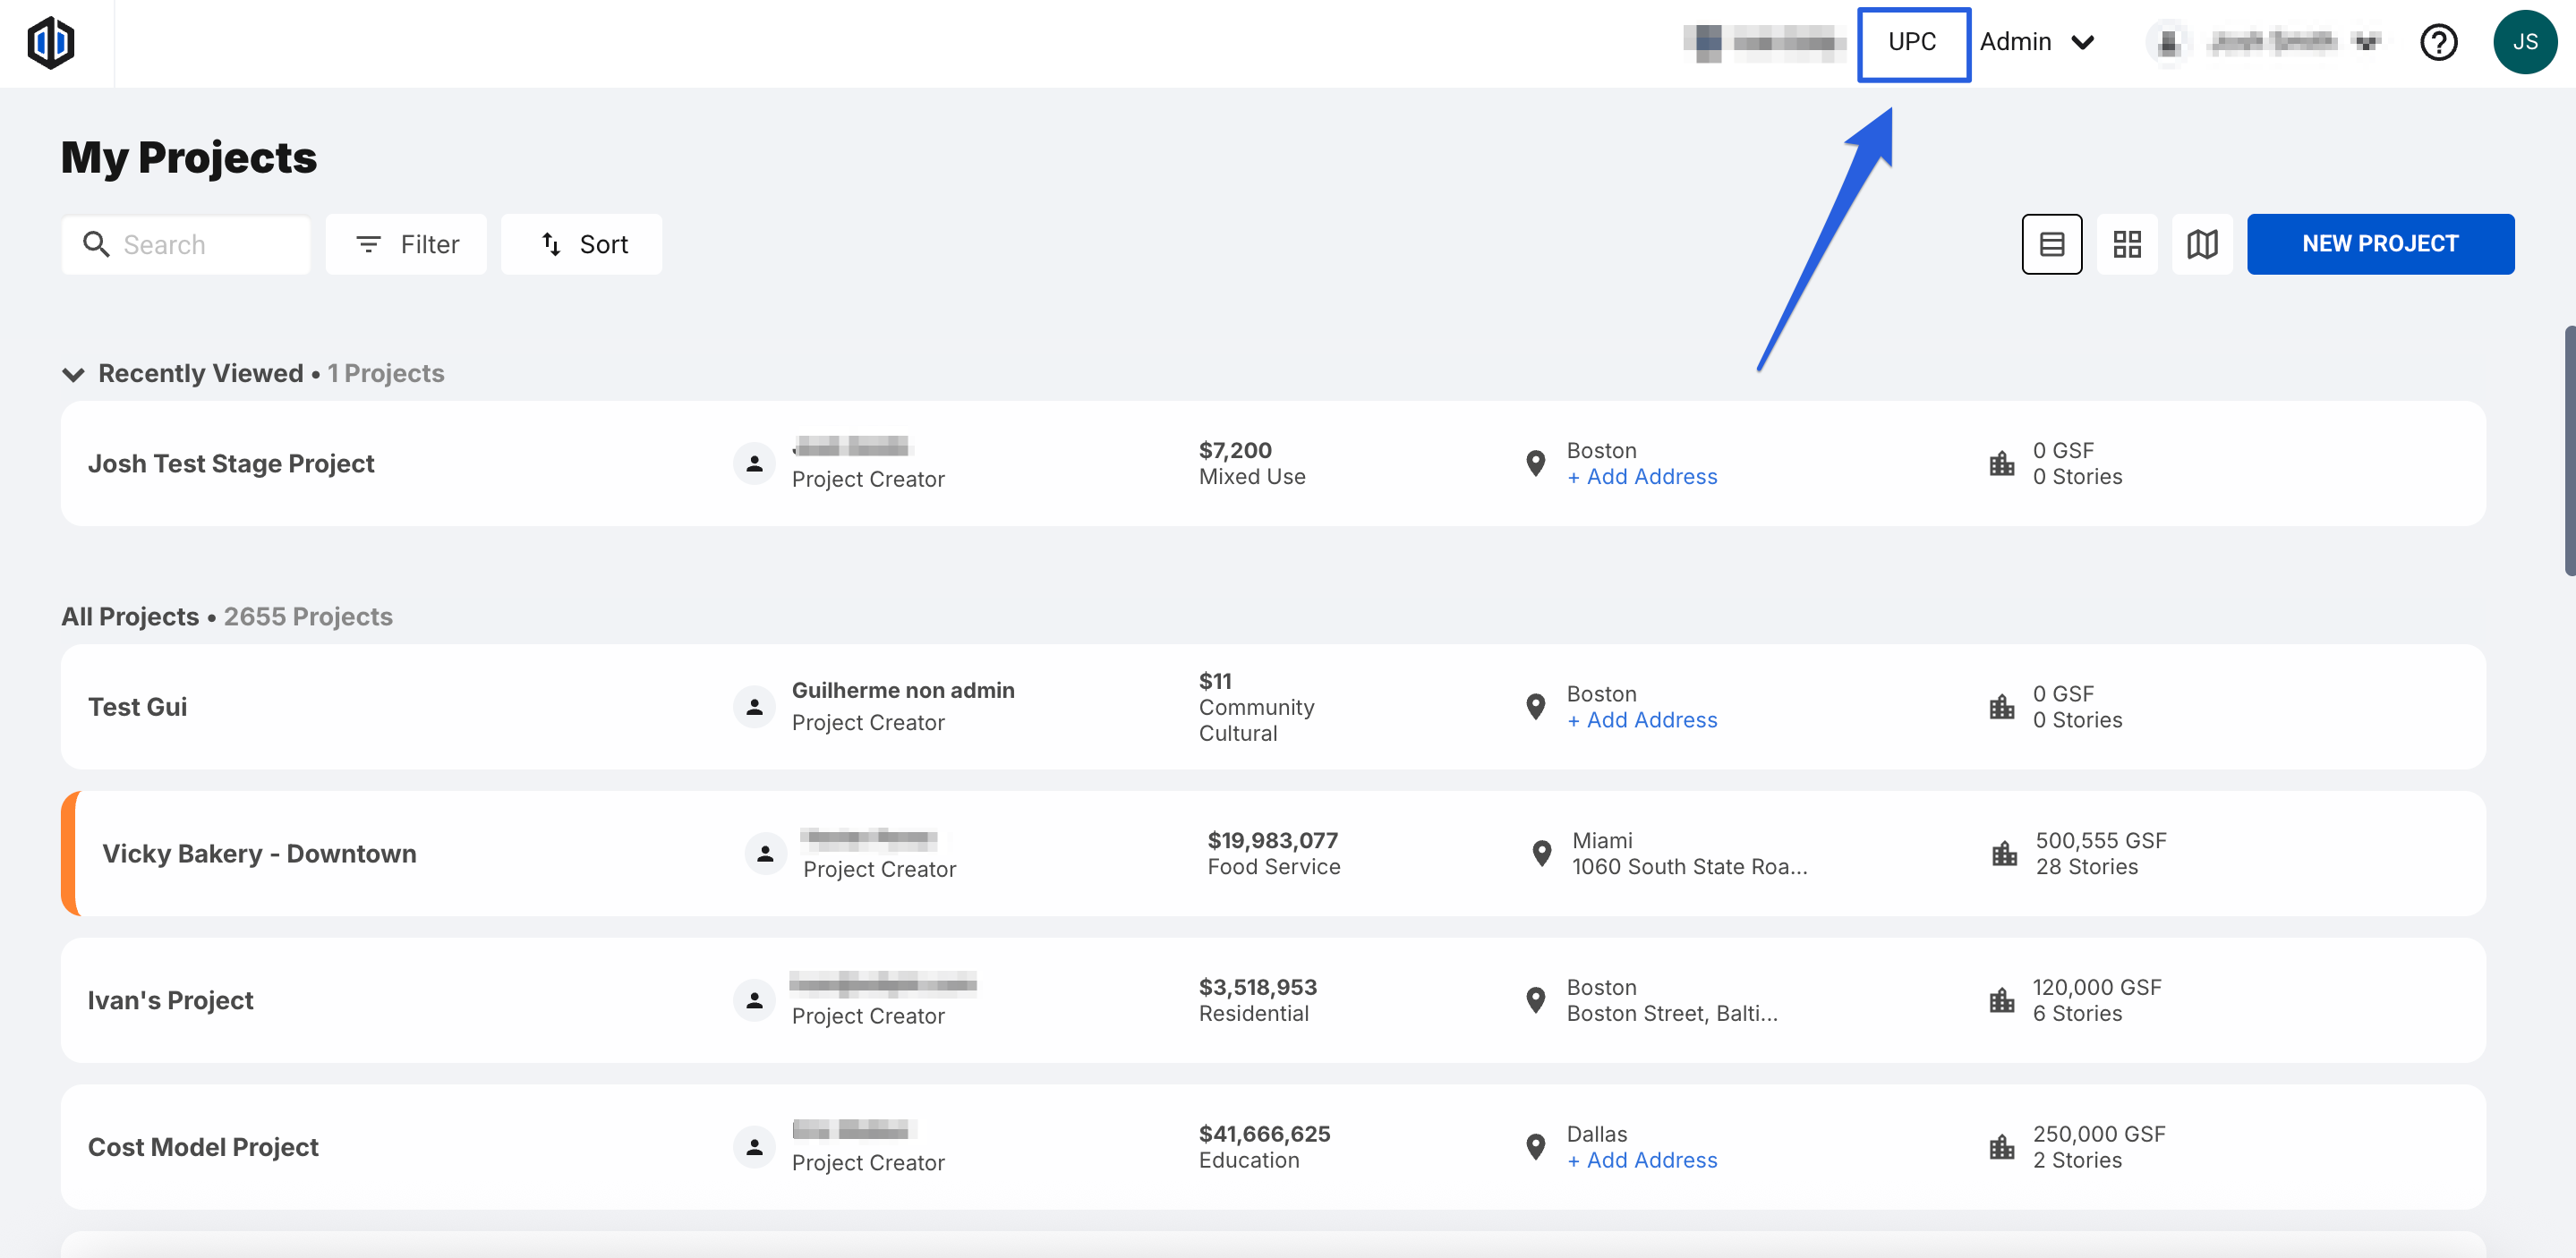
Locate the UPC button at the top of the page.
-
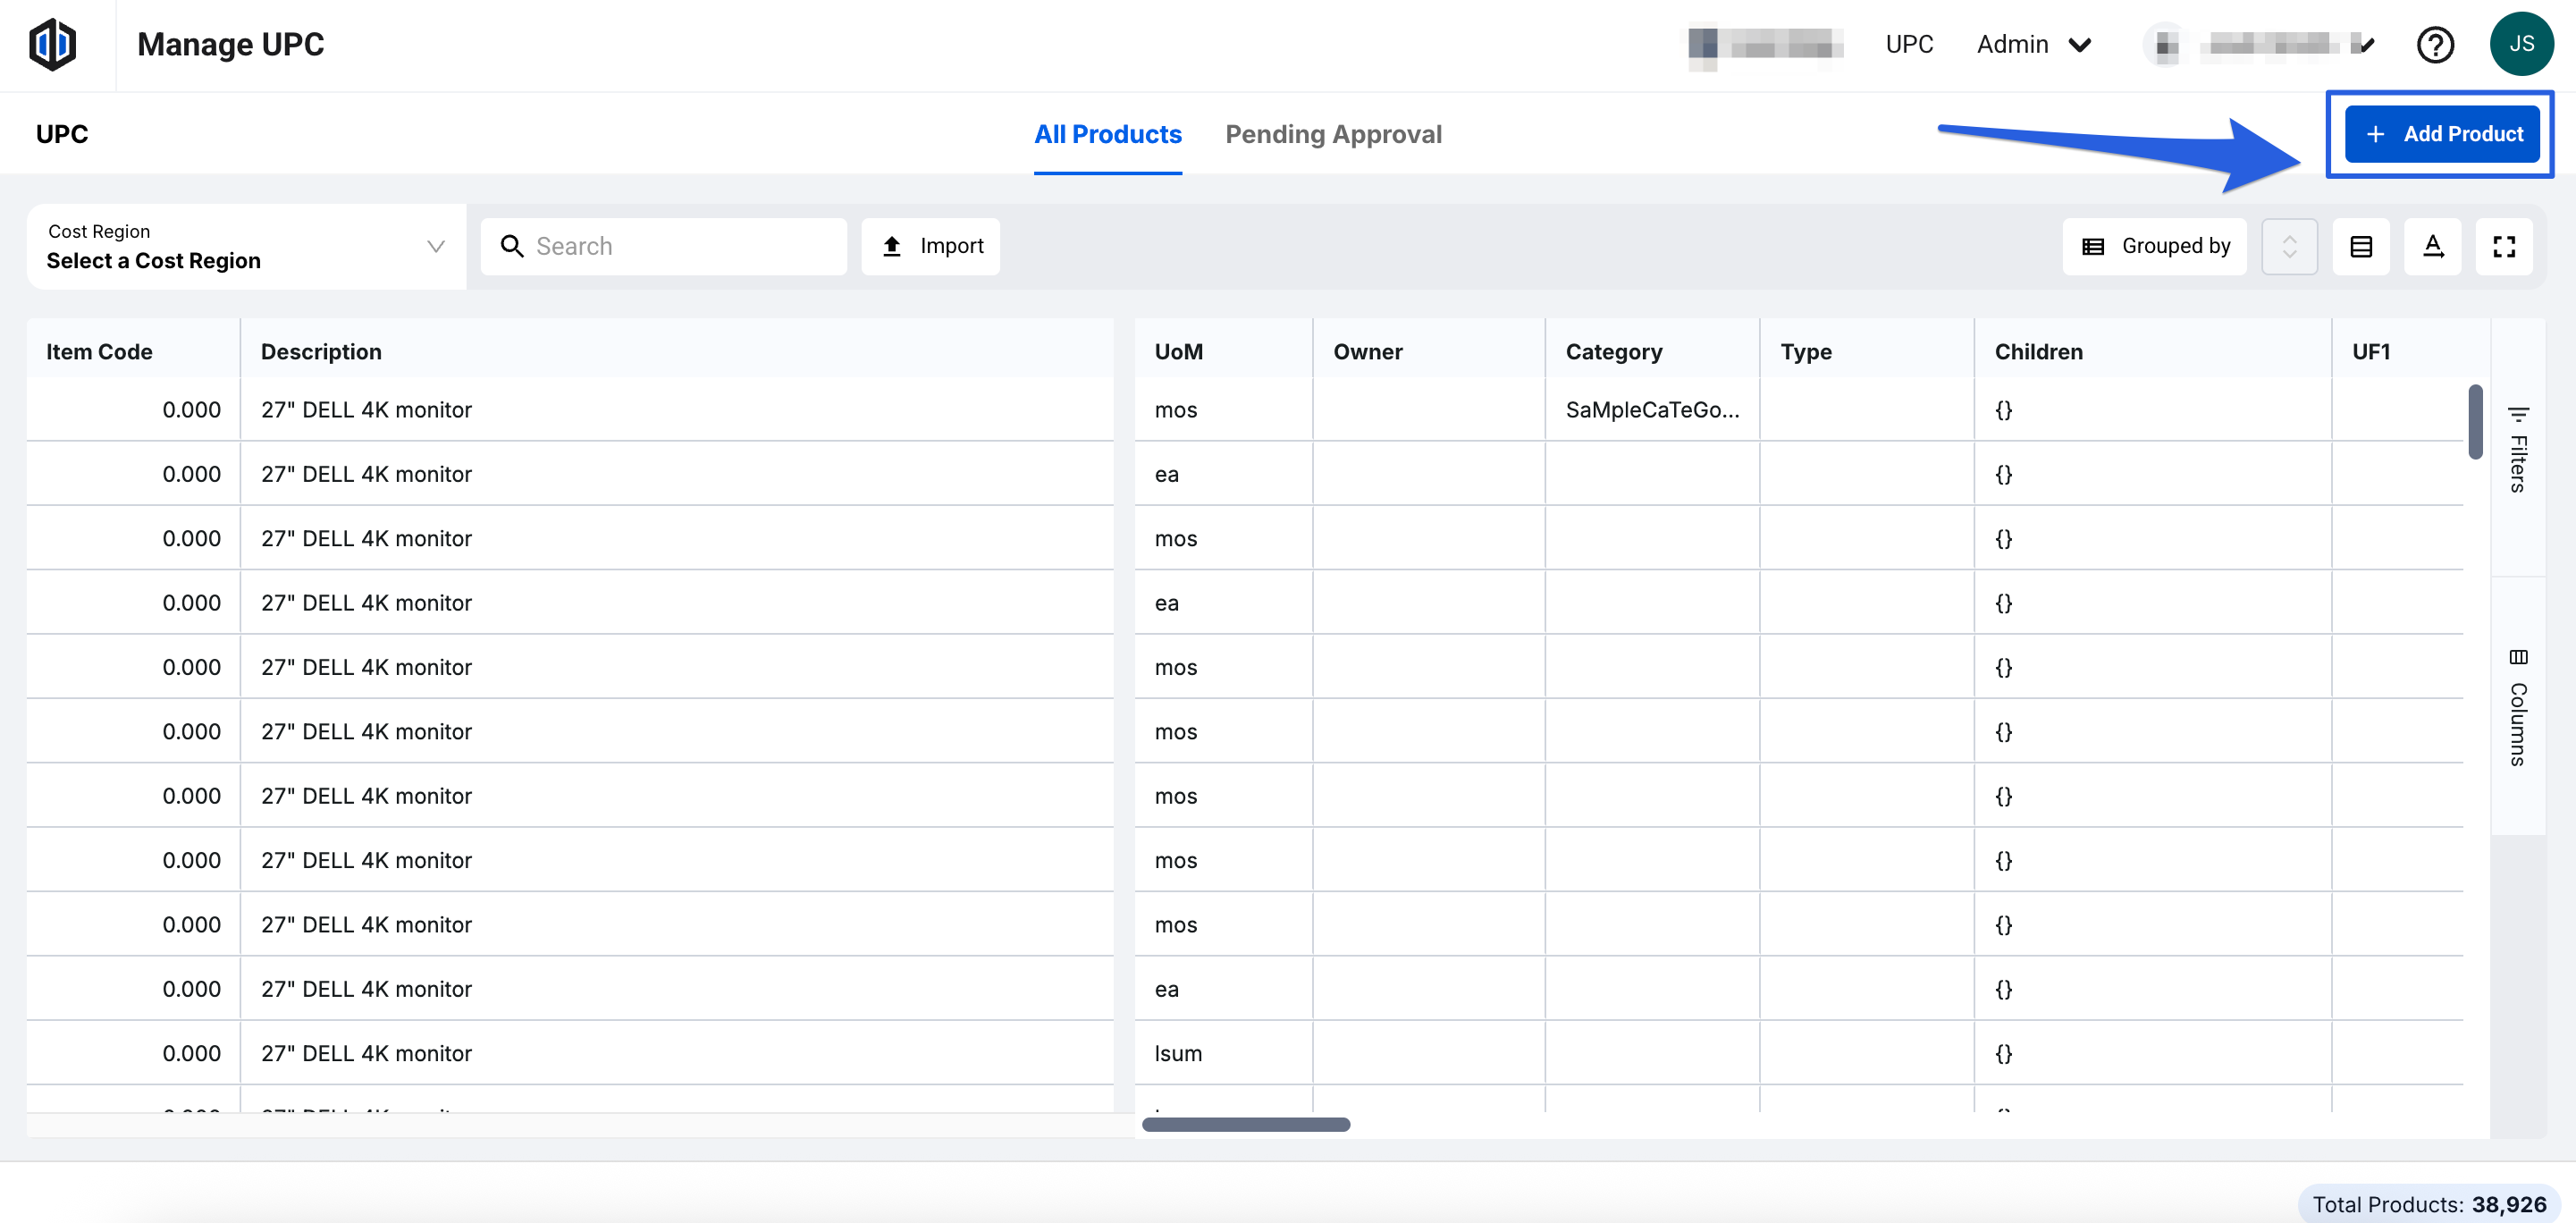
Click on the + Add Product button.
- Fill out the Required Fields (Name & Classification) and other fields as you see fit.
- Click on Save.
- After creation, the Product ID is auto-filled with a generic ID number. Fill out other columns as needed.


Pro Tip: In order to add costs to a product in the UPC, you will need to select the Region you want to assign costs to first. Once selected, the Unit Cost column will appear allowing for cost entry (you will need to do this for each Region as needed). If no region has been selected, the product will not show the Unit Cost column.

If you have any questions, feel free to contact our support team, and we'll be happy to help!