Above The Line Markups
Ediphi provides users with the ability to create Above the Line Markups, allowing for adjustments to the Sort Codes and cost of work values within an Estimate. These markups can be applied either as a percentage or a lump sum, affecting all line items or only specific Sort Codes.
Above the Line Markups offer flexibility in managing contingencies, allowances, and additional fees, making them an essential tool for refining cost structures in estimates. Users can choose to show or hide these markups depending on their audience, creating separate views such as an Internal view for internal teams to see the complete cost breakdown, including contingencies and markups, or an Owner view for clients and external stakeholders, where specific markups can be hidden for a cleaner presentation.
In this article
- Above the Line vs. Below the Line Markups
- How Above the Line Markups Affect Estimates
- Above the Line Markups & Cost Modeling
- Above the Line Markups & Contracting
- Allocating Markups
- How to Show or Hide Above the Line Markups
- Permissions
- FAQs
Above the Line vs. Below the Line Markups
Ediphi differentiates between Above the Line and Below the Line markups based on how they are applied and displayed within an Estimate.
| Above the Line | Below the Line |
|---|---|
| Applied to specific scopes of work | Treated as separate business expenses |
| Rolled into the Estimate's values | Listed as distinct line items |
| Can be hidden in certain Estimate views | Always visible in the Schedule of Values (SOV) and Markups tabs |
Since Below the Line expenses, such as general contractor fees, taxes, and administrative costs, are not directly tied to construction trades, they appear as standalone costs in the Estimate. On the other hand, Above the Line Markups are integrated into the Estimate’s values, helping contractors manage small margins while maintaining control over cost presentation.
How Above the Line Markups Affect Estimates
Above the Line Markups directly impact how costs are calculated and displayed. When these markups are enabled, they are included in the cost of work values and allocated to line items. However, when hidden, they are still accounted for in an estimate’s Total Cost but are not visibly itemized in the Markups view.
This allows for a more tailored cost narrative, ensuring that different audiences see only the necessary level of detail. For example, an internal team may need to view all markups for budgeting, whereas a client might only need to see final adjusted costs without markup breakdowns.
In certain Ediphi views (Detailed Summary, Line Items, Schedule of Values), users can toggle columns that display values which include Above the Line Markups. These columns can be controlled from the Columns side panel (located to the right of the grid) and include:
- Unit Cost +: Displays the unit cost of a line item including its proportionate share of allocated markups. This value reflects what each unit would cost after applying overhead and profit.
- Markups: Shows the markup amount applied to the line item, distributed proportionally based on the user’s allocation settings. This includes any overhead, profit, or other markups configured above the line.
- Total +: Represents the total cost of the line item after markups, calculated by multiplying the Unit Cost + by the line item’s quantity.
Above the Line Markups & Cost Modeling
Since Above the Line Markups are integrated directly into the Estimate’s values, cost modeling totals may appear differently from the primary Estimate view. In a benchmarked estimate, all markups will be displayed as Below the Line markups (i.e., regular markups) by default. While this does not impact the subtotal of the benchmarked estimate, it does change the grand total. Additionally, this update means that how markups appear within your cost model is not consistent with how they appear in an Estimate, so users should be mindful of this distinction when reviewing estimate data.
Above the Line Markups & Contracting
Since Above the Line Markups are integrated directly into the Estimate’s values, markup totals may appear differently from the primary Estimate view when performing a Contracting Export. Within the Schedule of Values of Contracting, all markups will be displayed as Below the Line markups (i.e., regular markups) by default. While this does not impact the subtotal, it does change how markups appear within Contracting, so users should be mindful of this distinction when reviewing estimate data.
Allocating Markups
Allocating Markups in Ediphi refers to the method by which a user distributes or applies their desired markup (typically representing overhead and profit) across different line items within an estimate. Rather than applying a single markup uniformly, users can allocate specific markups either to All Lines within the estimate, or to selected Sort Codes.
Effective markup allocation within an estimate can improve bid accuracy and help ensure profitability targets are met without overpricing specific elements of the job.
How to Allocate Markups
The steps to allocate Markups in the platform are as follows:
- Within the Markups tab, under the Allocation column, click on the specific cell for the markup you want to allocate. (If you don’t see the Allocation column, ensure that the Above the Line Markups option is not hidden; see How to Show or Hide Above the Line Markups below.)
- A pop-up will appear, in which you’ll be able to allocate your markup. You’ll be presented with 3 options:
- Below the Line: Allows you to allocate the markup to the Total Cost of the estimate (Default option when creating markups).
- All Line Items: Allows you to allocate the markup proportionally across all accepted line items in your estimate.
- Sort Code: Allows you to select the specific Sort Fields and Sort Codes you want to apply the markup to, proportionally.
- Select the appropriate option, and then click Allocate.

How to Show or Hide Above the Line Markups
Ediphi allows users to toggle Above the Line Markups on or off, providing flexibility in cost presentation.
Steps to Show/Hide Above the Line Markups:
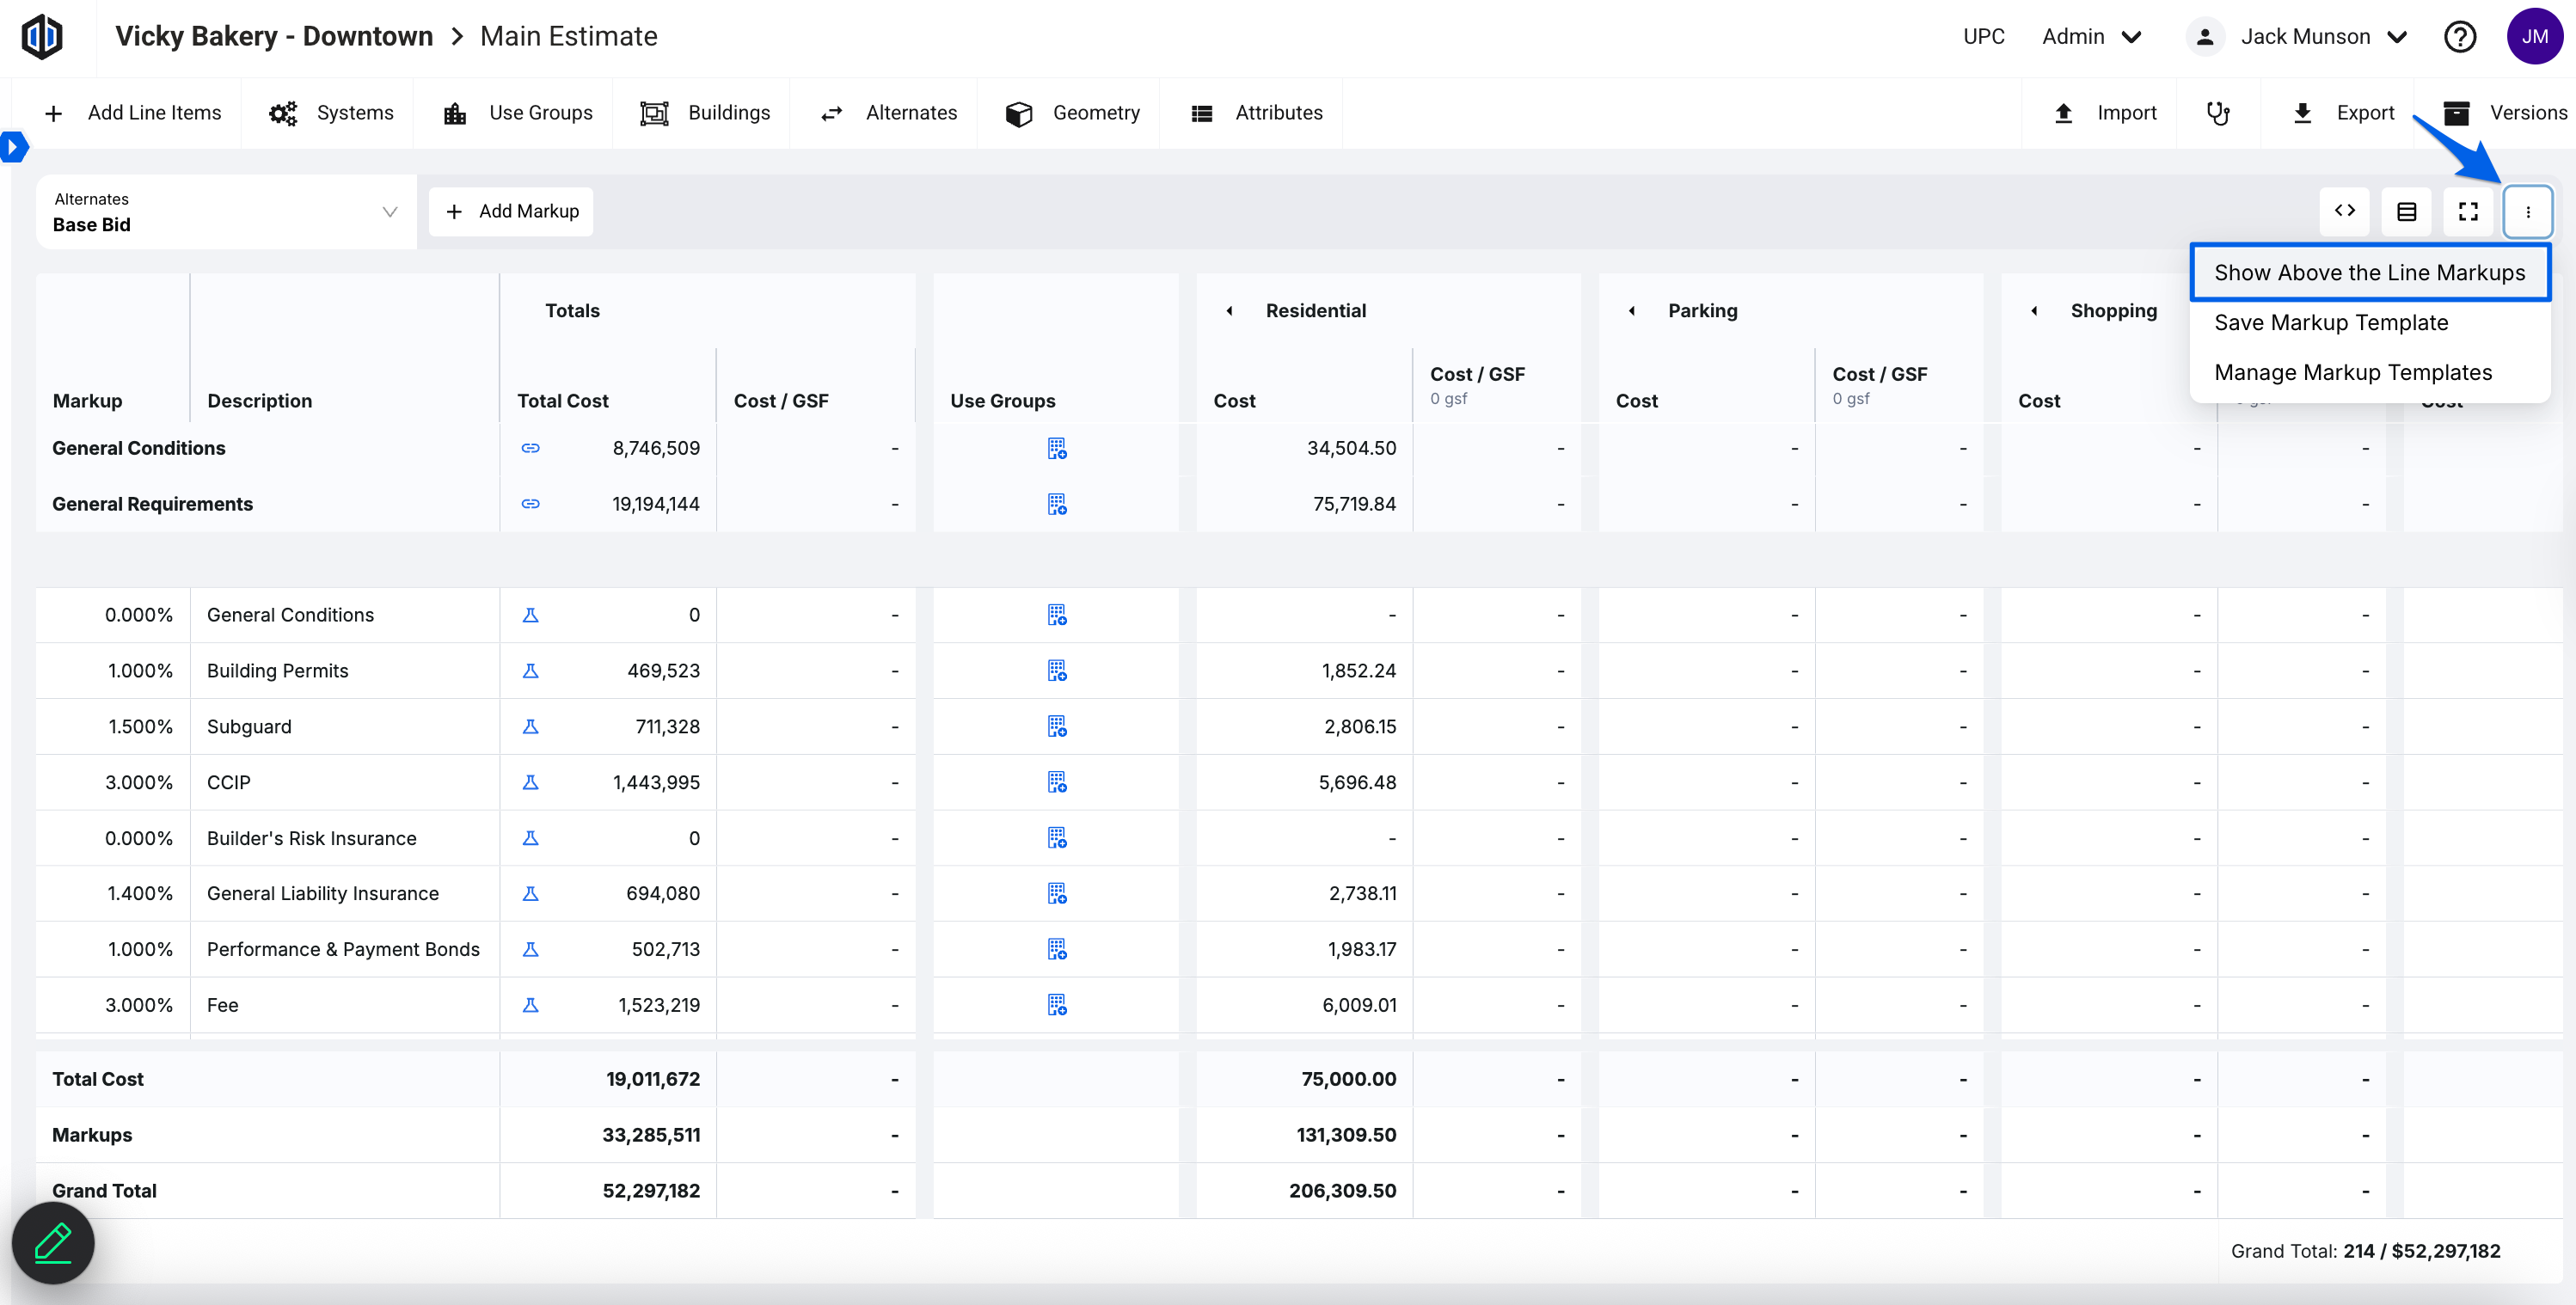
- Navigate to the Markups tab within your Estimate.
- Click on the three dots (ellipses) in the top-right corner.
- Select “Show [or Hide] Above the Line Markups” to add/remove them from your view.
Steps to Show/Hide Above the Line Markups (in Estimate Views):
- Navigate to the Detailed Summary, Line Items or Schedule of Values (SOV) tabs within your Estimate.
- Within the Column side panel, you can turn on and off the following columns by clicking their respective checkboxes: Unit Cost+, Markups, Total+, and Total + for each Use Group available.

Note: Our Schedule of Values (SOV) view also has Cost / GSF + and Cost / Unit + (if Units are assigned to a Use Group) that can be shown/hidden with the Column side panel.
What Happens When Above the Line Markups Are Hidden?
Above the Line Markups in Ediphi provide a powerful way to manage contingencies and refine cost narratives within an Estimate. Whether used for internal budgeting or external presentations, they offer flexibility in how costs are allocated and displayed. Understanding how to show, hide, and apply these markups ensures that your Estimate reflects the appropriate level of financial detail for your project stakeholders.
- The Allocation column is removed from the Markups table.
- The Above the Line Markups total row is hidden from the bottom of the Markups table.
- Above the Line Markup line items are removed from the main Markups table.
- The Grand Total remains accurate, ensuring that markups are still reflected in the final estimate.
Permissions
Above the Line markup permissions depend on a user’s Estimate access level within a project. Users with Read access may have different markup capabilities than those with Write access.
Read Permissions
- Show/Hide columns in Detailed Summary and Line Items views.
- Filter line items.
- Show/Hide subtotals in Detailed Summary.
- Show/Hide Above the Line Markups.
- View all data within Markups.
- Cannot make any changes to the data within Markups itself.
Write Permissions
- All of the above.
- View and edit anything within Markups.
Note: See this article for information on how to update user’s permissions: Project Permissions
FAQs
- How can I hide all the Markup Columns in Detailed Summary?
You can use the Column feature; see here.
- How do I assign Use Groups to my Above the Line Markup?
You currently cannot assign a Use Group to an Above the Line Markup, however you can always go to the specific line item and assign said line item to a Use Group.
- I'm seeing a red symbol in my Markup. What does it mean?
When a red symbol appears on a markup, it indicates that the markup is allocated to a sort code that does not have a corresponding line item. We recommend fixing this by assigning a sort code with line items.
Important: Markups with a red symbol will be added to the Below the Line Markup subtotal so that it is represented in the Estimate totals to avoid cost discrepancies. Once you have corrected the allocation, it will be assigned to the proper sort code as an Above the Line Markup.
If you have any questions, feel free to contact our support team and we'll be happy to help!