Using a Schedule
Within Ediphi, the Schedule module is a great place to organize and manage your Schedule activities throughout the project lifecycle. Users have the ability to adjust the duration of an activity and link multiple activities together. The Schedule module is similar to the Labor Gantt tab in the GCGRs module and will show Schedule activities in both areas.
In this article
Creating a Schedule
- Create a new Schedule by performing either of these 3 actions:
- Click on Create Schedule in the Side Panel.
- Click on the + sign in the Side Panel.
- Click on Create New in the Overview page, then select Scheduling.
-
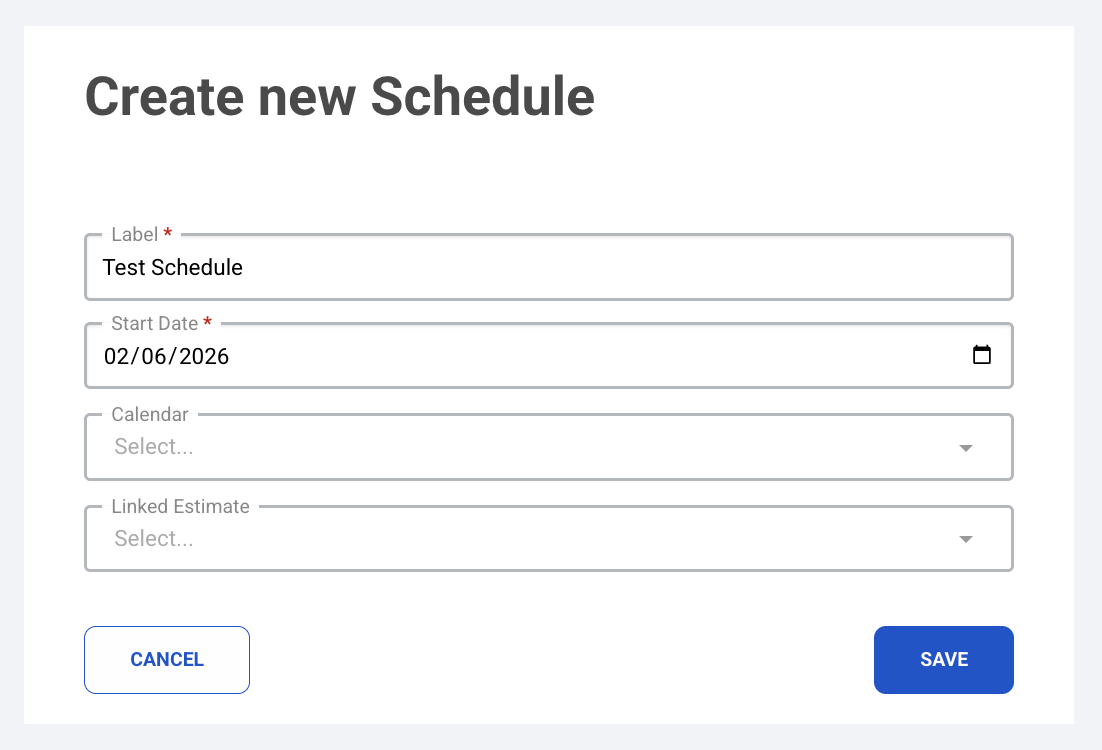
In the Create New Schedule modal, fill out the fields and select Save.

Adding Activities
There are two ways to add a Schedule Activity: via the Schedule module or via the Labor Gantt tab in the GCGRs module.
Via the Schedule Module
- Open a Schedule.
- Click on + Add Activity.
- You will see required fields under Activity and optional fields under Sort Fields.
- ID is pre-filled automatically and in numerical order by the last created ID.
- Label will be the name of the activity.
- Duration is set in quantity of days.
- Fill this out and select Save. This Schedule Activity will be listed in the Schedule module only.
Via the GCGRs Module
- Open a GCGR.
- Click on the Labor Gantt tab.
- Hover over + Add Activity in the top left corner, and select Schedule Activity.
- You will see required fields under Activity and optional fields under Sort Fields.
- ID is pre-filled automatically and in numerical order by the last created ID.
- Label will be the name of the activity.
- Duration is set in quantity of days.
- Fill this out and select Save. This Schedule Activity will be listed in the Labor Gantt as well as the Schedule module.
Linking Activities
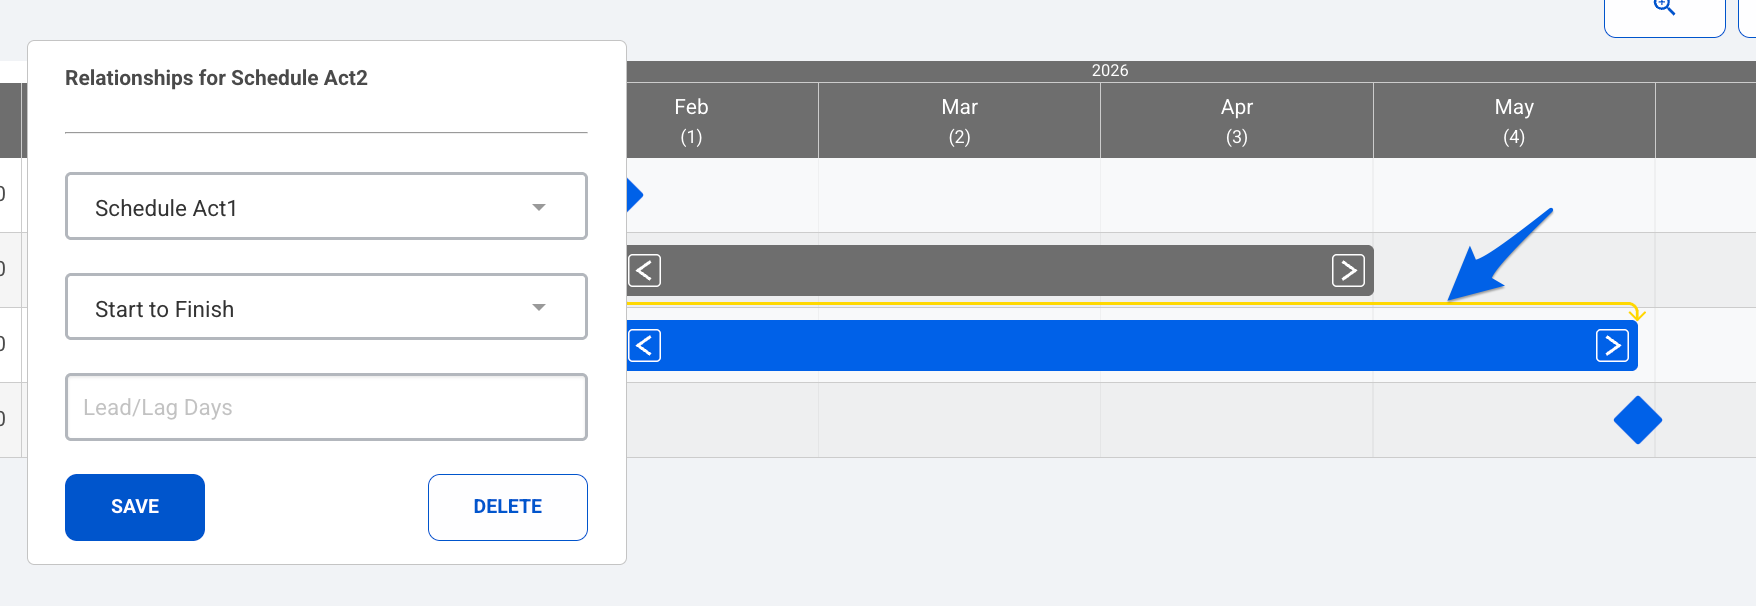
Users can link Schedule activities together to better understand timelines and the start and finish dates. These are called relationships and can be edited through this view.
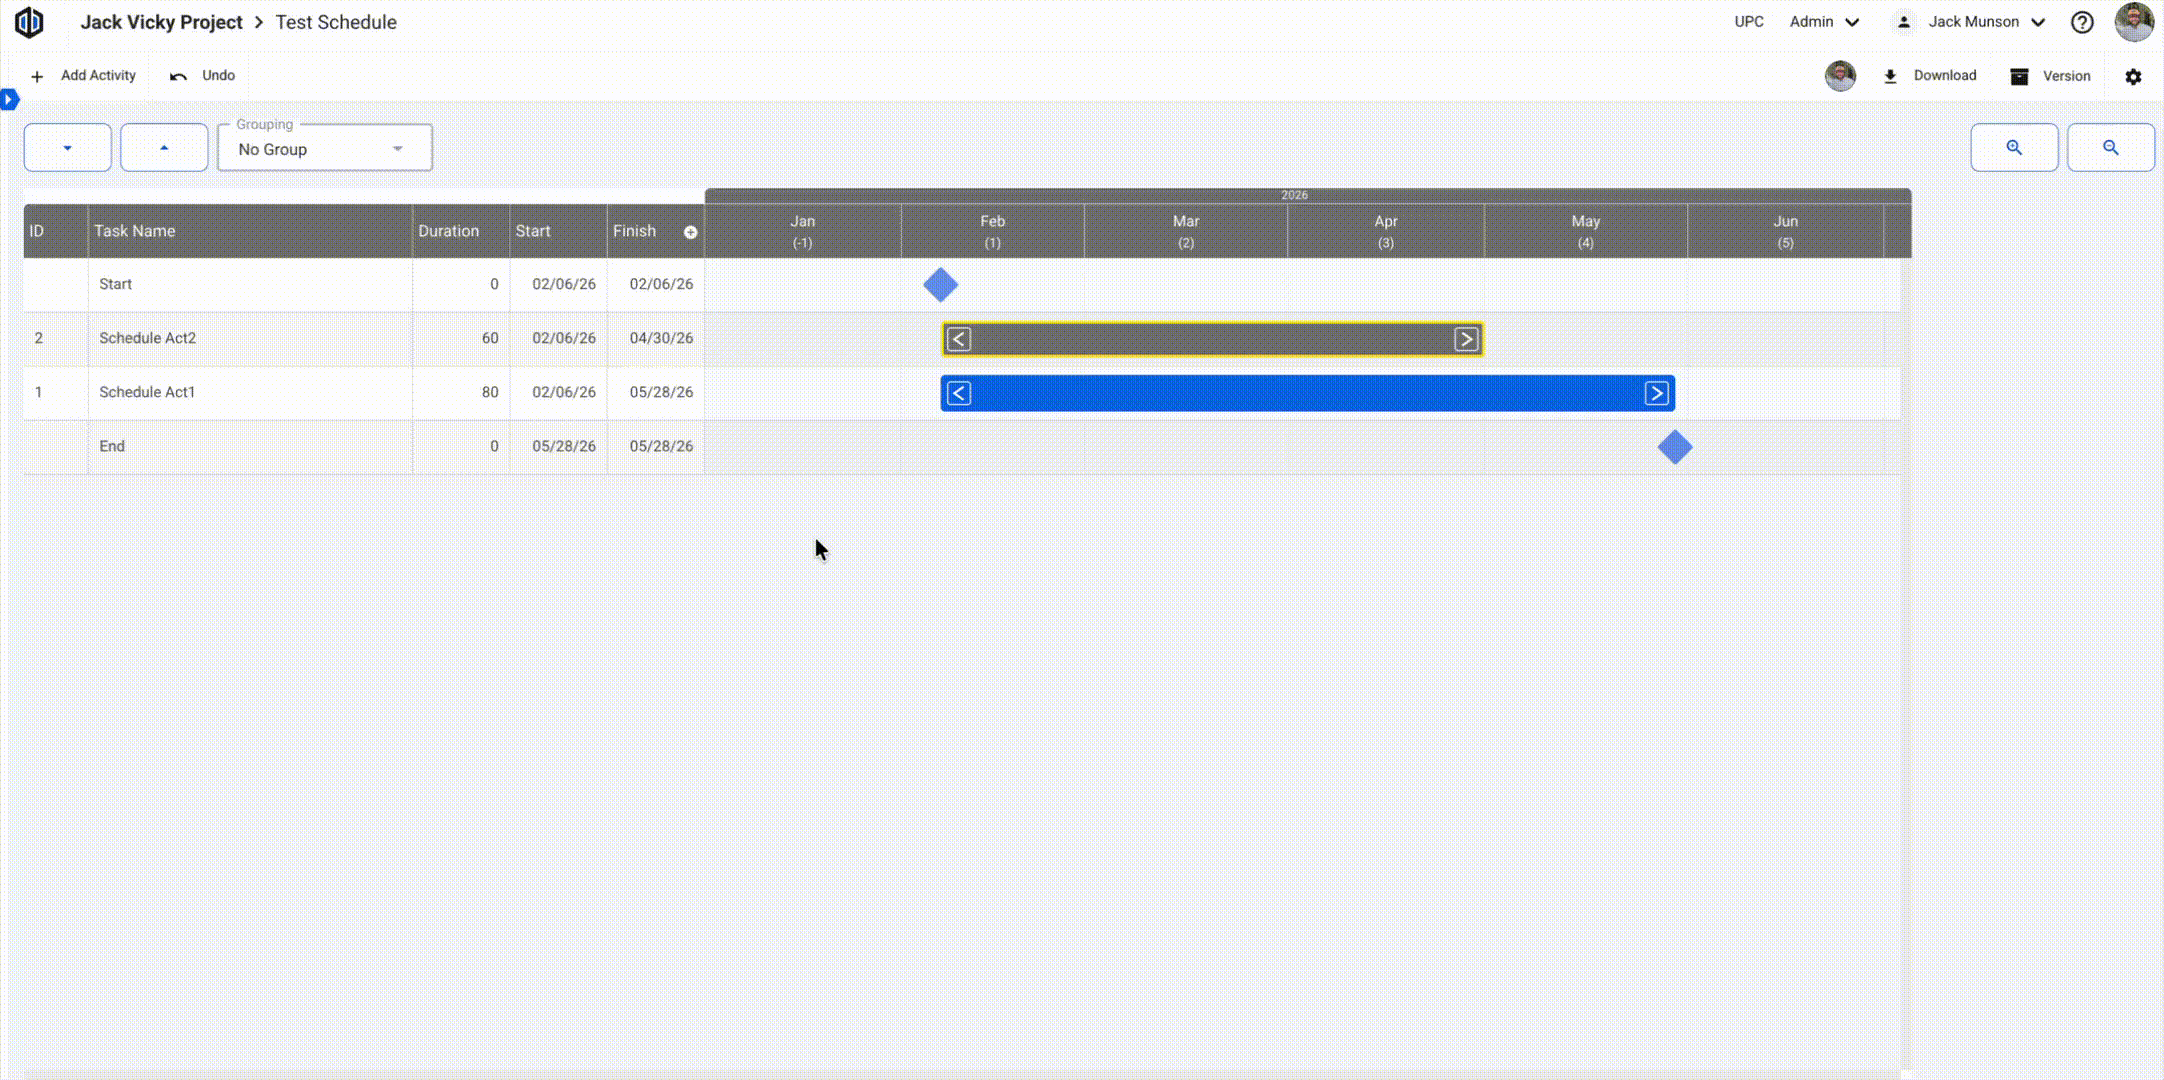
- After creating a Schedule Activity, it will show up as a blue line in the Schedule view.
-
The Duration is important in showing how long this activity will be active on the project. The longer the duration, the longer your activity line will be.
-
To link or create relationships between activities, you can click into the Schedule Activity line, then, with the arrows, you can align start and finish dates to other activities.
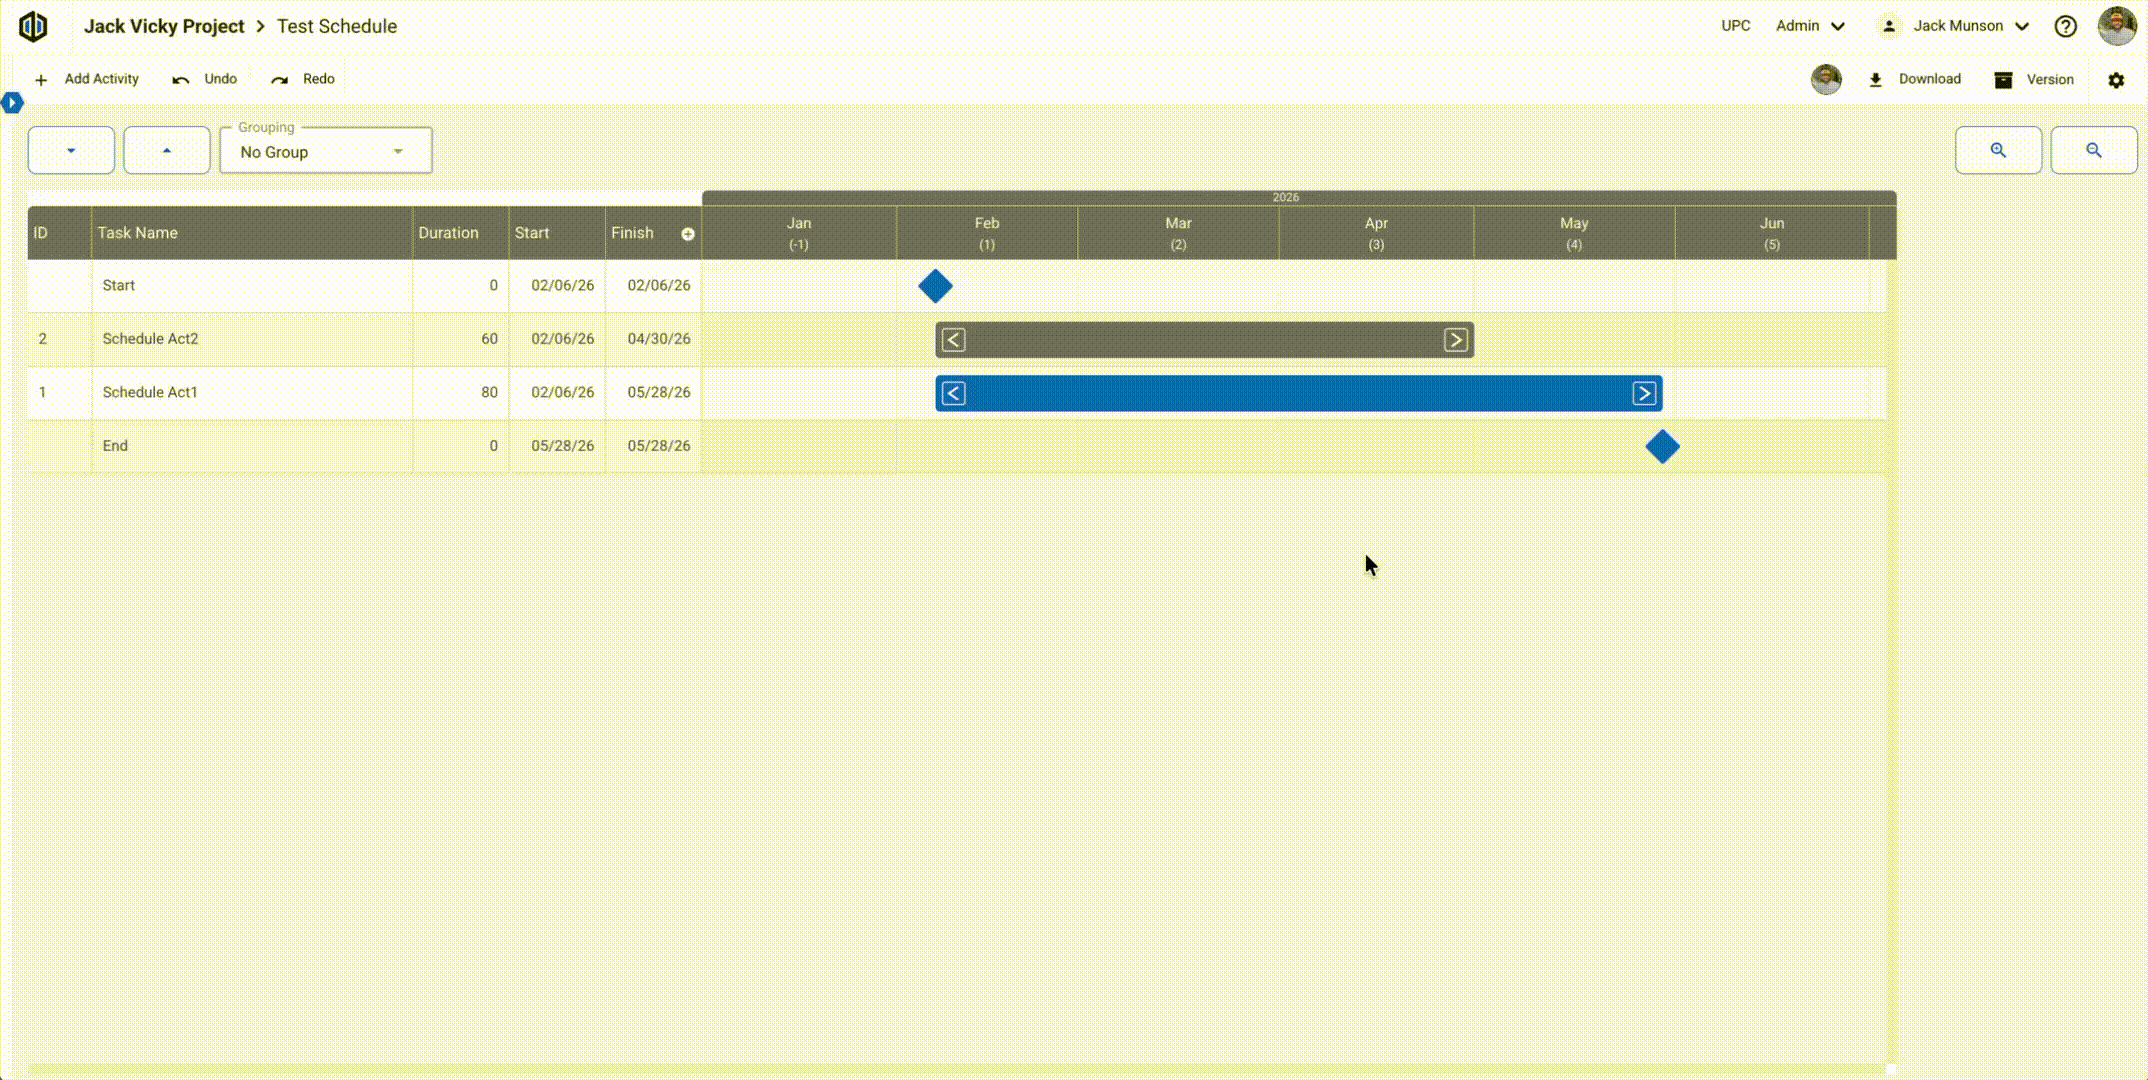
- After you connect activities together, these will now be linked, and a relationship has been formed.
-
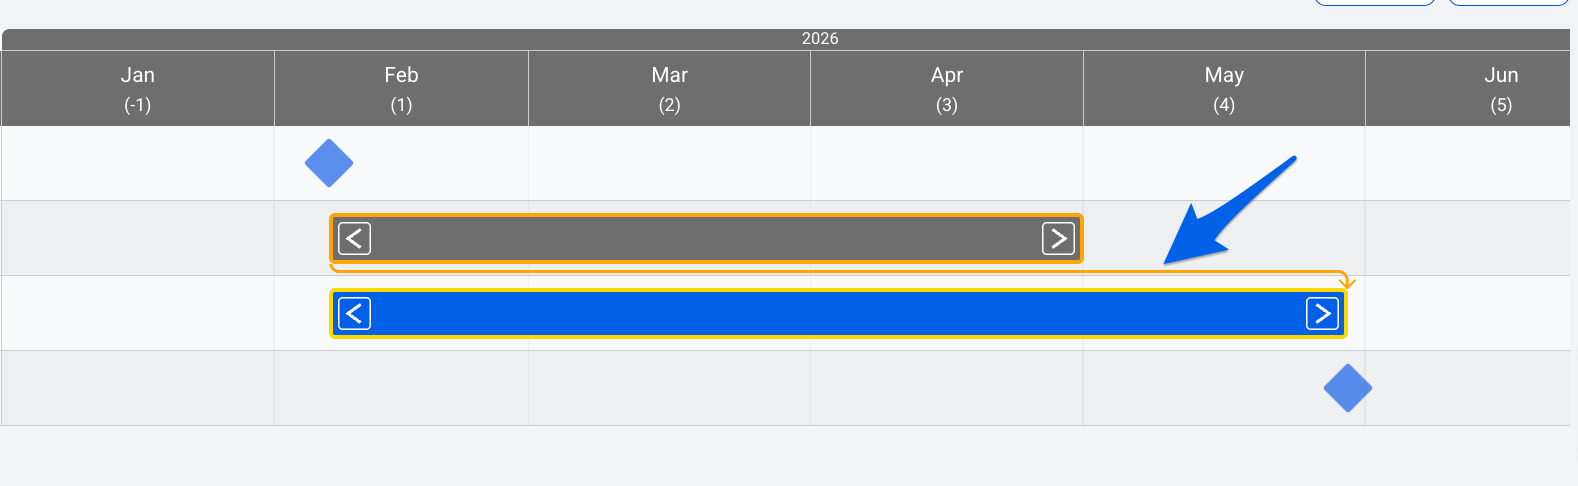
To see the relationships you have created, simply click into any Activity line to see yellow arrows. These arrows are connected to the activities in which they are linked.


Managing a Schedule
Editing a Schedule
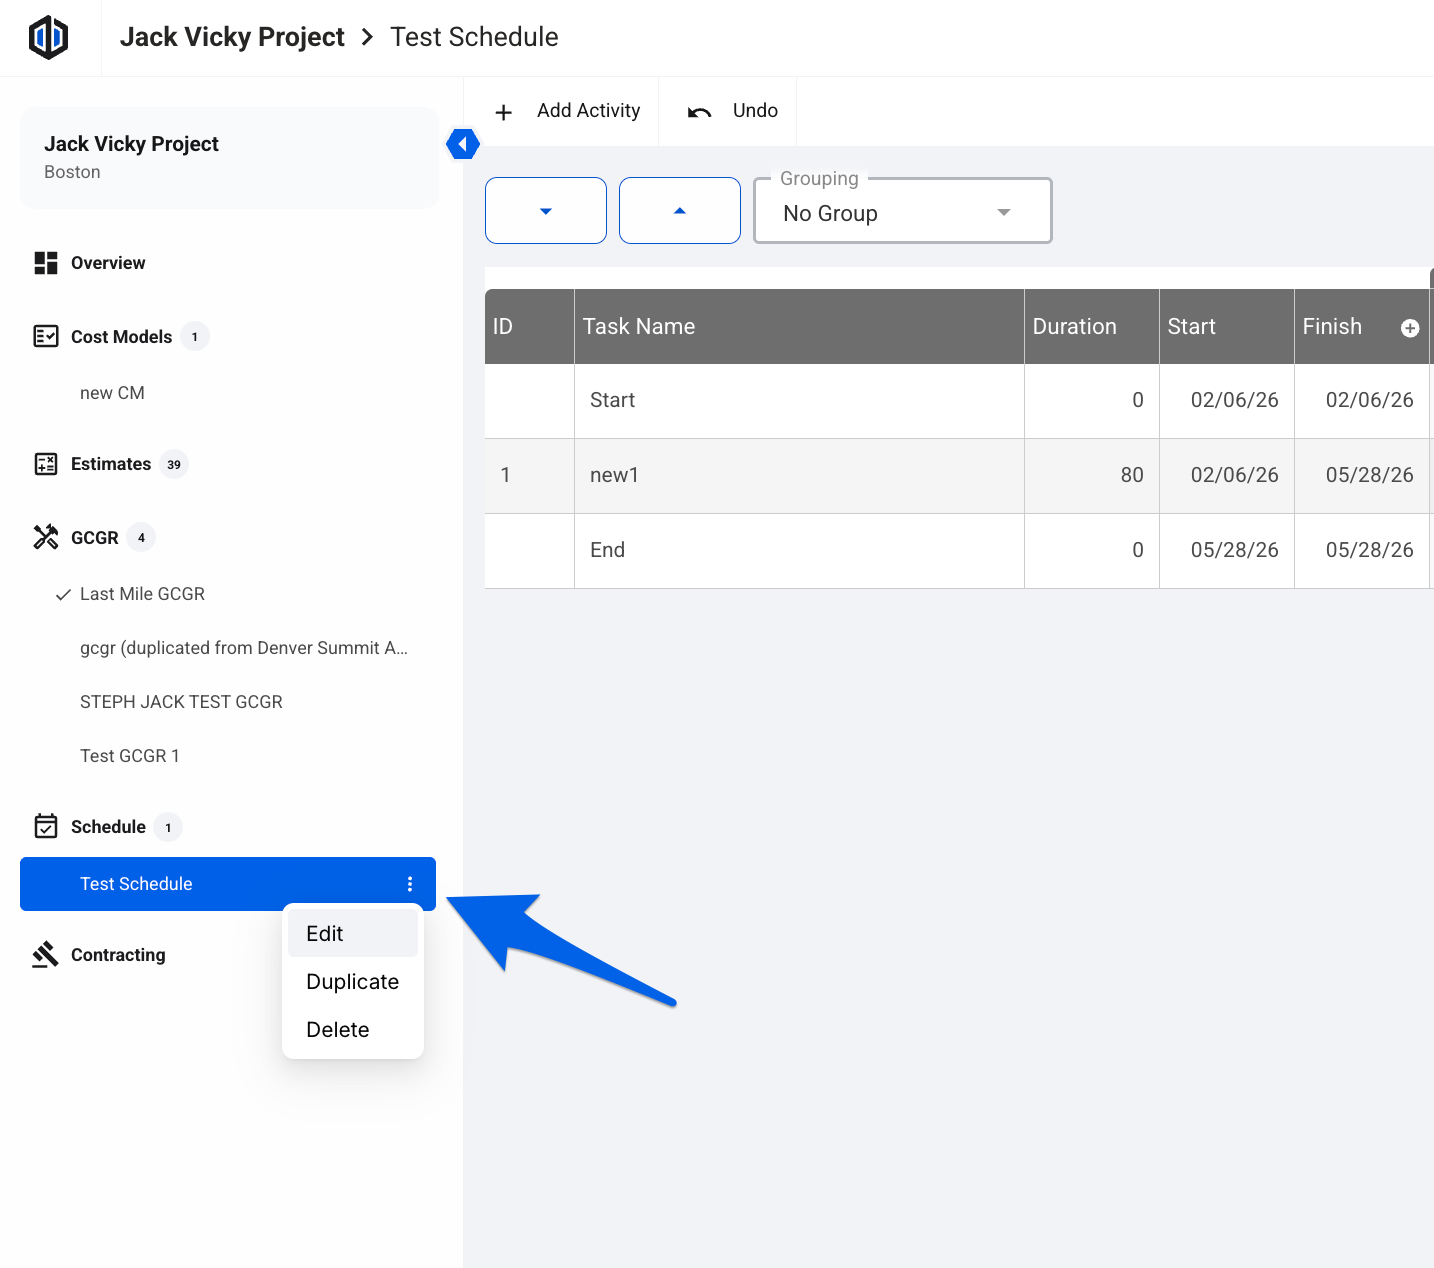
- Open the Side Panel, revealing all schedules.
- Click on the 3 dots (ellipses) of any schedule you would like to edit. Select Edit.
-
An Edit Schedule modal will appear. Edit any fields here and select Save once finished.

Pro Tip: If you are working within a Schedule and need to edit a field, you can always click on the cog icon in the top right.

Duplicating a Schedule
- Open the Side Panel, revealing all schedules.
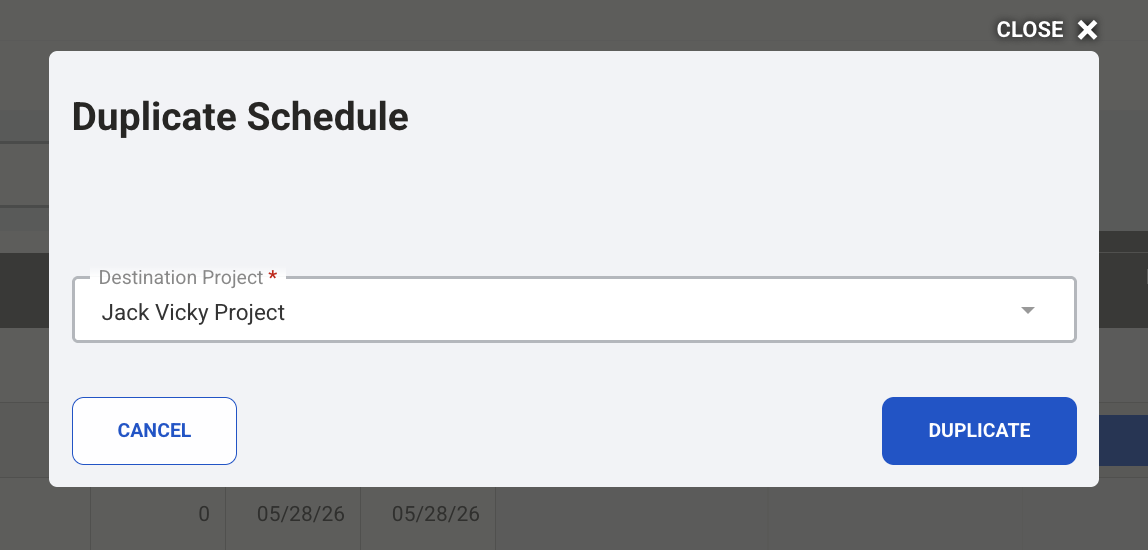
- Click on the 3 dots (ellipses) of any schedule you would like to duplicate. Select Duplicate.
- A Duplicate Schedule modal will appear. Select the destination project for this duplicated schedule to be sent to.
-
Click on Duplicate.

Deleting a Schedule
- Open the Side Panel, revealing all schedules.
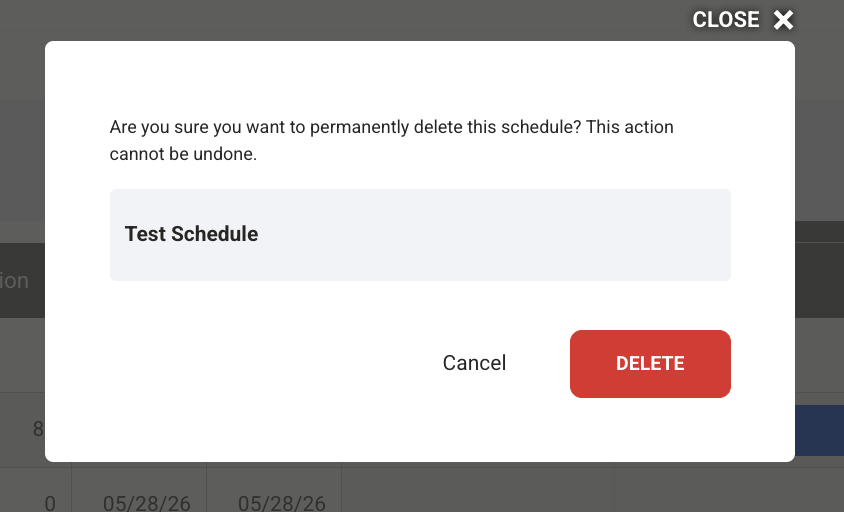
- Click on the 3 dots (ellipses) of any schedule you would like to delete. Select Delete.
-
A Delete Schedule modal will appear with a warning message upon deletion. If you accept, click on Delete.

Schedule Tips & Tricks
- Schedule Activities can be created in the Schedule module and the Labor Gantt tab within the GCGRs module. If a Schedule Activity is created in the Labor Gantt, that activity will show in the Schedule module.
-
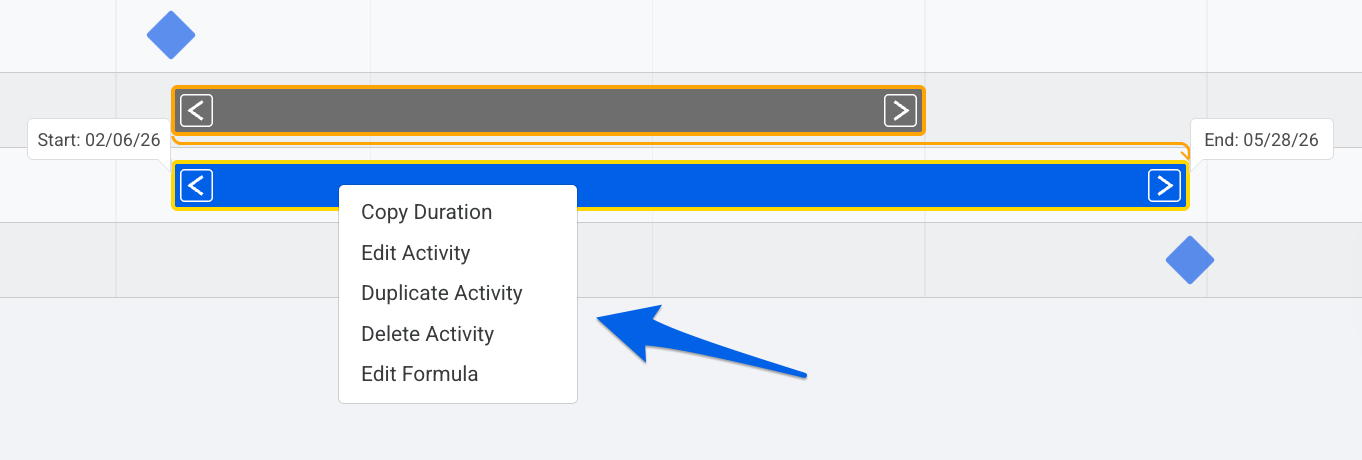
After creating your Schedule Activities, you have the ability to perform other actions such as copy duration, edit formulas, edit activity, delete activity, and duplicate activity via a Right-click or double click on any activity line.
-
Leads and Lags can be added between Schedule Activities via relationships by clicking on the yellow arrows.
-
Quantity Formulas are accessible in this view. These formulas are tied to estimates if you link the calculations. If the estimate is changed, it will adjust these Schedule Activities that have an active formula.


If you have any questions, feel free to contact our support team, and we'll be happy to help!