Labor and Crews (UPC)
Note: Only Global Admins have the ability to manage Labor and Crews in the UPC within Ediphi.
Labor and Crews in the UPC gives your organization one central place to set up the labor resources and crews used across your estimates. Instead of rebuilding the same workers and crews in every estimate, Global Admins can define them once in the UPC, set their rates for each cost region, and assign crews to UPC products to calculate labor unit costs automatically.
When a resource’s rate or a crew’s makeup changes, every UPC product using that crew will recalculate, so your labor costs stay consistent across your UPC.
Note: For details on using Labor and Crews within an estimate, see Labor and Crews (Estimates).
In this article
- Getting Started with Labor and Crews in the UPC
- Labor Resources
- Labor Crews
- Assigning Crews to UPC Products
- Sharing Crews Between myUPC and Central UPC
Getting Started with Labor and Crews in the UPC
Key Terms
- Labor Resource: A role or worker, such as a Carpenter or Laborer. Each resource has an hourly rate for Regular Time, Overtime, and Double Time.
- Labor Crew: A named group of labor resources that specifies which workers are needed and how many of each.
- Crew Rate: The crew’s total combined cost per hour. This is the rate applied to a UPC product when a crew is assigned.
- Individual Rate: The average rate for a single worker in the crew.
- Cost Region: Just like UPC products, labor resource rates are set per cost region. A resource can have a different rate in each region.
How Crew Rate and Individual Rate are calculated
The Crew Rate is calculated by multiplying the quantity of each resource by its rate, and then adding the results together. The Individual Rate is the Crew Rate divided by the crew size (the total quantity of all resources in the crew, including any overtime or double time).
For example, a Foundations crew includes 1 Concrete Foreman at $50.00, 4 Carpenters at $55.00, and 2 Laborers at $40.00, all at regular time:
- Crew Rate: (1 × $50.00) + (4 × $55.00) + (2 × $40.00) = $350.00
- Individual Rate: $350.00 ÷ 7 workers = $50.00
Overtime and double time quantities are included in the Crew Rate the same way, using each resource’s Overtime and Double Time rates.
Navigating Crews in the UPC
Once Labor and Crews is enabled, you’ll see Crews in the UPC’s side panel, below Cost Framework and UPC Products. The Crews module is organized into two tabs:
- Labor Resources: Where you create and manage individual workers and their rates.
- Labor Crews: Where you group those resources together into crews.
From there, the general workflow looks like this:
- Create your resources in the Labor Resources tab.
- Build crews from those resources in the Labor Crews tab.
- Assign crews to UPC products in UPC Products.
Note: Changes made in the UPC’s Crews module can recalculate the unit costs of UPC products that use those crews. They will not affect any existing estimates.
Labor Resources
Labor resources are the individual roles or workers used to build your crews. All of your UPC’s resources are managed in the Labor Resources tab. The # of Crews column shows how many crews each resource belongs to.
Creating a Labor Resource
- From the UPC, select Crews from the side panel, and click on the Labor Resources tab.
- Select a Cost Region from the dropdown.
- Click on New Labor Resource. A new row will be added to the grid, ready for you to start typing in your values.
- Enter a Description and Item Code, if desired.
- Enter the resource’s hourly Regular Time, Overtime, and Double Time rates for the selected cost region.
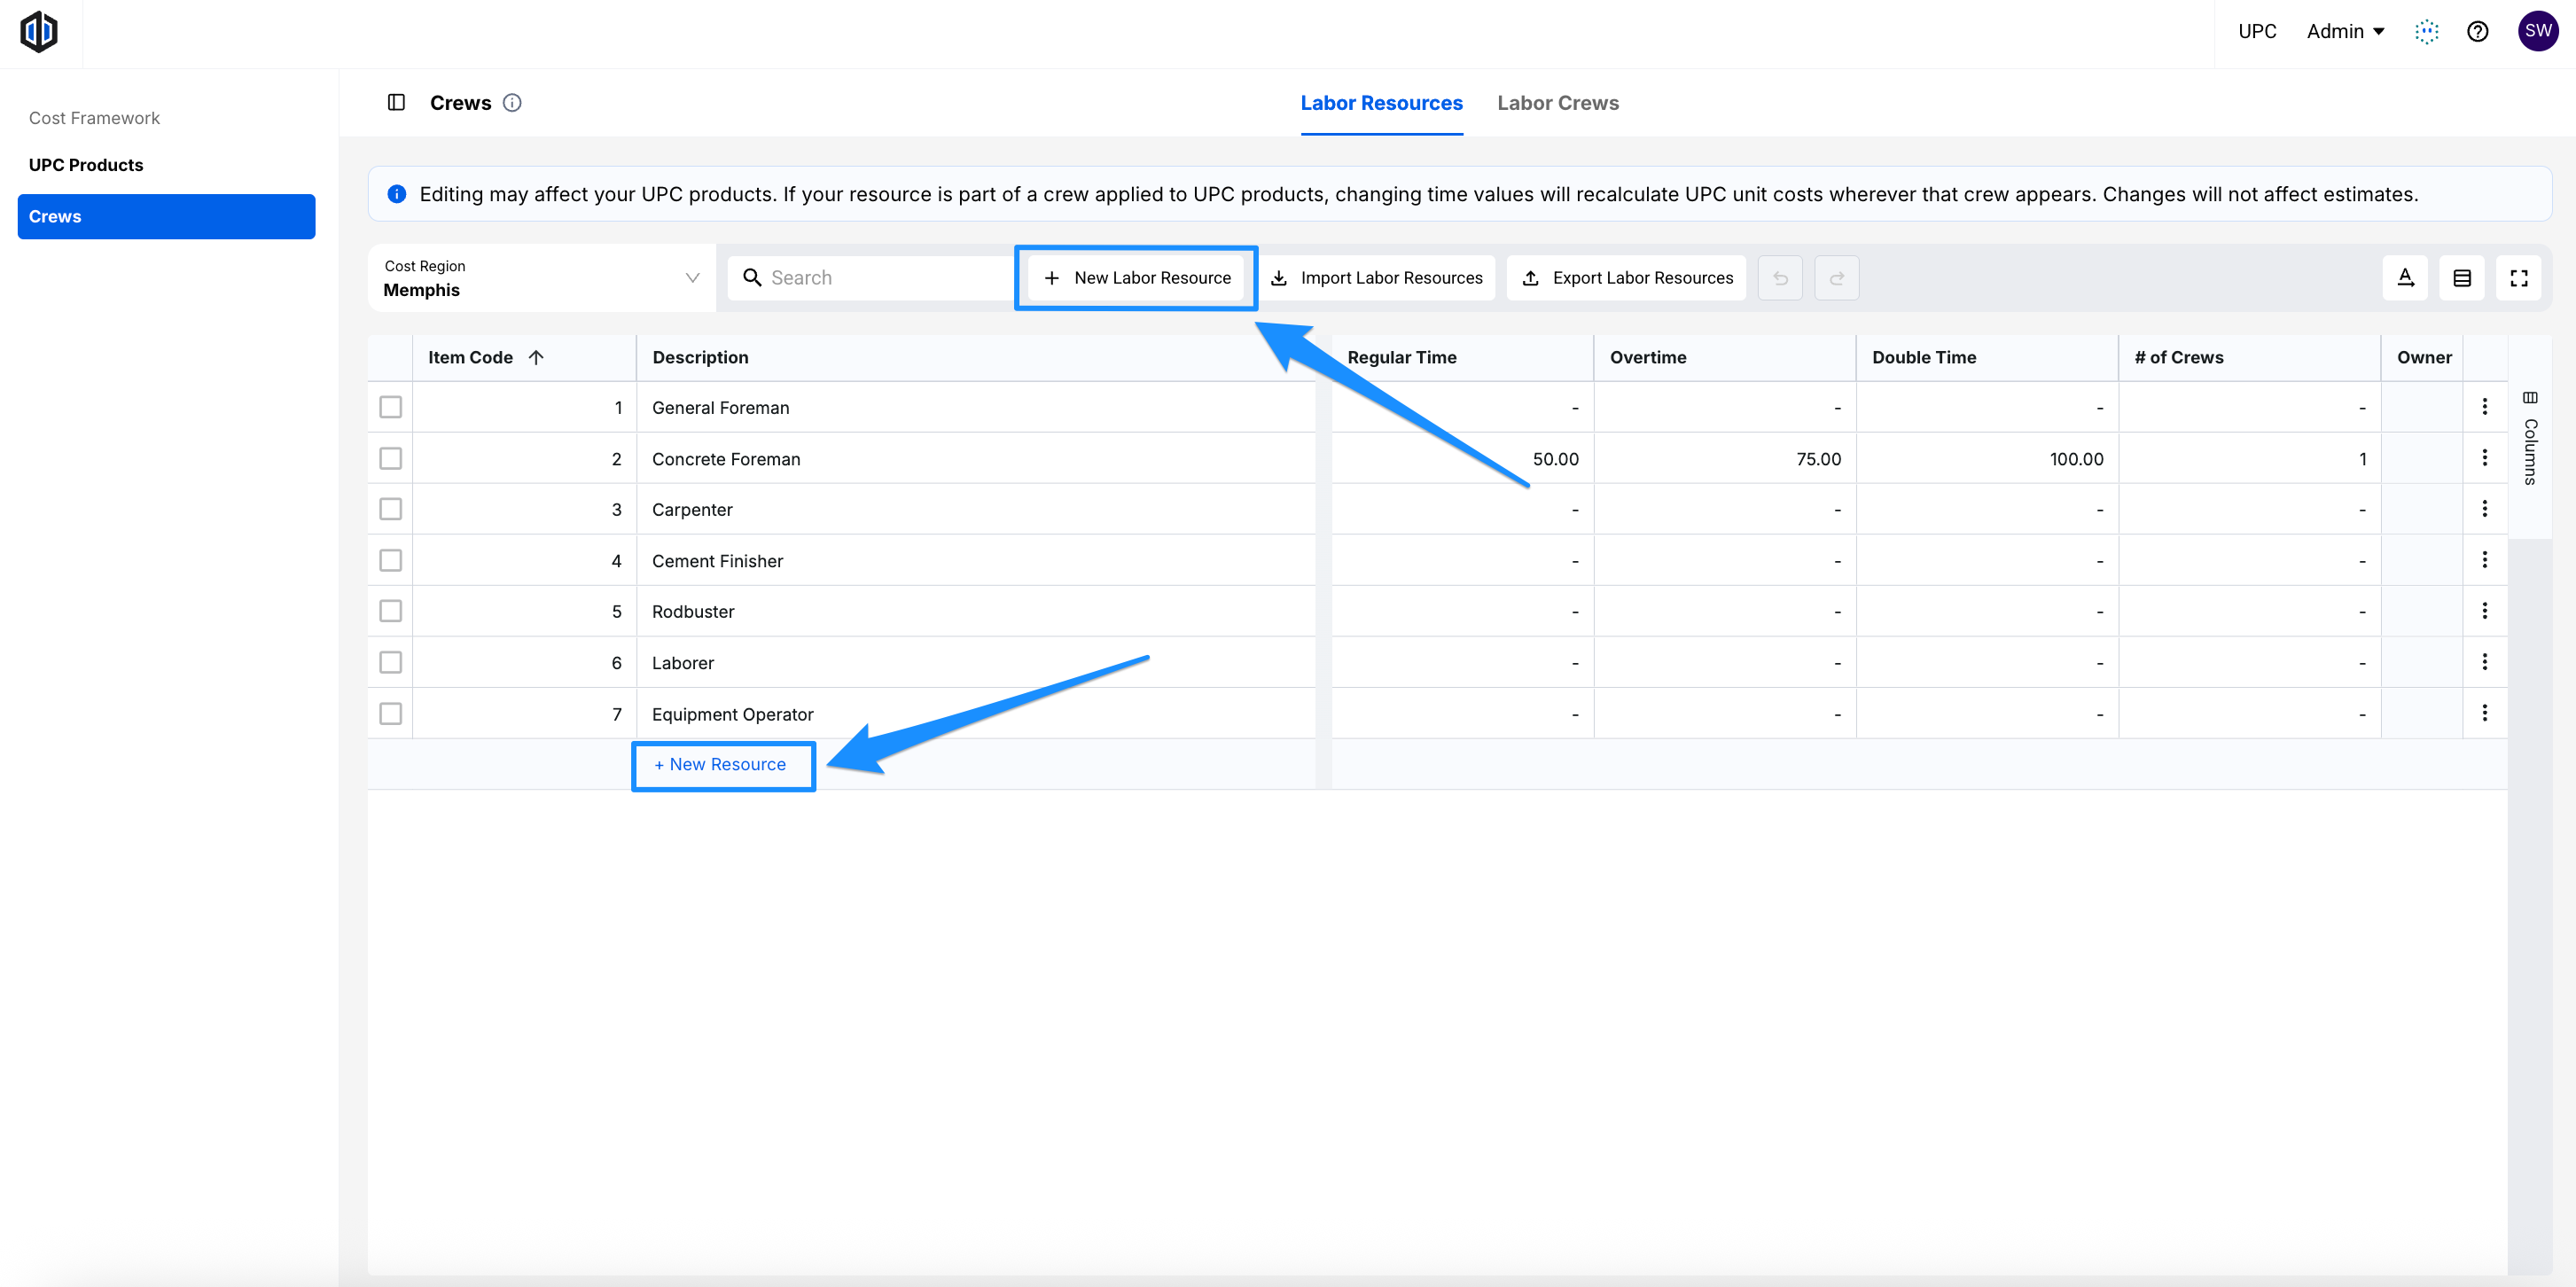
Note: Rates are flat hourly values. Descriptions, item codes, and rates can all be edited directly in the grid at any time.
Creating Labor Resources in Bulk via Import
To add several resources at once, you can import them from a CSV file.
- From the UPC, select Crews from the side panel, and click on the Labor Resources tab.
- Select a Cost Region from the dropdown. The rates in your file will be added for this cost region.
- Click Import Labor Resources. The Import Labor Resources window will open.
- To start from a template, click Sample CSV to download one. The sample includes a few example rows that you can replace with your own.
- In your file, add one row for each resource, using the following columns:
- description (required): The resource’s name, such as Carpenter.
- item_code (optional): Letters, numbers, and hyphens only.
- regular_rate, overtime_rate, and double_rate (optional): The resource’s hourly rates for the selected cost region. Leave a rate blank to skip it.
- Save the file as a CSV, then select it in the Import Labor Resources window, or drag and drop it into the window. The file will upload as soon as you select it.
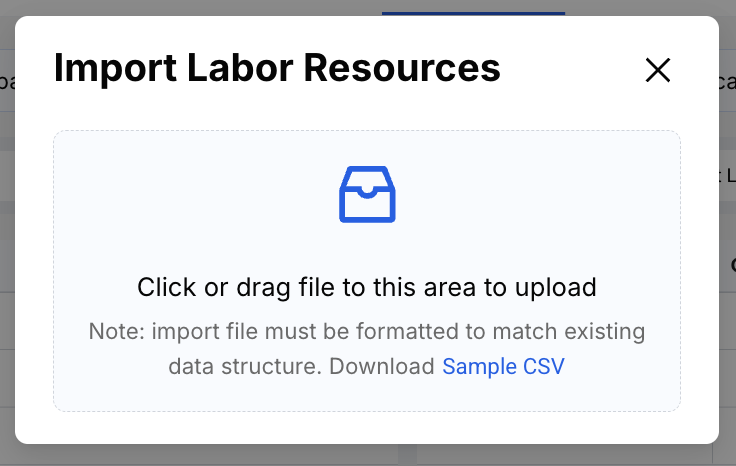
Once the import is complete, your new resources will appear in the Labor Resources grid.
If any row in the file has an error, nothing in the file will be imported. An error window will show which rows need to be fixed. Correct those rows and import the file again.
Note: Importing can only add new resources. It can’t update resources that already exist, so you can’t use an import to change rates or details in bulk. To change an existing resource, edit it directly in the grid.
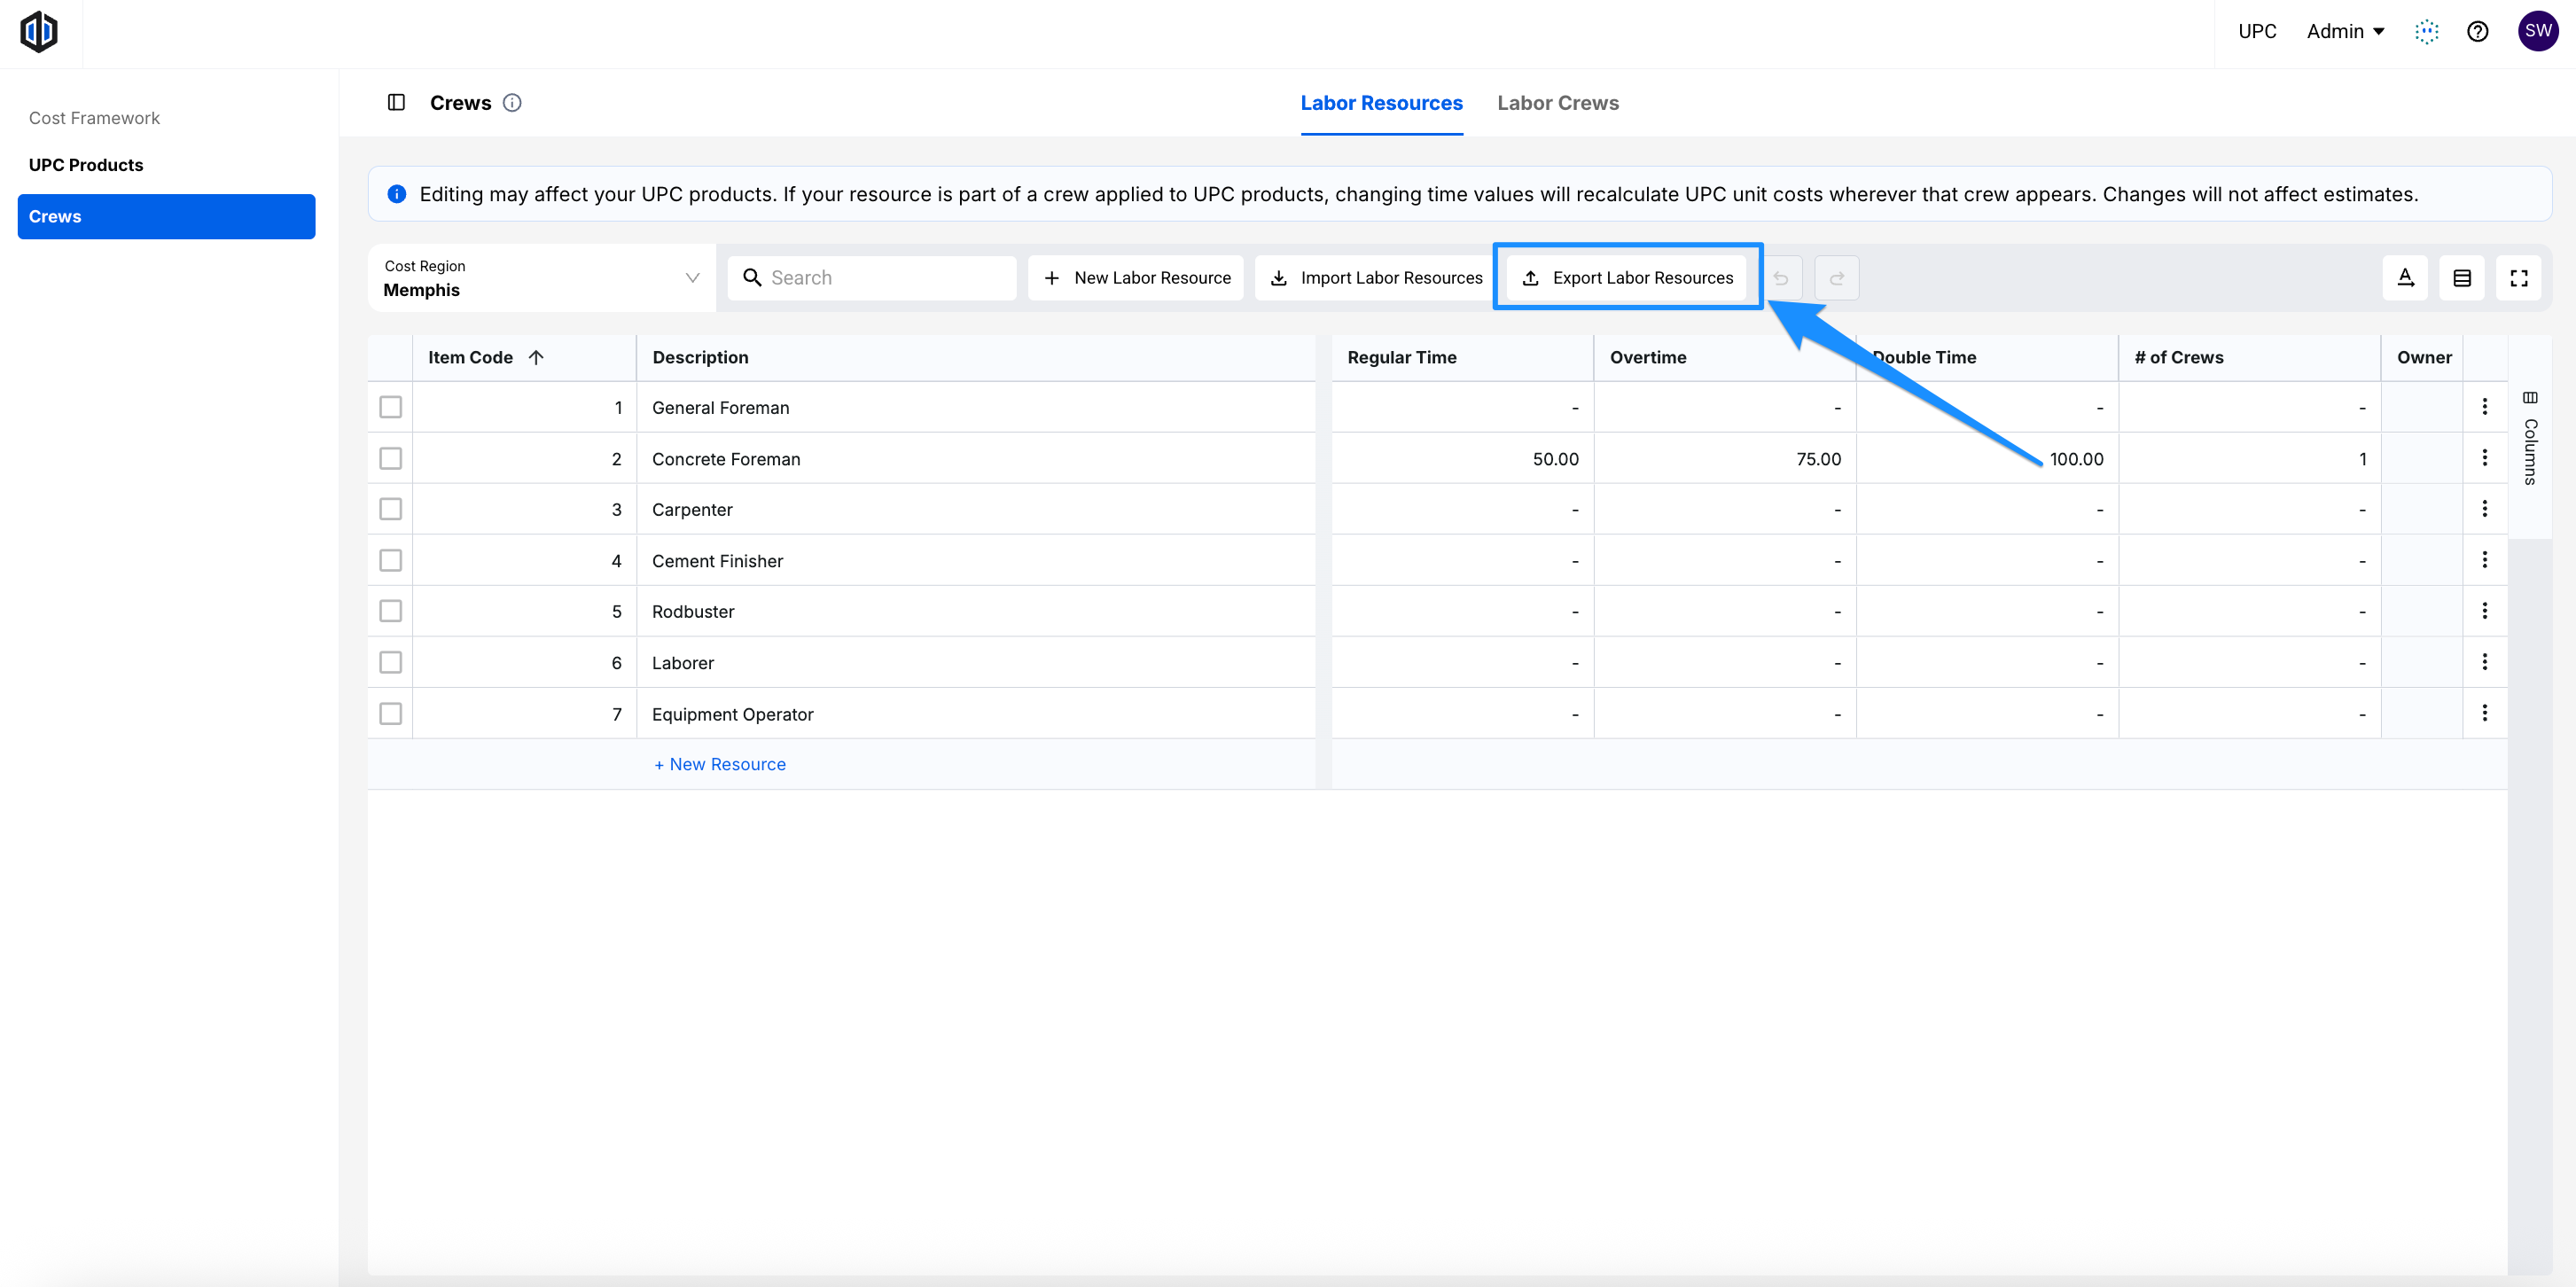
Pro Tip: Click Export Labor Resources to download your current resources for the selected cost region in the same format.
Setting Rates by Cost Region
Each resource can have its own rates in every cost region, so the same Carpenter can cost more in one region than another.
- From the Labor Resources tab, select a different region from the Cost Region dropdown.
- Enter the resource’s Regular Time, Overtime, and Double Time rates for that region.
Repeat for each cost region where you’ll use the resource.
Note: Rates entered in one cost region don’t carry over to other regions. You’ll need to enter a resource’s rates in each region where you plan to use it.
Inserting, Duplicating, or Deleting a Labor Resource
- From the UPC, select Crews from the side panel, and click on the Labor Resources tab.
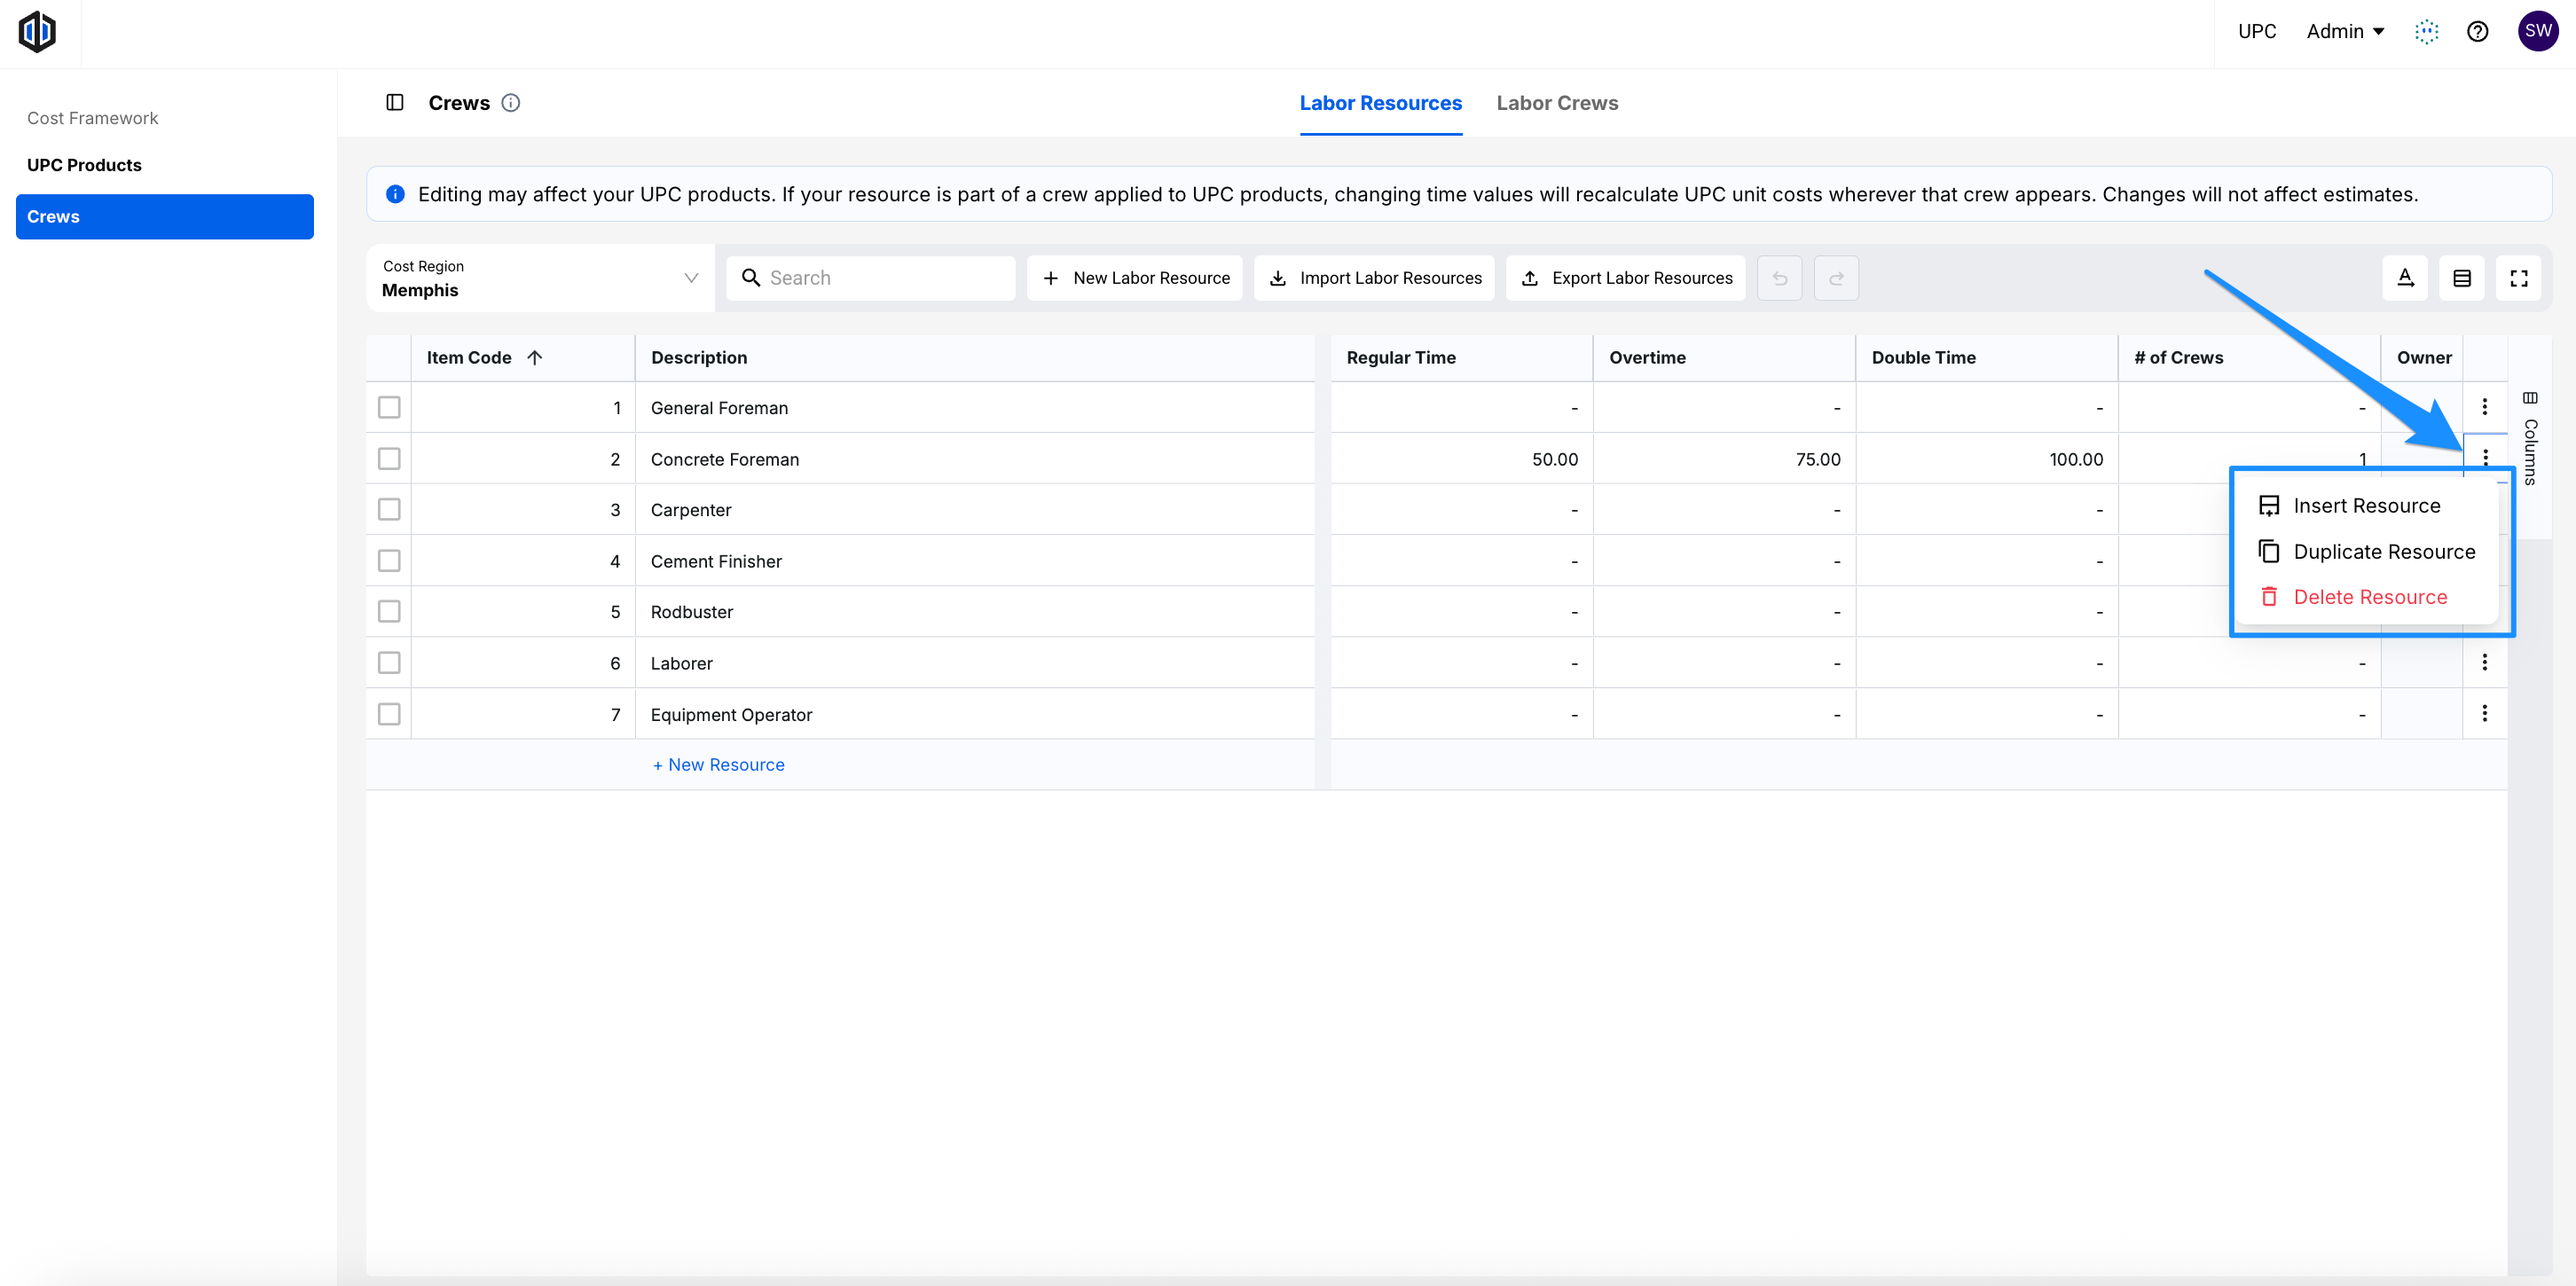
- Click the 3 dots (ellipses) to the right of the resource.
- Select one of the following:
- Insert Resource to add a new resource directly below the selected one.
- Duplicate Resource to create a copy of the selected resource. The copy will include “(Copy)” at the end of its name.
- Delete Resource to remove the resource.
Note: If a resource is part of a crew assigned to UPC products, changing or deleting it can recalculate those products’ unit costs. See How Changes Update Your UPC Products.
Working with Multiple Resources
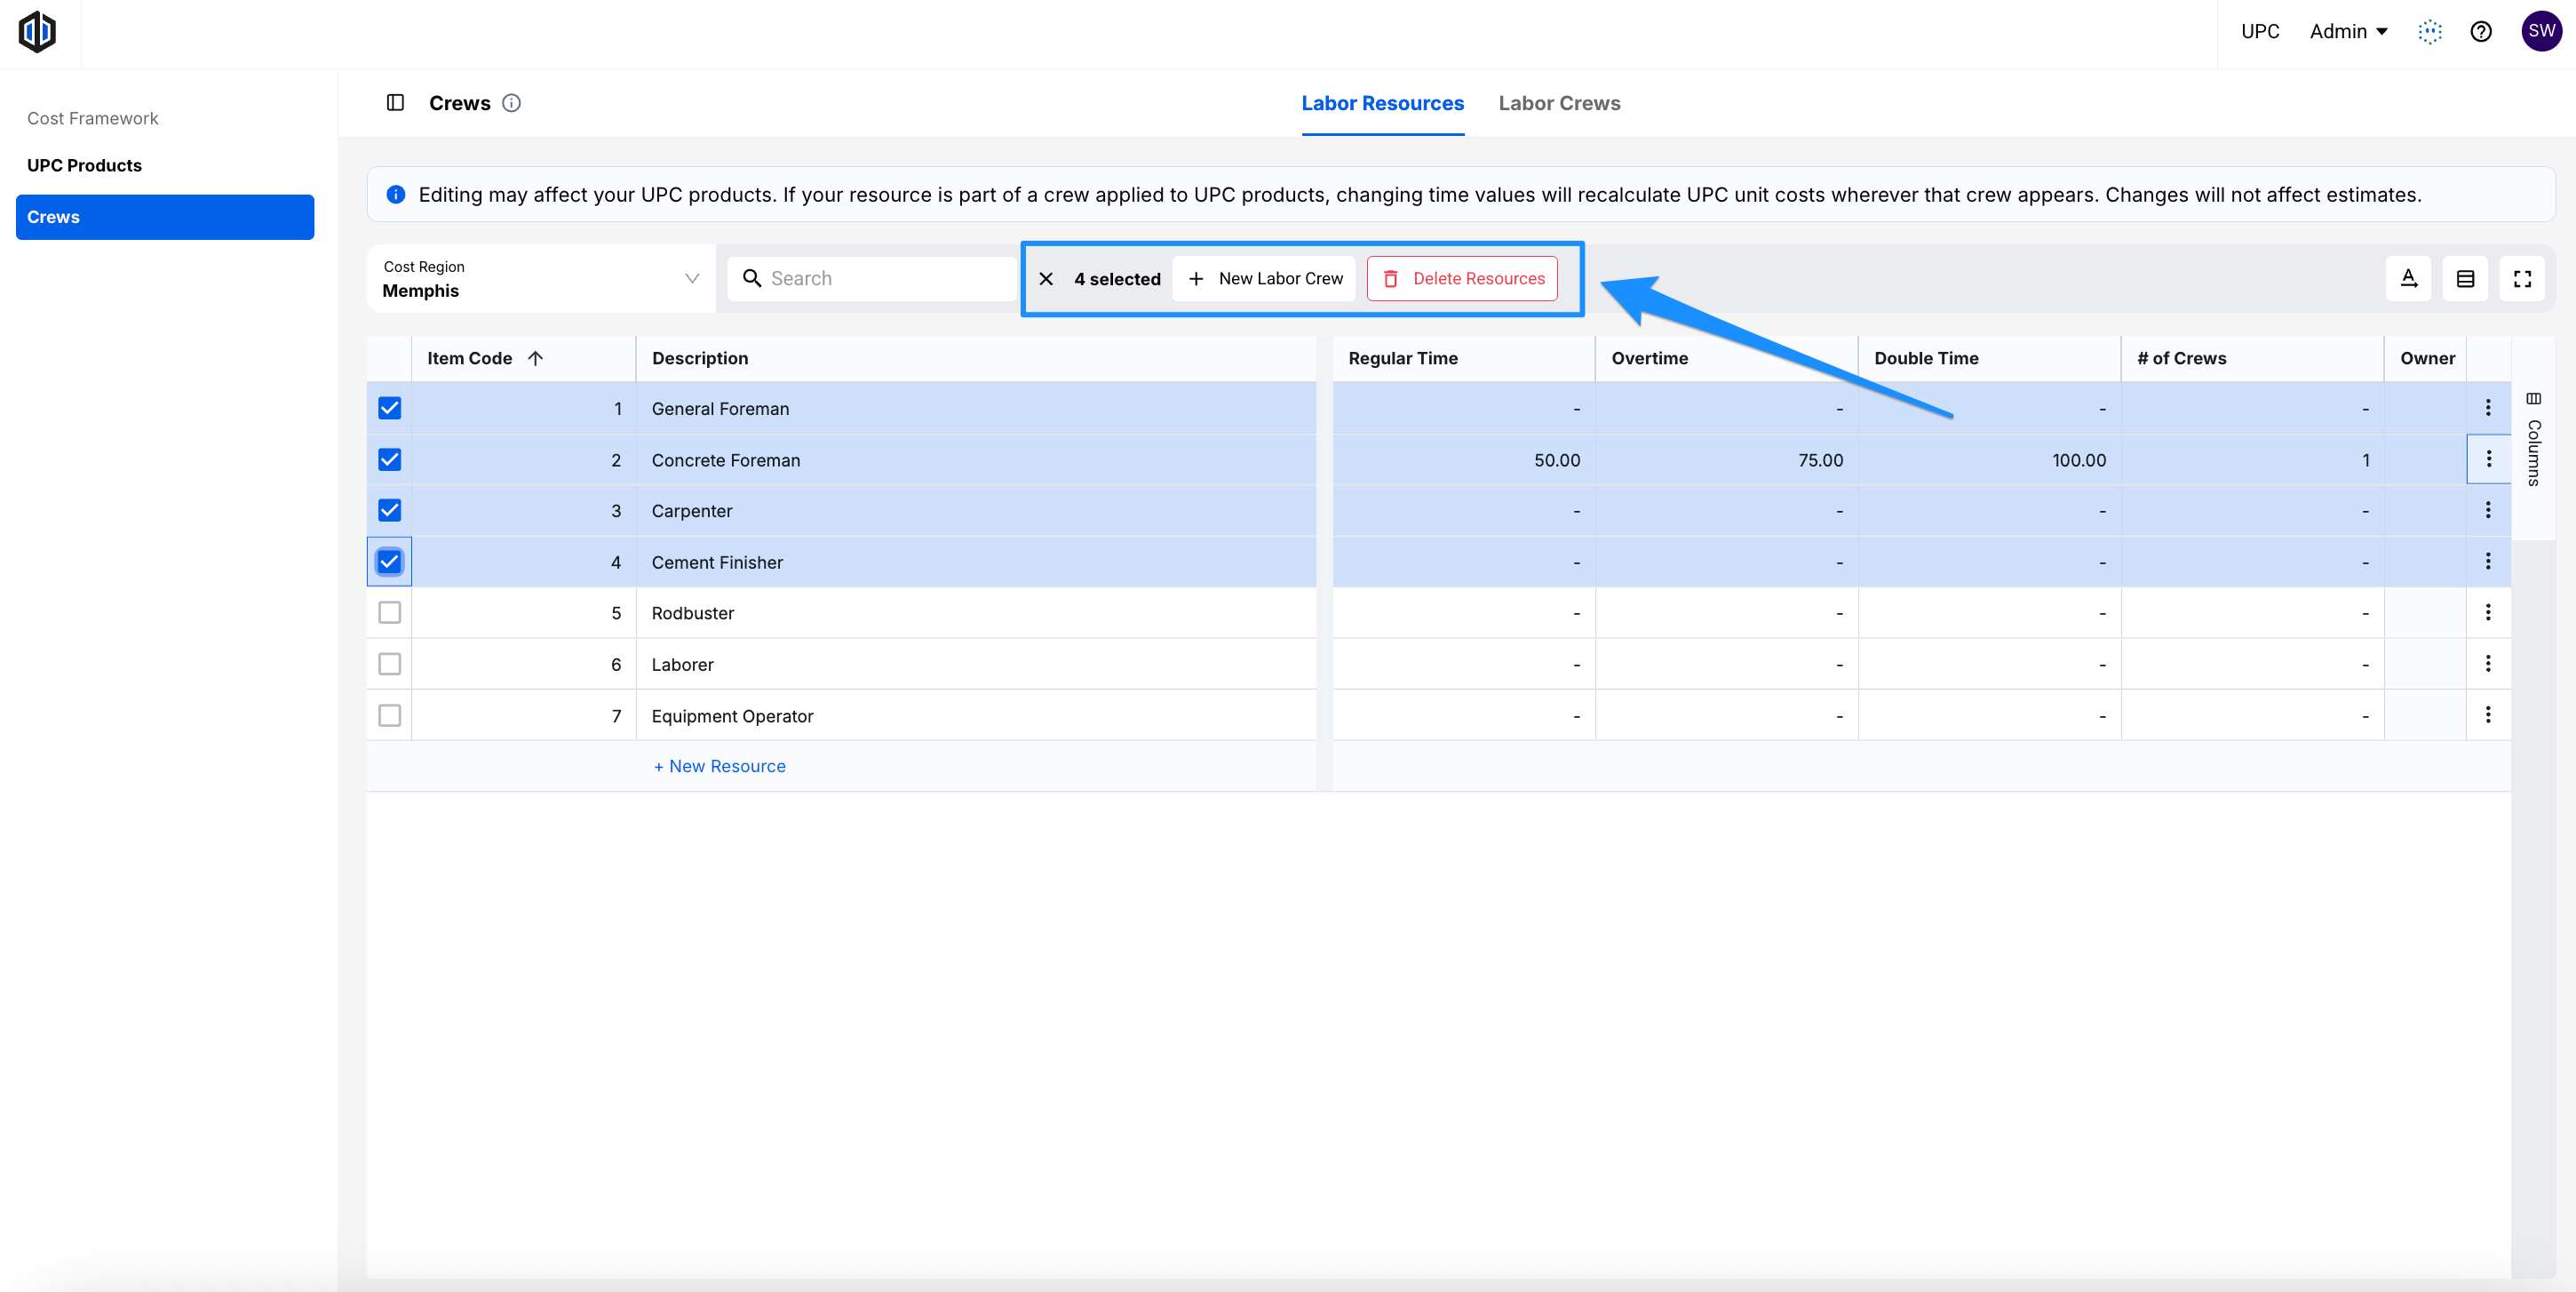
You can select multiple resources at once to delete them in bulk, or to quickly build a new crew from them.
- Select the resources you want by checking the box to the left of each row.
- The toolbar will update to show how many resources are selected. From there, choose one of the following:
- New Labor Crew to create a new crew that includes all of the selected resources.
- Delete Resources to delete all of the selected resources at once.
Labor Crews
Labor crews group your labor resources together and specify how many of each resource is needed. All of your UPC’s crews are managed in the Labor Crews tab.
Creating a Labor Crew
- From the UPC, select Crews from the side panel, and click on the Labor Crews tab.
- Select a Cost Region from the dropdown.
- Click on New Labor Crew.
- In the New Labor Crew window, enter a Labor Crew Name (required) and a Crew Item Code (if applicable).
- Click Create Crew.
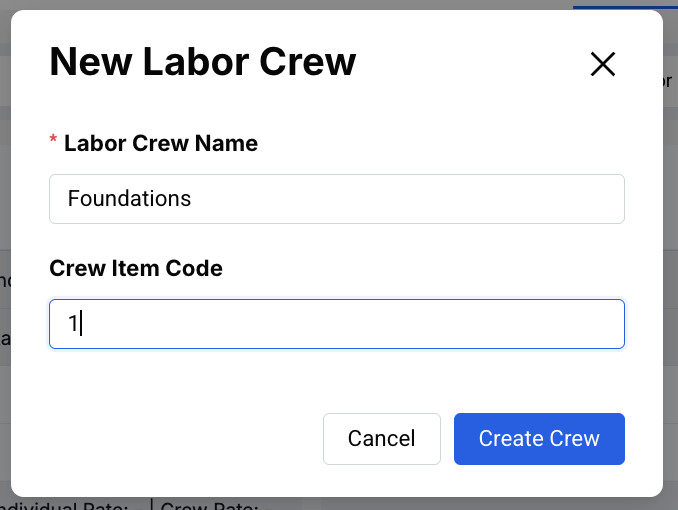
Your new crew will be added to the grid, ready for you to add resources.
Creating Labor Crews in Bulk via Import
To create many crews at once, along with any new resources they need, you can import them from a CSV file.
- From the UPC, select Crews from the side panel, and click on the Labor Crews tab.
- Select a Cost Region from the dropdown. The quantities and rates in your file will be added for this cost region.
- Click Import Labor Crews. The Import Labor Crews window will open.
- To start from a template, click Sample CSV to download one. The sample includes a few example rows that you can replace with your own.
- In your file, add one row for each resource in a crew. Rows with the same crew_description and crew_item_code will be grouped into one crew. Use the following columns:
- crew_description (required): The crew’s name. Use the same name on every row for that crew.
- crew_item_code (optional): Letters, numbers, and hyphens only. Use the same item code on every row for that crew. If rows have the same crew name but different item codes, or an item code on some rows but not others, they’ll be imported as separate crews.
- crew_id (optional): To add resources to a crew that already exists, enter its ID. You can find crew IDs in a Labor Crews export. Leave it blank to create a new crew.
- resource_id: To use a resource that already exists, enter its ID. You can find resource IDs in a Labor Crews export. The import will use that existing resource and its rates for the selected cost region.
- description and item_code: To create a new resource, leave resource_id blank and enter the new resource’s name and item code (optional) instead. If a resource with the same description and item code already exists, or is on another row in the file, the import will use that resource instead of creating a duplicate. That resource’s current rates will be used, and any rates entered on the row will be ignored.
- regular_quantity, overtime_quantity, and double_quantity: How many of this resource the crew needs at each time type. Every row needs at least one quantity. Quantities can be fractional or negative, just like in the grid. Leave a quantity blank to skip it.
- regular_rate, overtime_rate, and double_rate: For new resources only. Enter a rate for each time type you entered a quantity for.
- Save the file as a CSV, then select it in the Import Labor Crews window, or drag and drop it into the window. The file will upload as soon as you select it.
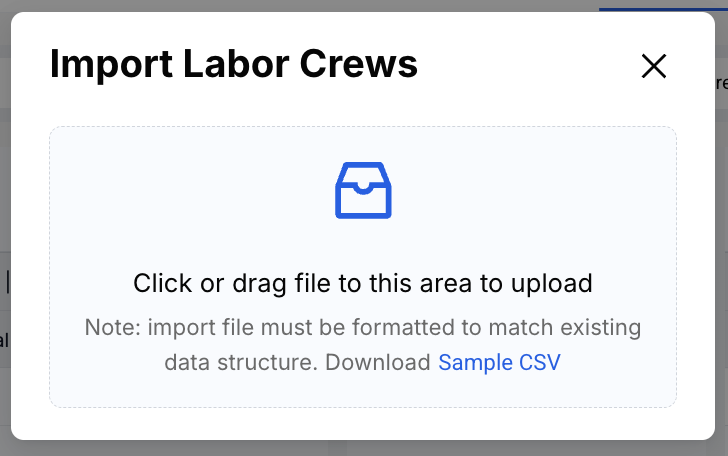
Once the import is complete, your new crews will appear in the Labor Crews grid. Any new resources created by the import will also appear in the Labor Resources tab.
If any row in the file has a problem, nothing in the file will be imported. You can download a copy of your file with an errors column added, which explains what needs to be fixed on each row. Correct those rows and import the same file again. The errors column is ignored when you re-import.
Note: If a row doesn’t have a crew_id, the import creates a new crew, even if a crew with the same name already exists. If a row has a crew_id and that crew already has resources in the selected cost region, the import will merge the resources in your file with the crew’s existing resources. To change an existing crew’s resources or quantities, edit it directly in the Labor Crews grid.
Pro Tip: Click Export Labor Crews to download your current crews for the selected cost region in the same format. The export also includes each crew’s crew_id and each resource’s resource_id.
Copying Crews to Other Cost Regions
Once your crews are set up in one cost region, you can use an export to set up the same crews in your other regions, so you don’t have to re-create them by hand. Each region’s crews will use that region’s resource rates.
- Add your resources’ rates in the new cost region, either directly in the Labor Resources grid or by importing them. See Setting Rates by Cost Region. You must complete this step first in order for the import to work.
- From the Labor Crews tab, select the cost region where your crews are already set up, and click Export Labor Crews.
- Select the new region from the Cost Region dropdown.
- Click Import Labor Crews and select the exported file. You don’t need to make any changes to it. This will maintain the region’s resource rates.
Repeat steps 3 and 4 for each of your other cost regions.
Since the export includes each crew’s crew_id, the import adds the resources to the same crews instead of creating new ones.
Adding Resources to a Crew
- From the Labor Crews tab, open the Quick Add modal in one of two ways:
- Hover over the crew and click the + button.
- Click + Add Resource beneath the crew’s resources.
- The Quick Add modal will show all of your UPC’s resources, along with their rates for the selected cost region. Check the box to the left of each resource you want to add to the crew.
- Enter the quantity of each resource needed in the Qty columns for Regular Time, Overtime, and Double Time.
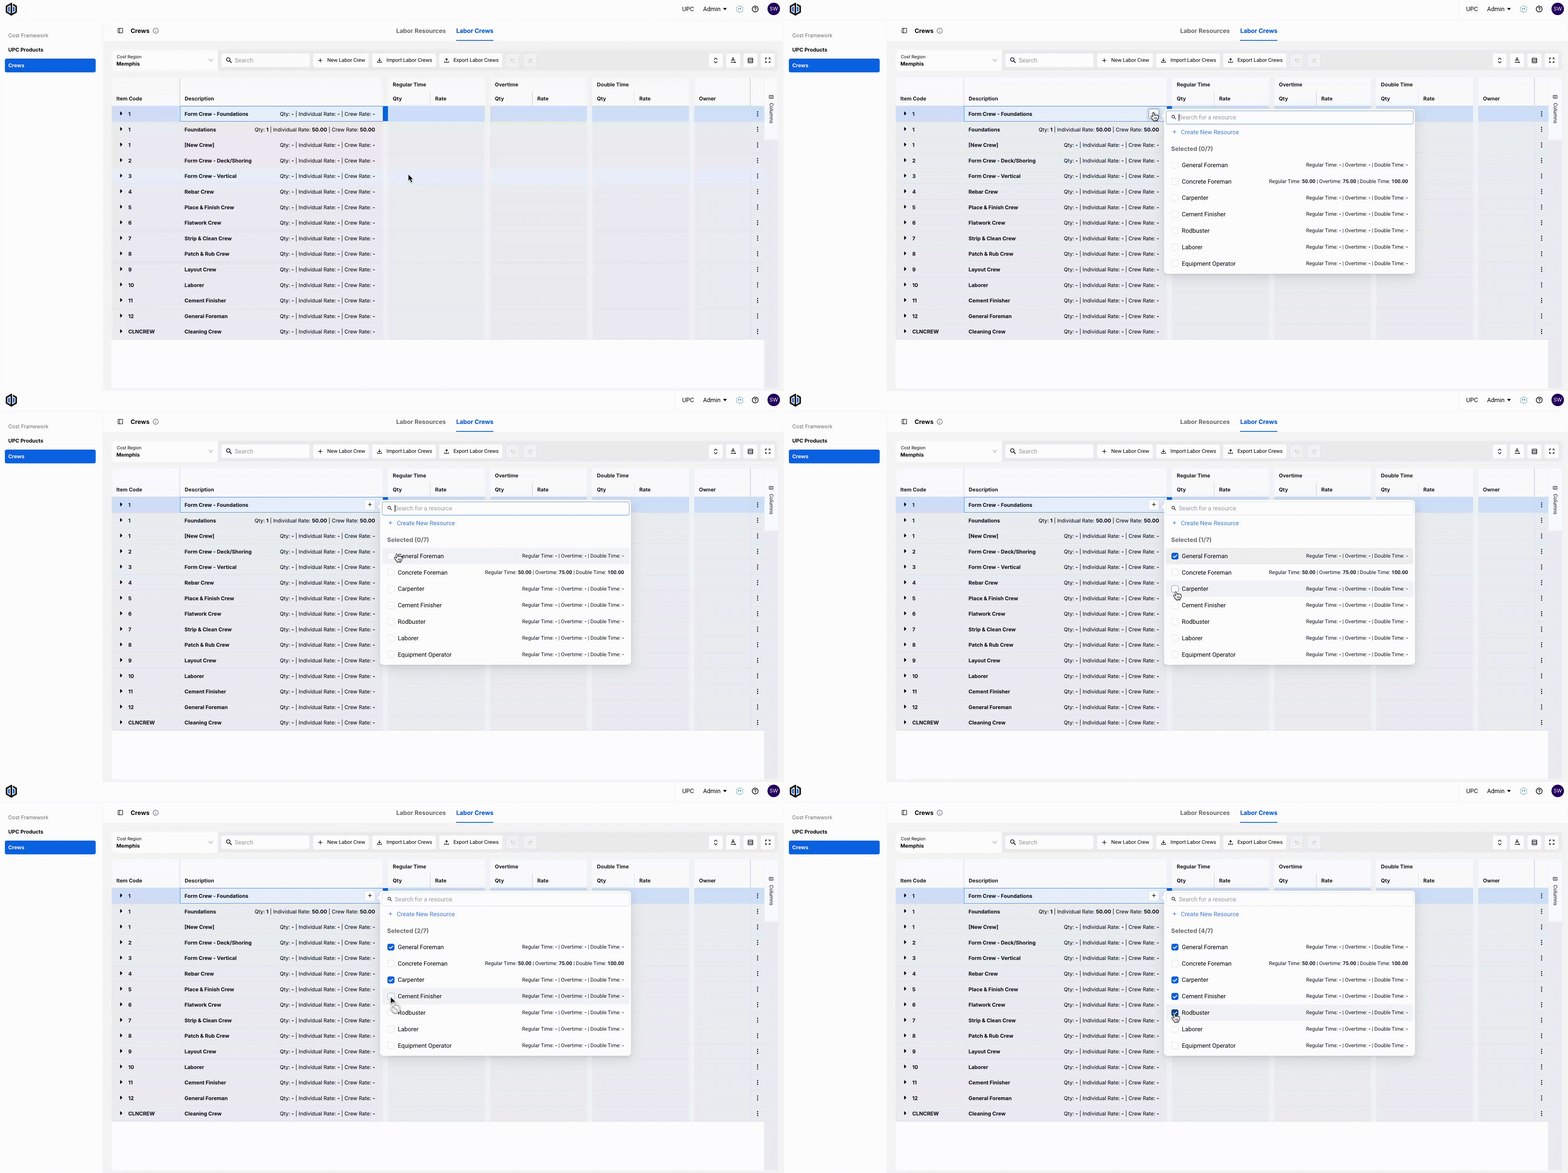
The crew’s Qty, Individual Rate, and Crew Rate will appear on the crew’s row and calculate automatically as you enter quantities.
Note: Resource rates can’t be edited from the Labor Crews tab. You’ll only enter quantities here. To change a rate, update the resource in the Labor Resources tab, and every crew using that resource will update.
Pro Tip: Use the search bar at the top of the Quick Add modal to find a resource quickly. If the resource you need doesn’t exist yet, click + Create New Resource to create it without leaving the crew.
Using fractional and negative quantities
Quantities don’t have to be whole numbers. Overtime counts toward crew size like any other quantity, so one approach is to enter overtime as a fraction of a person. For example, 2 hours of overtime on an 8-hour day is 0.25 of a person, so 5 workers who each work 2 hours of overtime would be entered as 1.25 at Overtime.
Negative quantities are also allowed to account for a non-productive resource in a crew. For example, if your Foreman is not supposed to be counted as part of your Production Rate, they can be represented as follows:
1 Concrete Foreman at $50/hour, and -1 Concrete Foreman (non-productive) at $0/hour.
This includes the Concrete Foreman’s cost in the Crew Rate without counting them in the crew size, so they aren’t included in the individual production rates (Individual Hrs/UoM and UoM/Individual Hrs).
Managing Crews and Their Resources
To manage a crew, click the 3 dots (ellipses) to the right of the crew’s row and select one of the following:
- Insert Crew to add a new, empty crew.
- Duplicate Crew to create a copy of the crew, including its resources and quantities.
- Delete Crew to remove the crew.
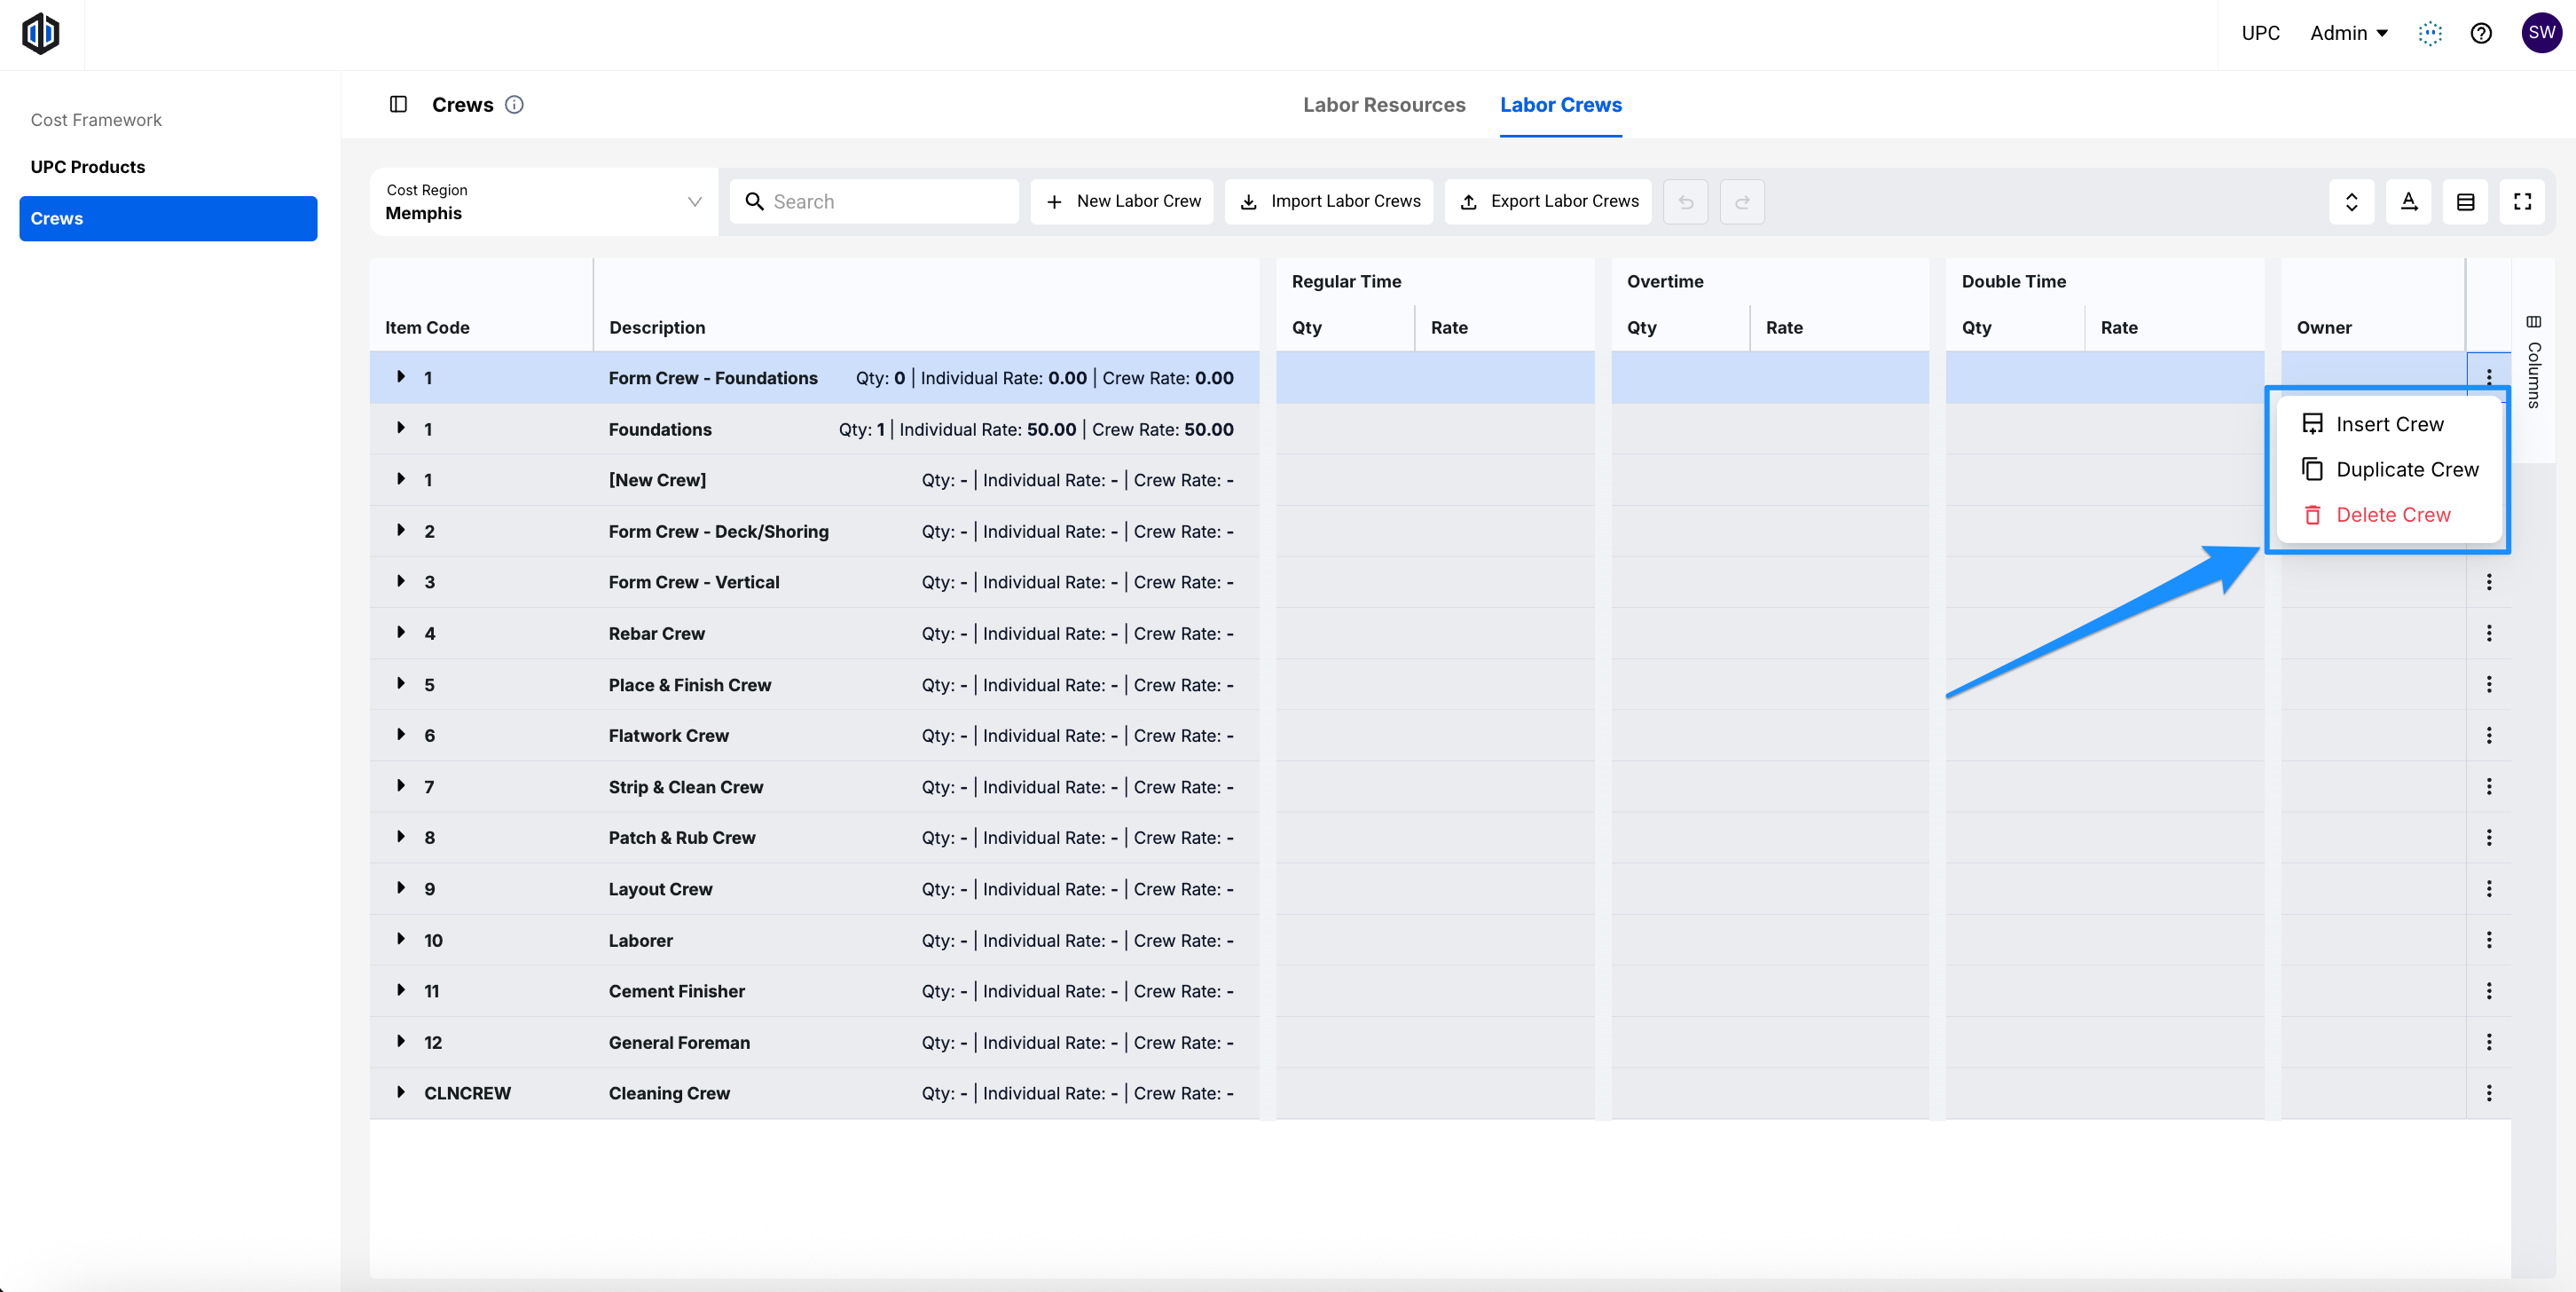
Note: If the crew is assigned to any UPC products, a warning will show how many products it’s attached to before you delete it. Deleting the crew removes it from those products and changes their labor cost.
To manage a resource within a crew, click the 3 dots (ellipses) to the right of the resource’s row and select one of the following:
- Edit Resource to update the resource’s details and its quantities in this crew.
- Duplicate Resource to open the Create New Resource window with the selected resource’s details already filled in and “(Copy)” added to the end of the Resource Name. Edit any of the details as needed to create the new resource.
- Remove Resource to remove the resource from this crew. The resource itself will still be available in the Labor Resources tab.
Assigning Crews to UPC Products
Once your crews are set up, you can assign them to UPC products to drive their labor unit costs. Crews are assigned per cost region, so a product can use a different crew in each region.
Pro Tip: Assigning a crew in the grid only applies to the selected cost region. To assign crews to many products at once, or to assign a crew in every cost region at once, use a CSV import. See Assigning Crews to Products in Bulk via Import.
Changes to the UPC Products Grid
With Labor and Crews enabled, you’ll notice a few changes to the UPC Products grid:
- Labor Crew: A new column that shows the crew assigned to each product for the selected cost region.
- Crew Rate: The Labor Rate column is now labeled Crew Rate. When a crew is assigned, this value comes from the crew.
- Individual Rate: A new column that shows the average rate for an individual worker in the assigned crew. This column is read-only.
- Crew Hrs/UoM: The Hrs/UoM column is now labeled Crew Hrs/UoM. It works the same way Hrs/UoM did before.
- UoM/Crew Hrs: The UoM/Hrs column is now labeled UoM/Crew Hrs.
- Individual Hrs/UoM: A new column that shows the production rate in hours per unit of measure for an individual worker.
- UoM/Individual Hrs: A new column that shows the production rate in units of measure per hour for an individual worker.
These columns are linked, so editing any one of them can update the others. If no crew is assigned, the crew size is treated as 1, so the crew and individual columns will match.
Note: The Labor Crew and Individual Rate columns are hidden by default. To show or hide all labor columns at once, click the ⋮ (more options) menu at the top right of the grid and check or uncheck Show Labor Columns. Ediphi will remember your choice the next time you open the UPC.
Note: Historical Pricing also includes the Labor and Crews columns, so you can compare the crews and labor rates used on past line items. Use Show Labor Columns to show or hide them. See Historical Pricing.
Assigning a Crew to a UPC Product
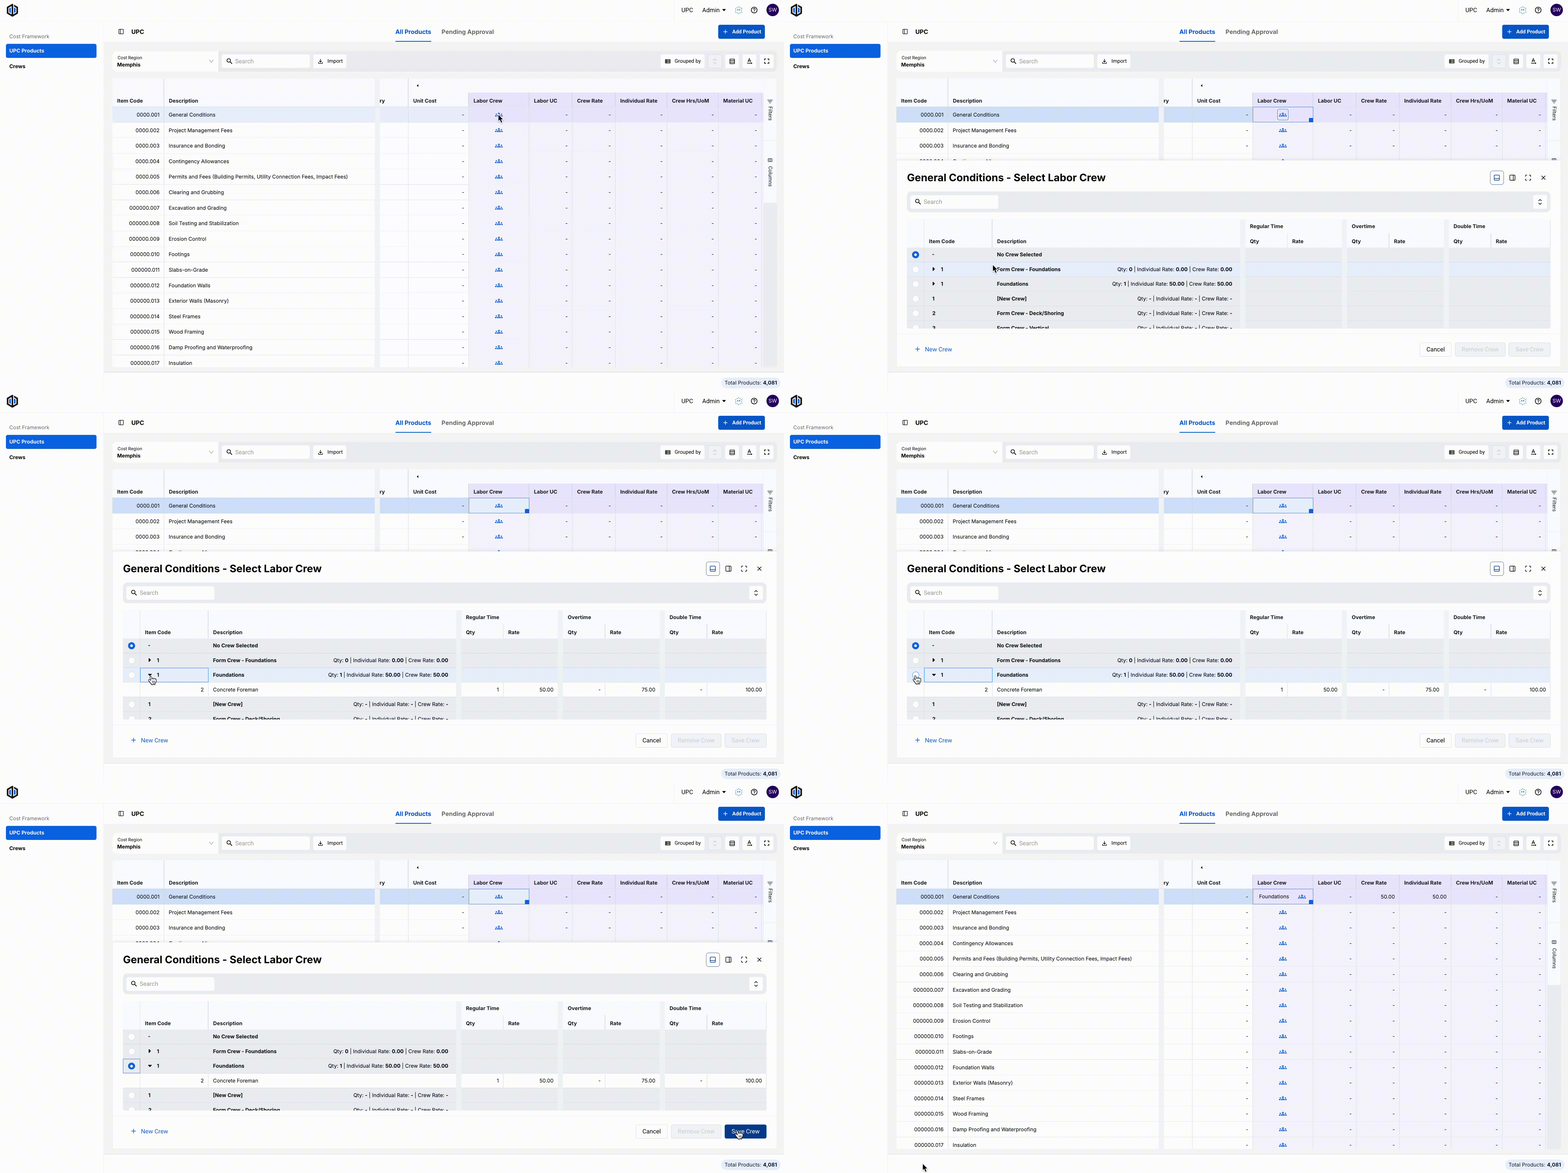
- From the UPC, select UPC Products from the side panel.
- Select a Cost Region from the dropdown.
- Click on the icon within the Labor Crew cell for the product. The Select Labor Crew panel will appear at the bottom of the page, listing the crews available in that cost region.
- Expand a crew to review its resources and rates, or use the search bar to find a crew.
- Select the button to the left of the crew, and click Save Crew.
- Enter the product’s production rate in the Crew Hrs/UoM column.
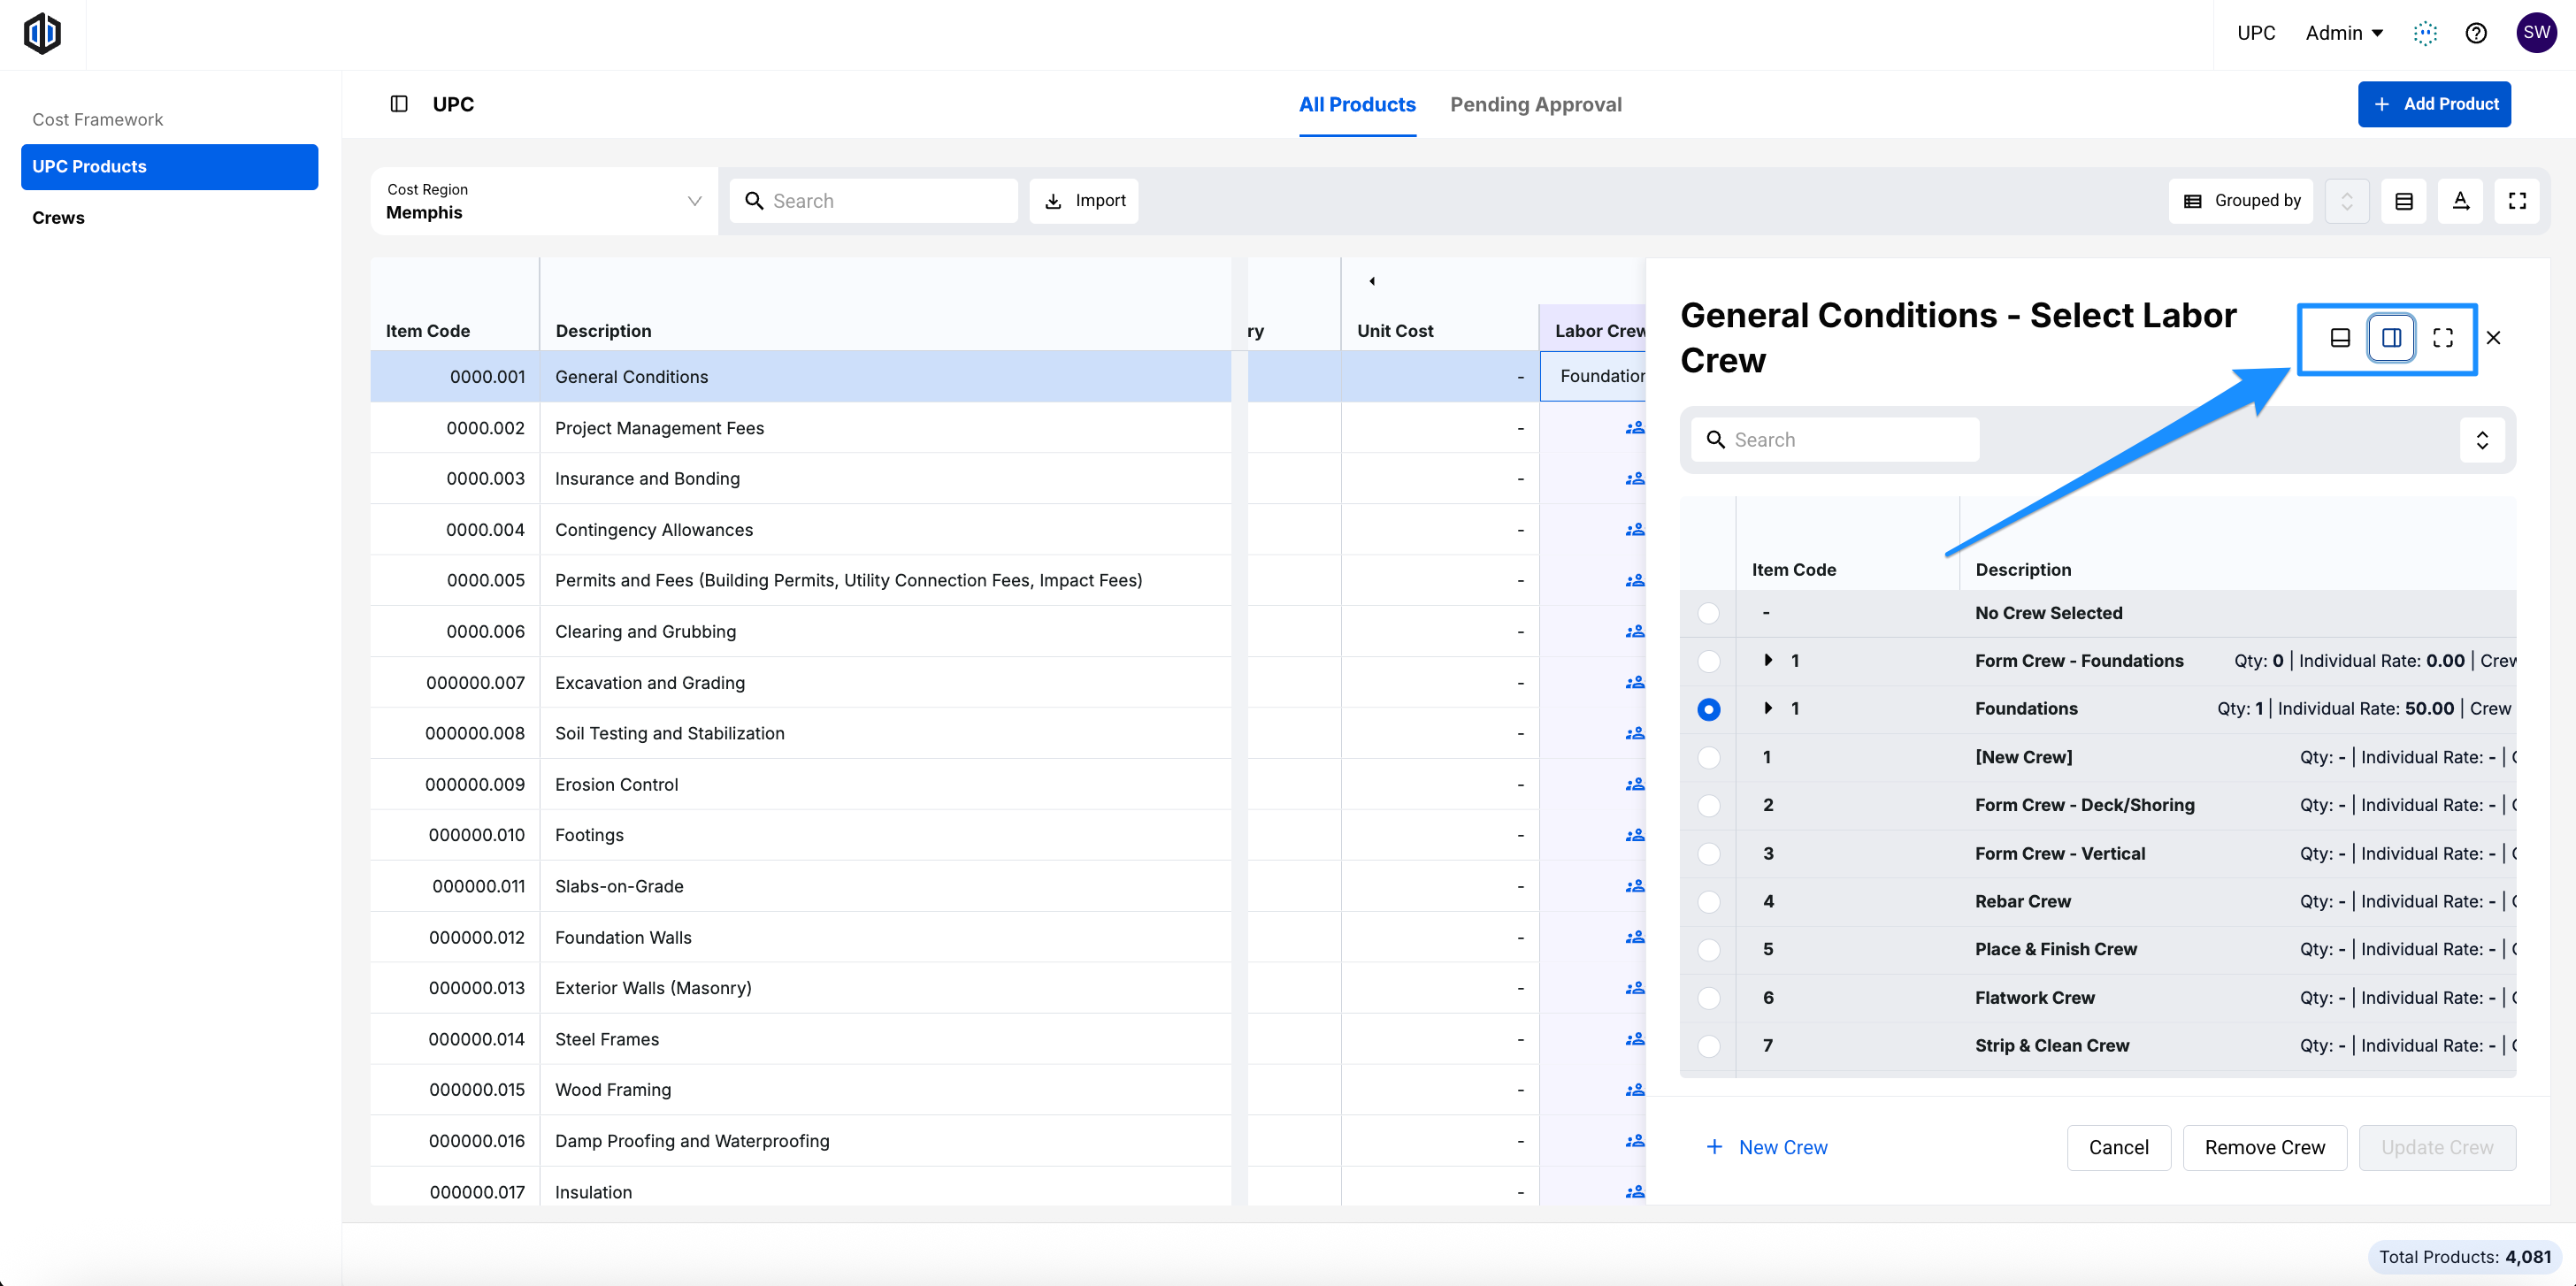
Pro Tip: You can change how the Select Labor Crew panel is displayed to better fit your screen. Use the icons at the top right of the panel to switch between:
- Bottom view: Shows the panel along the bottom of the page.
- Side view: Shows the panel along the right side of the page.
- Full screen: Expands the panel to fill the screen.
The product’s Crew Rate and Individual Rate will populate from the crew, and its Labor UC will calculate automatically by multiplying the Crew Rate by the Crew Hrs/UoM.
For example, if the Foundations crew (Crew Rate of $350.00) is assigned to a product with a Crew Hrs/UoM of 48, the product’s Labor UC will be $350.00 × 48 = $16,800.00.
Note: Each product can only have one crew assigned per cost region. If you assign a different crew to a product that already has one, the new crew will replace the current one.
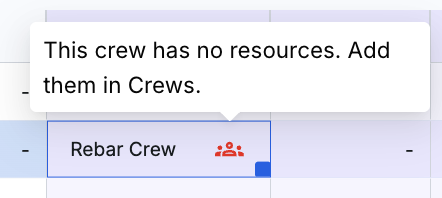
Note: If the icon in the Labor Crew cell is red, the assigned crew has no resources, its resources may have no quantities, or its resources may have no time values. Hover over the icon to see the message, and make updates to the crew from the Labor Crews tab in Crews.
Creating a New Crew While Assigning
If the crew you need doesn’t exist yet, you can create it from the Select Labor Crew panel without leaving the grid.
- Within UPC Products, click on the icon within the Labor Crew cell for the product.
- From the Select Labor Crew panel, click + New Crew on the bottom left.
- In the New Labor Crew window, enter a Labor Crew Name (required) and a Crew Item Code (if applicable), and click Create Crew.
- Click + Add Resource to add resources to the crew, and enter the quantity of each resource needed under Regular Time, Overtime, and/or Double Time. The crew’s Qty, Individual Rate, and Crew Rate will calculate automatically as you enter quantities.
- Click Add Crew on the bottom right to assign the new crew to the product, or click Back to return to the crew list without assigning it.
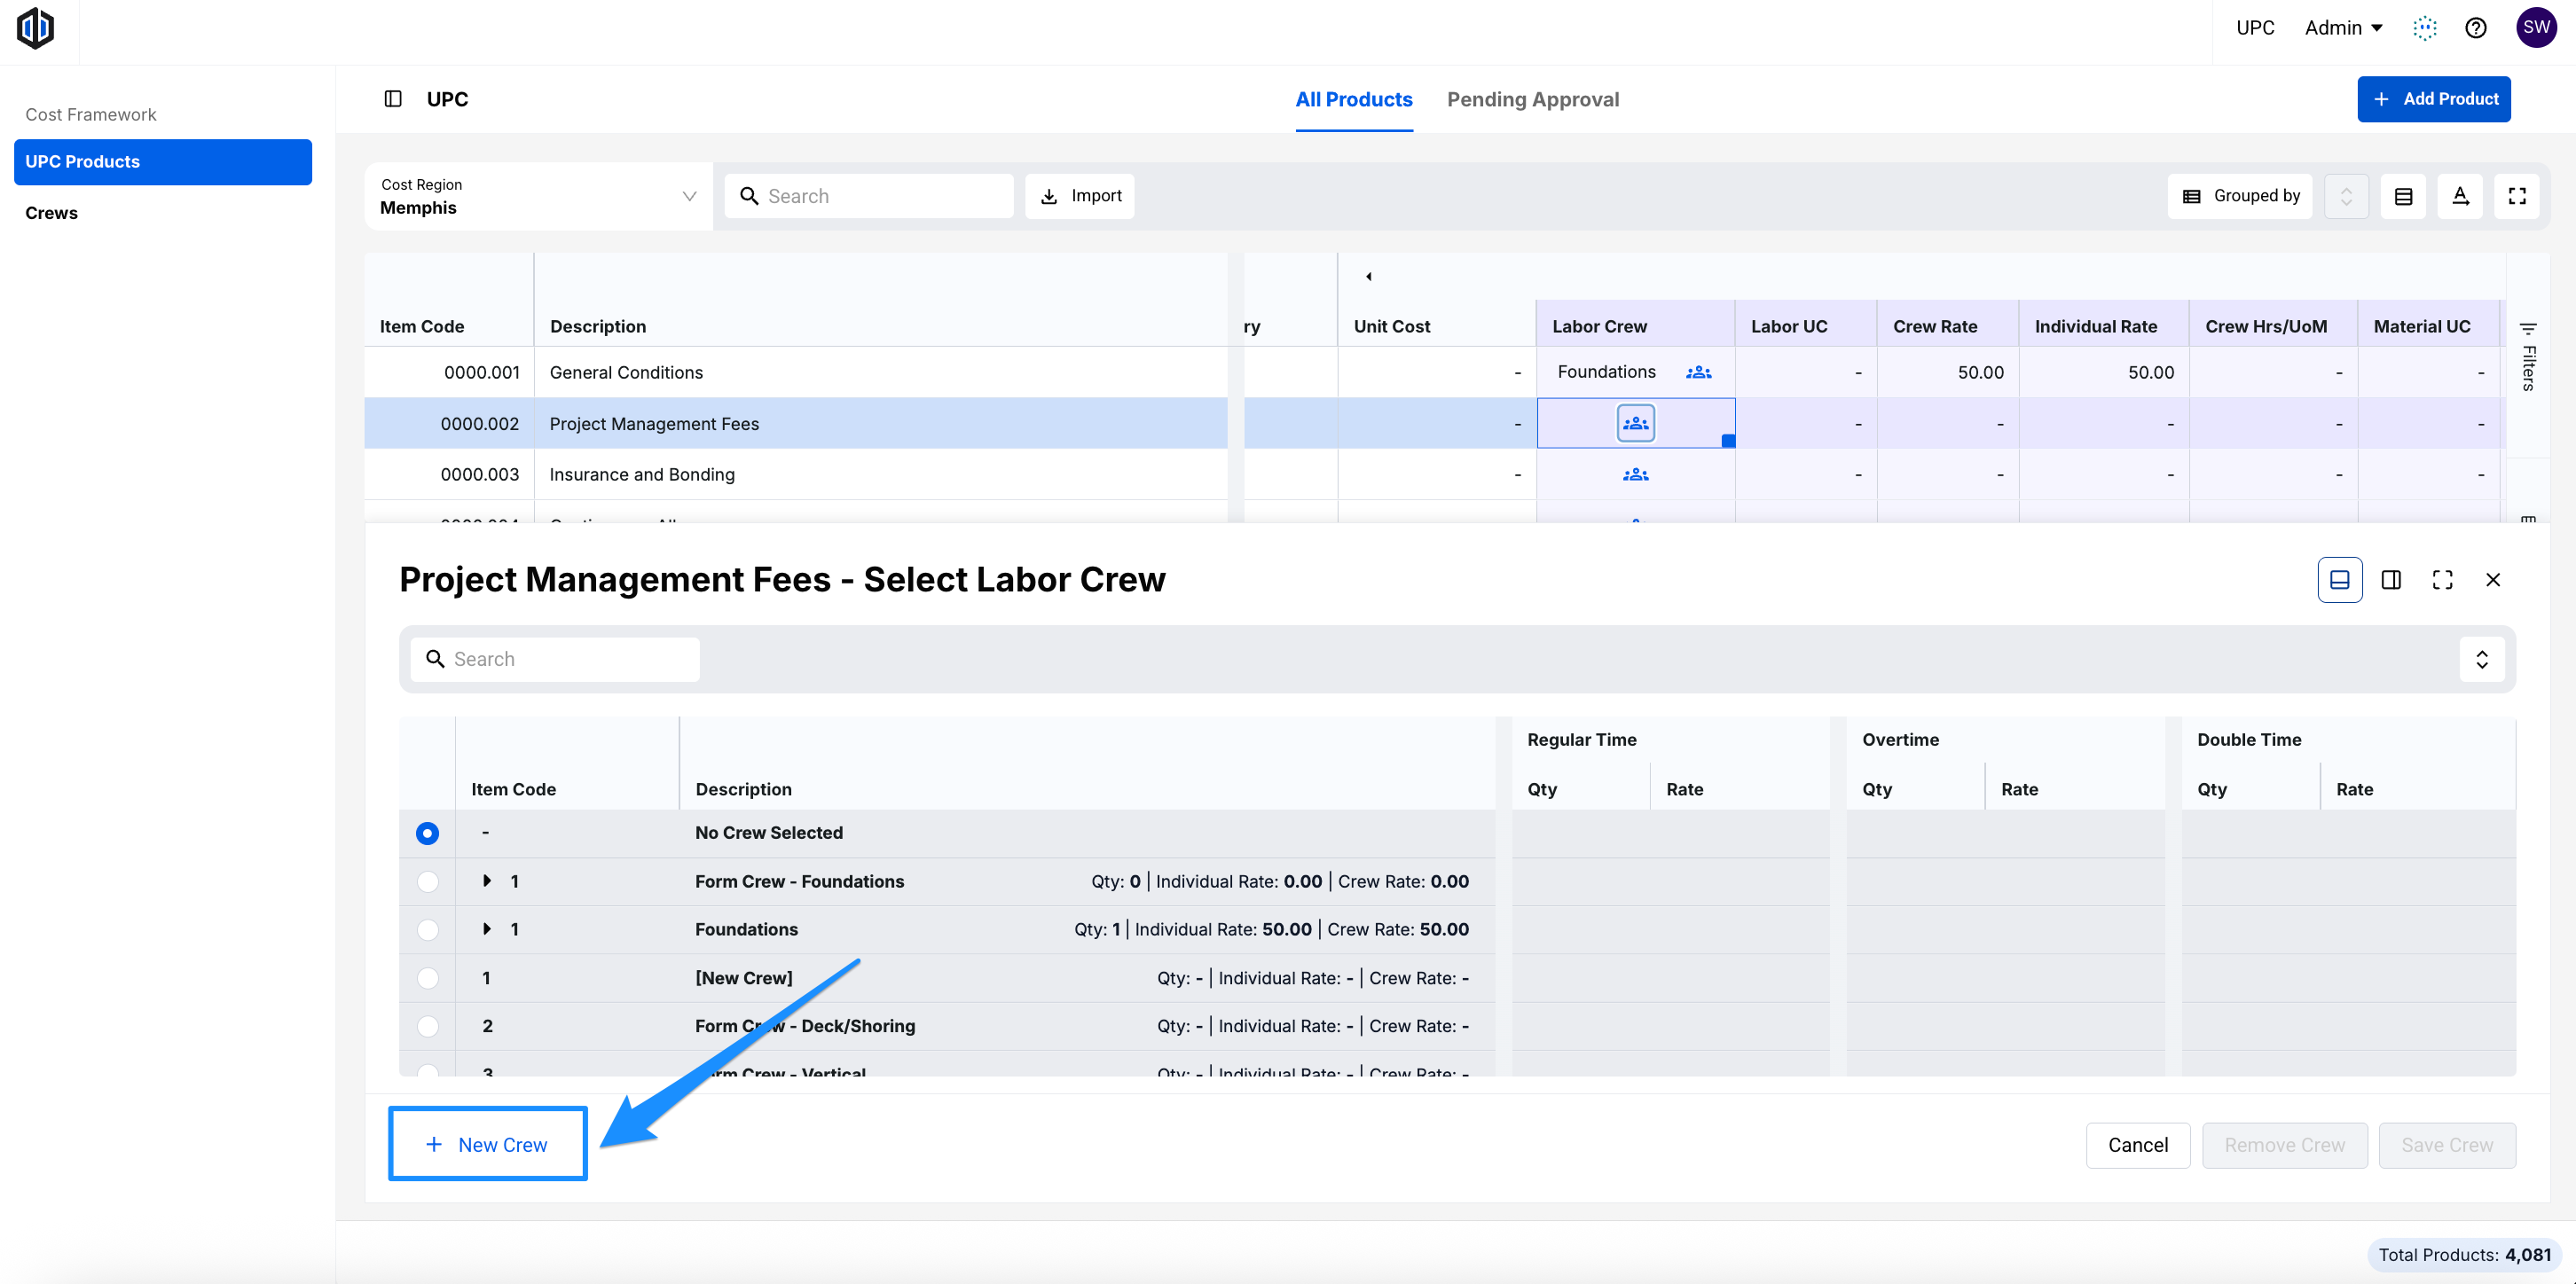
The new crew will also appear in the Labor Crews tab, so you can assign it to other products.
Unassigning a Crew
- Within UPC Products, click on the icon within the Labor Crew cell for the product.
- From the Select Labor Crew panel, select No Crew Selected and click Update Crew.
Pro Tip: You can also select the Labor Crew cell and press Backspace or Delete on your keyboard to unassign the crew.
When a crew is unassigned:
- The Labor Crew and Individual Rate cells return to a dash.
- The Crew Rate keeps the last rate from the crew as a flat value, which you can edit.
- The Crew Hrs/UoM stays as entered.
Overriding a Crew Rate
If a product needs a different rate than its crew provides, you can override the Crew Rate while keeping the crew assigned.
- Within UPC Products, double-click into the Crew Rate cell for a product that has a crew assigned.
- Enter the new rate.
The crew will stay assigned, and the Labor Crew cell will appear grayed out to show that the rate has been overridden. The Individual Rate will continue to show the crew’s value, so you can compare the two.
To go back to using the rate from the crew, clear the value in the Crew Rate cell.
Assigning Crews to Products in Bulk via Import
You can assign crews to many products at once by importing a CSV file on UPC Products. This is also the only way to assign a crew to a product in every cost region at once.
- Set up your resources and crews in Crews.
- From the Labor Crews tab, select a Cost Region and click Export Labor Crews.
- In the exported file, find the crew_id column and copy the ID for each crew you want to assign. Each crew has one ID, which repeats on every row for that crew’s resources. The crew_id is a UUID (universally unique identifier), a long code of letters and numbers separated by dashes, such as a1b2c3d4-e5f6-7890-abcd-ef1234567890. Copy the full ID exactly as it appears. A crew’s crew_id is the same in every cost region.
- In your UPC products import file, paste the crew_id into one of the following columns for each product:
- Labor Crew Global to assign the crew in every cost region.
- [Region] Labor Crew (for example, New York Labor Crew) to assign the crew in that cost region only.
- From UPC Products, click Import and import the file.
When you import crew assignments:
- You only need to include the product ID and a crew column. The product’s other fields won’t be changed.
- An imported crew replaces any manual Crew Rate override, so the product will go back to using the crew’s rate.
Note: For more on preparing and importing a CSV file, see Importing a CSV into the UPC.
How Changes Update Your UPC Products
Any changes to your resources or crews will carry through to every UPC product that uses the affected crew, so you don’t need to update each product individually.
The following changes will update your assigned UPC products, however, please note they will not affect any existing estimates:
- Updating a resource’s rate in the Labor Resources tab
- Changing a resource’s quantity within a crew
- Adding or removing a resource from a crew
In each case, the crew’s Crew Rate will recalculate, and the Labor UC of every UPC product using that crew will update as well.
Note: Products with an overridden Crew Rate will keep the rate you entered until the override is cleared.
Sharing Crews Between myUPC and Central UPC
Labor resources and crews can belong to Central UPC, where everyone in your organization can use them, or to a user’s myUPC, where only that user can see them. The Owner column on the Labor Resources and Labor Crews tabs shows which user a myUPC item belongs to.
How Crews Carry Over When Line Items Are Added to myUPC
When you add a line item that has a crew to myUPC (right-click the line item and select Add to myUPC or Add Selected Line Items to myUPC), the new myUPC product keeps its crew:
- If the crew already came from the UPC (Central UPC or your own myUPC), the product uses that same crew. No duplicate is created.
- If the crew was created in the estimate, a copy of the crew and its resources is added to your myUPC, with you as the Owner. The estimate’s crew is then linked to the new UPC crew.
- If the line item’s Crew Rate was overridden, the product keeps the overridden rate.
Note: If a line item’s crew belongs to another user’s myUPC, that line item won’t be added. Any other line items you selected will still be added.
Adding a Labor Resource or Crew to Central UPC (Global Admins)
Global Admins can add a myUPC resource or crew to Central UPC without adding any products.
- From the UPC, select Crews from the side panel, and click on the Labor Resources or Labor Crews tab.
- Right-click the resource or crew, or click the 3 dots (ellipses), and select Add to Central UPC.
- Confirm to add it.
When you add a crew, any myUPC resources in it are added to Central UPC too, since a Central UPC crew can only use Central UPC resources. Products that use the crew are not added. Add those products to Central UPC separately.
Note: Add to Central UPC only appears for Global Admins, and only on myUPC resources and crews.
How Crews Carry Over When a Product Is Added to Central UPC
When a myUPC product with a crew is added to Central UPC, its crew and the crew’s resources are added to Central UPC too, if they aren’t there already. This applies whether a Global Admin adds the product directly or approves a request. See Request Add to Central UPC.
Note: A Central UPC product can’t use a myUPC crew, since other users can’t see that crew. A myUPC product can use a Central UPC crew.
If you have any questions, feel free to contact our support team and we'll be happy to help!